Monday, January 24, 2011

Growing up (One Bowl Chocolate Cake Recipe - Redux)

My son turned 7 yesterday and as I sit here typing these words, I still can't believe it. How in the world do kids grow up so fast? How did he become this little 7 year old boy who can now read and write, do math problems and figure out a video game way quicker than I can? Can you tell I'm feeling a little old right now? Yep, I am...


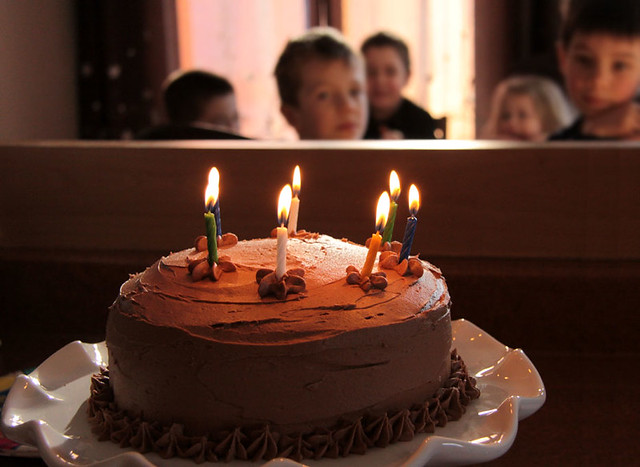
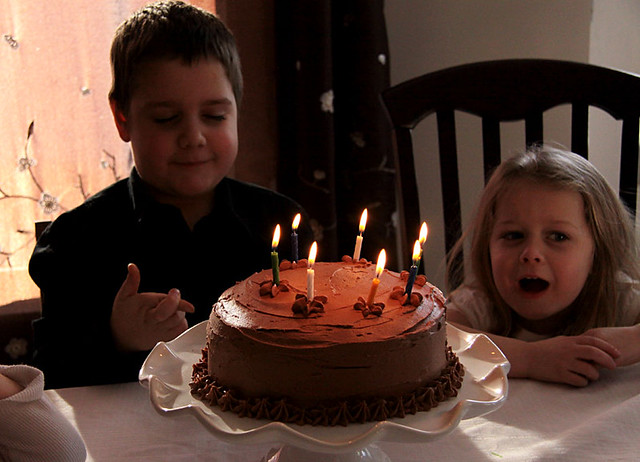
When I asked Tom if he wanted cupcakes or a real cake for his birthday party he replied: "A real cake, of course!" as if cupcakes were just for girls! And, of course, he wanted a chocolate cake. So I decided on my usual One Bowl Chocolate Cake with Chocolate Icing. A bunch of little boys eating chocolate cake at a birthday party, sounds fun, right? Can't be afraid of a little sugar high!

The reason I decided to do another post for this cake is that I used buttermilk instead of milk in the recipe. Doesn't sound like much of a change but it makes a great cake even better. Annabelle even told me the cake was just as good, if not better, without the icing. Without icing! OK, so I'm not sure the boys would have been quite as impressed if I had baked this as a bundt instead of a 3 layer cake but I'm sure going to try it when another chocolate craving strikes!


One Bowl Chocolate Cake
adapted from Allrecipes


2 cups white sugar
1 3/4 cups all-purpose flour
3/4 cup unsweetened cocoa powder
1 1/2 teaspoons baking powder
1 1/2 teaspoons baking soda
1 teaspoon salt
2 eggs
1 cup buttermilk
1/2 cup vegetable oil
2 teaspoons vanilla extract
1 cup boiling water

Preheat oven to 350 degrees F (175 degrees C). Grease and flour two nine inch round pans (or 2 heart-shaped pans).

In a large bowl, stir together the sugar, flour, cocoa, baking powder, baking soda and salt. Add the eggs, buttermilk, oil and vanilla, mix for 2 minutes on medium speed of mixer. Stir in the boiling water last. Batter will be thin. Pour evenly into the prepared pans.

Bake 30 to 35 minutes in the preheated oven, until the cake tests done with a toothpick. Cool in the pans for 10 minutes, then remove to a wire rack to cool completely.

Note: For the layer cake pictured above, I used three 9-inch round cake pans and baked them for approximately 20 minutes. Check the layers and if a toothpick inserted in the center of the cakes comes out clean, they're done!

Chocolate Icing

4 cups sifted confectioner’s sugar
1 cup butter, at room temperature
2 tsp pure vanilla extract
1 to 2 tbsp milk, depending on the consistency you want
5 tbsp unsweetened cocoa powder

Cream butter, sugar and vanilla. Add a small amount of milk to reach desired spreading consistency. Add cocoa powder and beat well. Spread on cooled cake.
Pin It!

Friday, January 14, 2011

Three Years!!! (Apple Coffe Cake Recipe)

There are so many things going through my head right now. Has it really been three years since I hit "publish post" for the very first time? Have I really made caramel that many times since? Did we eat all those desserts? Really? And how in the world did three years, three years, go by so freaking fast? Yes, today folks, this little webspace of mine is three years old. Yes, there has been a lot more sweet than savory appearing in these pages. Yes, we ate everything I made, but we did share a lot of it. And yes, there will be more baking, cooking and sharing in the coming years and I wouldn't have it any other way; I've been enjoying myself way too much to quit. I'm hoping you've also enjoyed reading my ramblings and trying some of the recipes I've posted. I've discovered so many new techniques and flavors since starting to blog and I suspect I'm not done learning!

I've made a few changes here and there and I'd like to share them with you. There are some tabs near the top there, under the header and I've finally got that recipe index I've always wanted! It's a work in progress as I'm not sure about the categories I've chosen, but it's there and functional! I've also decided to (finally) write an "About Page". I know, I know, about time, right? This one
I've mentioned before, but if you haven't had a chance yet, go on over and visit And then I do the Dishes on Facebook, leave a comment, question, whatever you like! And, last but not least, there's this nifty little "print button" at the bottom of each post and I would not forgive myself if I didn't thank Taylor over at Print Friendly. Best product support ever! Thanks so very much! And thank you guys, readers and friends for your support. For reading and commenting and keeping this little project of mine going. I couldn't do it without you. Thank you!

Now, onto the recipe! If you like coffee cake, this is the recipe you want! As you may already know, I have many, many recipe books and magazines but the best, tried and true recipes often come from those free recipe booklets handed out at grocery stores or stuck to pages of magazines. This recipe comes from such a booklet, Robin Hood Baking Festival 1992. I've long since adapted the recipe to suit my family's tastes but every time I find a little booklet of recipes, I can't help but keep it. You never know what little gem you might find inside.

Apple Coffee Cake
Adapted from Robin Hood

Topping:
3 tbsp granulated sugar
2 tbsp all-purpose flour
1/2 tsp cinnamon
1 tbsp unsalted butter, melted
1/2 cup chopped pecans (optional)

Cake:
2 cups all-purpose flour
1 1/4 cups granulated sugar
1 tbsp baking powder
1/2 tsp baking soda
1/2 tsp salt
1 tsp cinnamon
1/4 tsp nutmeg, freshly grated
1/8 tsp ground cloves
1/8 tsp tonka bean, freshly grated (optional)
2 eggs
1 cup sour cream or plain yogurt
1/4 cup unsalted butter, melted
2 cups peeled and grated apples, lightly packed

Topping:
Combine all ingredients. Mix well and set aside.

Cake:
Preheat your oven to 350F. Lightly grease a 10-inch springform pan and set aside.

In a large bowl, combine flour, sugar, baking powder, baking soda, salt, cinnamon, nutmeg, ground cloves and tonka bean, if using. Mix well. In another bowl, beat eggs, sour cream or yogurt and melted butter. Stir into dry ingredients until just blended. Stir in grated apples. Spread batter evenly into the prepared pan and sprinkle topping over the batter.

Bake in preheated oven for 45 to 50 minutes or until a toothpick inserted in center of the cake comes out clean. Let the cake rest in the pan a few minutes before unmolding and placing it on a baking rack to cool. Serve warm or at room temperature.

Maple Glaze
adapted from Comfy Belly

I added this glaze as an afterthought because I thought the cake looked plain in the photos. It certainly doesn't need the glaze taste wise, but it does add a little more sweetness, and it looks nice. You could also drizzle some caramel sauce on top, that would be just decadent!

1/2 cup milk (I used 2%)
1/2 cup maple syrup
Pinch of fleur de sel
1 tsp unsalted butter

In a saucepan, pour the milk and maple syrup. Add pinch of fleur de sel and bring to a boil. Whisk constantly until the mixture is thickened and starts to look like caramel. This can take from 5 to 10 minutes. When you're happy with the consistency, whisk in the butter, strain the glaze into a heatproof bowl and let it cool slightly. Now, you can pour the glaze directly onto the hot cake, in which case most of the glaze will be absorbed into the cake, which would be delicious. But, if you're going for the same look as in my photos, wait until the glaze and cake are cooled and drizzle the glaze onto the cake. If the glaze has hardened too much to pour, you can microwave it a few seconds to get it to the right consistency.
Pin It!

Friday, January 7, 2011

Mexican Lasagna

When Winter rolls around, all I feel like eating is comforting casseroles and warming dishes. Now, I know that after the sweet treats and decadent meals of the Holiday season, many people tend to look for low-fat, healthy salad recipes but with three kids to feed, salad ain't cuttin' it around here! You can serve this fantastic lasagna with a side salad though, you know, to lighten the guilt factor. This dish was such a hit, we all looked forward to having it for lunch the next day, which is saying a lot! I have a feeling this is one of those recipes that will be on permanent rotation on my meal plans!


Mexican Lasagna

1 1/2 lbs lean ground beef

1 green bell pepper, diced

1 onion, chopped

2 cloves of garlic, minced

1-28 oz can of diced tomatoes (don't drain it)
1 packet of taco spices (I use the low salt kind)
1 to 2 tsp Chipotle chili powder

1-12 oz can of corn kernels, drained (or use frozen)

1-19 oz can of red kidney beans, drained and rinsed

1 tbsp cornstarch (optional)
9 large flour tortillas

2 cups of sharp cheddar cheese, grated (or TexMex blend, or Monterey Jack)


Lightly grease a 9x13 inch baking dish; set aside.

In a dutch oven, brown ground beef until no longer pink. Drain off all fat and transfer to a heat proof bowl. In the same dutch oven, heat a tablespoon or two of olive oil and sauté bell pepper, onion and garlic until onion is translucent. Put the ground beef back in the pot and also add the tomatoes, taco spices and chili powder. Mix well then add the corn and the red kidney beans and mix again. Let simmer for a few minutes. If you find that your "chili" is a bit watery, make a slurry of a tbsp of cornstarch with some cold water and add it to the pot. Let it simmer a little and it should thicken up enough not to water down your lasagna.


Preheat your oven to 375F.


Ladle a little bit of chili on the bottom of your prepared baking dish. Cover with 3 of the tortillas, overlapping them to fit the dish. Ladle a third of your chili over the tortillas, sprinkle with a third of the cheese and cover with 3 more tortillas. Layer the ingredients that way, ending with the cheese on top of the casserole.


Bake for 35 to 40 minutes, until the filling is bubbly and the cheese is nicely browned. To further brown the cheese, broil the casserole for about 1 minute. Let the casserole stand for 5 minutes before serving.


Serve with sour cream, chopped green onions and a salad.
Pin It!