Showing posts with label dessert. Show all posts

Friday, January 14, 2011

Three Years!!! (Apple Coffe Cake Recipe)

There are so many things going through my head right now. Has it really been three years since I hit "publish post" for the very first time? Have I really made caramel that many times since? Did we eat all those desserts? Really? And how in the world did three years, three years, go by so freaking fast? Yes, today folks, this little webspace of mine is three years old. Yes, there has been a lot more sweet than savory appearing in these pages. Yes, we ate everything I made, but we did share a lot of it. And yes, there will be more baking, cooking and sharing in the coming years and I wouldn't have it any other way; I've been enjoying myself way too much to quit. I'm hoping you've also enjoyed reading my ramblings and trying some of the recipes I've posted. I've discovered so many new techniques and flavors since starting to blog and I suspect I'm not done learning!

I've made a few changes here and there and I'd like to share them with you. There are some tabs near the top there, under the header and I've finally got that recipe index I've always wanted! It's a work in progress as I'm not sure about the categories I've chosen, but it's there and functional! I've also decided to (finally) write an "About Page". I know, I know, about time, right? This one
I've mentioned before, but if you haven't had a chance yet, go on over and visit And then I do the Dishes on Facebook, leave a comment, question, whatever you like! And, last but not least, there's this nifty little "print button" at the bottom of each post and I would not forgive myself if I didn't thank Taylor over at Print Friendly. Best product support ever! Thanks so very much! And thank you guys, readers and friends for your support. For reading and commenting and keeping this little project of mine going. I couldn't do it without you. Thank you!
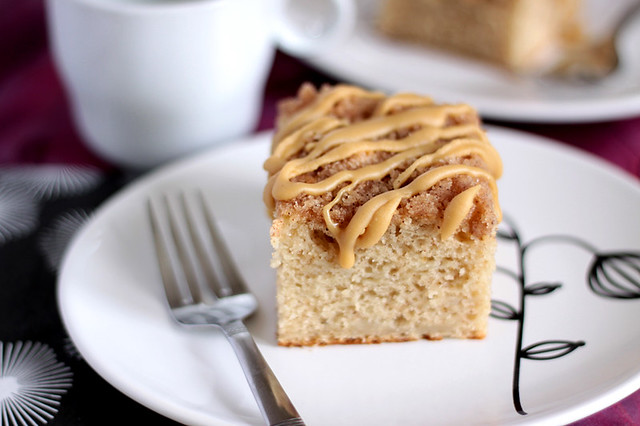
Now, onto the recipe! If you like coffee cake, this is the recipe you want! As you may already know, I have many, many recipe books and magazines but the best, tried and true recipes often come from those free recipe booklets handed out at grocery stores or stuck to pages of magazines. This recipe comes from such a booklet, Robin Hood Baking Festival 1992. I've long since adapted the recipe to suit my family's tastes but every time I find a little booklet of recipes, I can't help but keep it. You never know what little gem you might find inside.

Apple Coffee Cake
Adapted from Robin Hood

Topping:
3 tbsp granulated sugar
2 tbsp all-purpose flour
1/2 tsp cinnamon
1 tbsp unsalted butter, melted
1/2 cup chopped pecans (optional)

Cake:
2 cups all-purpose flour
1 1/4 cups granulated sugar
1 tbsp baking powder
1/2 tsp baking soda
1/2 tsp salt
1 tsp cinnamon
1/4 tsp nutmeg, freshly grated
1/8 tsp ground cloves
1/8 tsp tonka bean, freshly grated (optional)
2 eggs
1 cup sour cream or plain yogurt
1/4 cup unsalted butter, melted
2 cups peeled and grated apples, lightly packed

Topping:
Combine all ingredients. Mix well and set aside.

Cake:
Preheat your oven to 350F. Lightly grease a 10-inch springform pan and set aside.

In a large bowl, combine flour, sugar, baking powder, baking soda, salt, cinnamon, nutmeg, ground cloves and tonka bean, if using. Mix well. In another bowl, beat eggs, sour cream or yogurt and melted butter. Stir into dry ingredients until just blended. Stir in grated apples. Spread batter evenly into the prepared pan and sprinkle topping over the batter.

Bake in preheated oven for 45 to 50 minutes or until a toothpick inserted in center of the cake comes out clean. Let the cake rest in the pan a few minutes before unmolding and placing it on a baking rack to cool. Serve warm or at room temperature.

Maple Glaze
adapted from Comfy Belly

I added this glaze as an afterthought because I thought the cake looked plain in the photos. It certainly doesn't need the glaze taste wise, but it does add a little more sweetness, and it looks nice. You could also drizzle some caramel sauce on top, that would be just decadent!

1/2 cup milk (I used 2%)
1/2 cup maple syrup
Pinch of fleur de sel
1 tsp unsalted butter

In a saucepan, pour the milk and maple syrup. Add pinch of fleur de sel and bring to a boil. Whisk constantly until the mixture is thickened and starts to look like caramel. This can take from 5 to 10 minutes. When you're happy with the consistency, whisk in the butter, strain the glaze into a heatproof bowl and let it cool slightly. Now, you can pour the glaze directly onto the hot cake, in which case most of the glaze will be absorbed into the cake, which would be delicious. But, if you're going for the same look as in my photos, wait until the glaze and cake are cooled and drizzle the glaze onto the cake. If the glaze has hardened too much to pour, you can microwave it a few seconds to get it to the right consistency.
Pin It!

Friday, December 31, 2010

Another Year Over...

Christmas has come and gone and I can't believe it's New Year's Eve already. As I look back on 2010 all I can think of is how incredibly lucky I am. We are all healthy and happy, all five of us. I had wonderful opportunities this year to showcase my blog and photography, and for a stay at home mom who hasn't worked outside the home for about 10 years, it gave a real boost to my self esteem. I hope to keep the ball rolling in 2011, work on my photography and find new ideas to upgrade and renew this little webspace of mine.


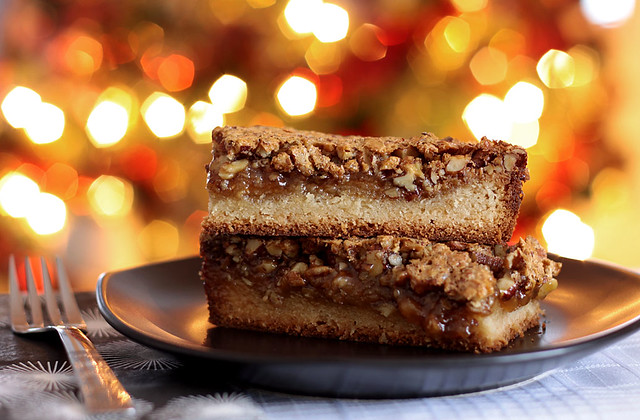
For now I want to share with you another recipe from Kraft's Recipe for Joy program. These Pecan Bars are an absolute perfect choice to end the year on a sweet note. Gooey caramel and crunchy pecans baked on a sweet cream cheese dough. Wonderful by itself or put it over the top with a scoop of vanilla ice cream or even whipped cream! And don't forget, you still have a few hours to send some last minute holiday wishes with some free e-cards. Let's all help
Kraft reach their goal of a $50,000 donation to Food Banks Canada.

Happy New Year everyone!!! Have fun and be safe!!!

For the recipe, please visit the Kraft Canada Website:

Pecan Bars

Pin It!

Wednesday, September 8, 2010

Chocolate Chip Cookie Lava Cakes

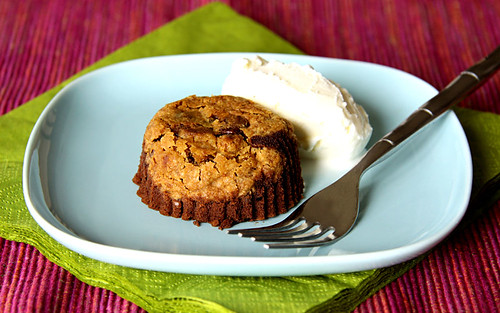
I am so completely addicted to food magazines, I even collect the little pamphlets they hand out in grocery stores. These days, they look a lot more like magazines though, as they're full of neatly styled recipes featuring, of course, said store's products. As most of you know, you don't really need to use the product in question and even when the recipe calls for a ready-made product, you can make it even better by using something homemade.


Case in point? These Chocolate Chip Cookie Lava Cakes. I noticed the recipe while I was "sifting" through magazines and stuff I could get rid of. Yes, I have too much stuff, go figure, and I need to get organized. Anyhoo, I was looking through a pile of Kraft's What's Cooking Magazine and when I spotted those cakes I had to make them right away! Well, first I had to make chocolate chip cookies, then I could make the cakes.

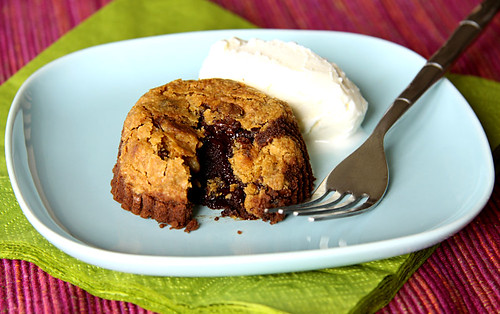
I made my favorite chocolate chip cookie recipe, used a round cookie-cutter to cut 12 cookies to the desired size and then made the cake batter. Easy-peasy! And when they're finally out of the oven, you flip them onto a plate, and you go to chocolate heaven. First you experience the crisp, crunchy and buttery taste of the cookie, then, as you cut into it, you find a rich, molten chocolate cake swimming in melting vanilla ice cream. Did I mention you have to pair this with vanilla ice cream? Well, you do!


Chocolate Chip Cookie Lava Cakes
adapted from kraftcanada.com

OK, first you have to make some chocolate chip cookies. I suggest this recipe; it contains walnuts, which are a nice addition to these little cakes.

12 chocolate chip cookies, cut into circles with a 2 1/2-inch cookie cutter
4 ounces of bittersweet chocolate, chopped
1/2 cup unsalted butter
2 whole eggs
2 egg yolks
1 cup confectioners sugar
1/3 cup flour
1/2 teaspoon fleur de sel

Preheat your oven to 425F. Line a 12-cup muffin tin with paper liners. Place the cookies, upside down, into the muffin liners. Press them into the bottom, they might be a bit big but don't worry about squishing them in, they're like the crust of these tatin-like cakes! OK, now set that aside while you make the batter.

Place the chocolate and the butter in a large microwaveable bowl, then microwave on high for about 2 minutes. At that point the butter should be melted and a little stirring will get the rest of the chocolate melted too. Alternately, you could do this on a double boiler.

In another bowl whisk together the eggs, egg yolks, confectioners sugar, flour and fleur de sel.
Slowly add the chocolate mixture, stirring as you go, until well blended.

Pour the batter over the cookies in your prepared muffin tin. Bake in preheated oven for about 8 minutes. The cakes will be slightly firm around the edges but still soft in the middle. Let the cakes stand a minute or 2 before serving. Remove each cake from its tin, invert it onto a plate (just like a tarte tatin!), remove its liner and serve with your favorite vanilla ice cream.

Pin It!

Wednesday, March 24, 2010

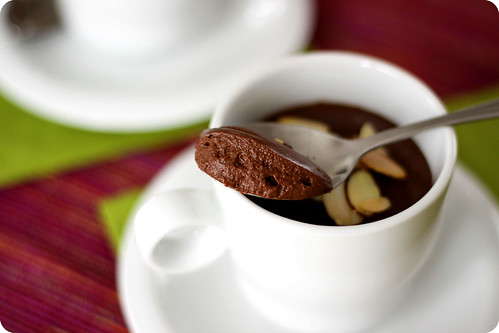
Silken Tofu and Chocolate Mousse

Have you ever told anyone you like tofu just to have them look at you like you were crazy or from another planet? Well, I used to be that person. I couldn't believe that tofu could be made to taste good. I mean how could anything so bland be useful anyways? It turns out tofu's blandness is what makes it interesting because, lo and behold, it is like a sponge and absorbs whatever flavors are around it. Most of you have probably known this for a while but I've had this epiphany only recently.

I discovered marinated and baked tofu, which, with a fresh, crunchy salad makes a great meal in itself. But what made me REALLY like tofu is this chocolate mousse I made yesterday. Yes, just yesterday! It's that good, I had to tell you guys about it right. this. minute!


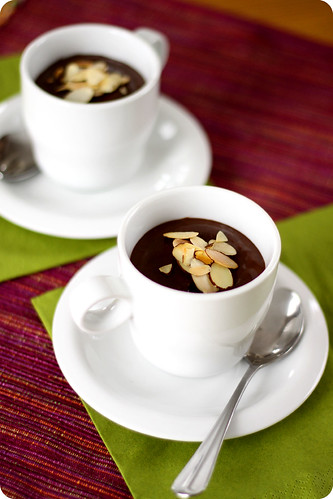
I know what you're all thinking: "Tofu, in a dessert, and it's good? She's gone mad for sure!" But no! I'm telling you, it is good! I mean, it's no heavy-cream-with-eggs-and-a-ton-of-sugar chocolate mousse, but the texture is beautifully silky and all you taste is the chocolate. Unless of course you decide to add a little almond, vanilla or peppermint extract, or even some instant espresso powder, then you've got a whole different dessert. You could even use almond flavored silken tofu, which I did, but it was a bit too sweet, next time I'll try it with plain silken tofu and add some flavor to it myself. The true test of this recipe came when I served it to my kiddos and my better half. They all loved it! Even when I finally told them it was tofu! Now, if that isn't a success, I don't know what is!


Silken Tofu and Chocolate Mousse

Adapted from Michael Smith via Food Network Canada

8 oz (about 300g) package of silken tofu

8 oz (about 300g) of bittersweet chocolate, chopped

1 tbsp vanilla extract (optional)


Start by melting your chocolate in a double boiler; set aside.

Next, you need to puree the tofu until it is smooth. Now, you can use your food processor for this, but I used my stand mixer with the whip attachment and I'm pretty sure you could use any kind of mixer you like. When the tofu is nice and smooth, add the melted chocolate and mix until the tofu and chocolate are blended very well.


Here's when you can add any kind of flavoring you like: vanilla extract, almond extract, peppermint extract, instant espresso powder, it's all up to you! Divide the mousse into 6 individual serving dishes and set in the refrigerator for a few hours.
Garnish with nuts, fruits, a little whipped cream, make it fun and enjoy!
Pin It!

Thursday, January 14, 2010

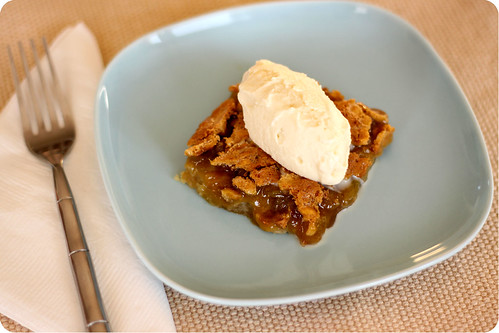
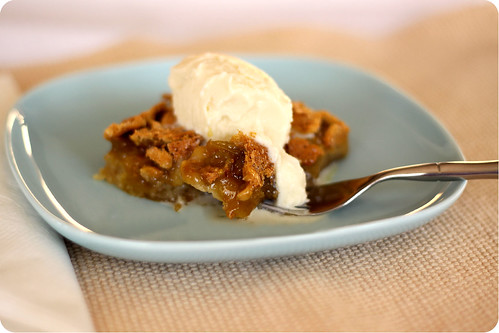
Two Years!!! (Maple Hazelnut ButterTart Squares)

Since this is my first post of 2010, I guess a Happy New Year is in order! I hope all of you have had a great start to this new year and that you will have the inspiration, energy and passion needed to reach success in all of your goals. How wonderful it is to get a fresh start every new year!

I can hardly believe my blog is 2 years old today! I feel like it was just yesterday that I decided to post a few photos and recipes and see what would come of it. 130 some posts and 122 followers (!) later, I'm still at it, albeit a little inconsistently lately. Balance is hard to achieve between obligations and the things I love to do, choices have to be made. I'll get there though, that's what life is all about!

I want to share one of my family's favorite desserts with you today. When I get a request for pecan pie but I don't have time to make the pie dough, I make these squares. They're so easy to make, almost too easy, I could have them everyday! For a change I used hazelnuts and golden raisins in this batch but you could use walnuts, pecans, currants, dried cranberries or pretty much any combination of dried fruit and nuts you like. As I said, it's all about choices!!! :)


Maple Hazelnut Butter Tart Squares
adapted from here and here


for the base:

1/2 cup butter, softened

1/4 cup granulated sugar

1 cup all purpose flour


for the topping:

1 cup brown sugar

1 tbsp flour

1/4 tsp baking powder

pinch of salt

1 tbsp melted butter

1/3 cup pure maple syrup

2 large eggs

1 tsp vanilla

3/4 cups golden raisins (or other dried fruit)

1/2 cup toasted hazelnut, skins removed, coarsely chopped (or other nuts)


To make the base:

Line an 8 inch square pan with parchment or aluminum paper. Set aside.


In a large bowl, with your mixer of choice, cream the butter and sugar together well. Add the flour and mix until the mixture resembles coarse crumbs. Press into the prepared pan and bake at 350F for 10 to 15 minutes. The base with be golden when ready. Don't over bake it as it will become hard but don't under bake it either or it will be too soft.


To make the topping:

Combine all the ingredients for the topping and mix well.

Spread the mixture over the base and bake at 350F for about 30 minutes. The top will be golden and cracked and beautiful!


Let cool to room temperature in the pan then cut into squares. Top with whipped cream or the ice cream of your choice.
Pin It!

Thursday, November 5, 2009

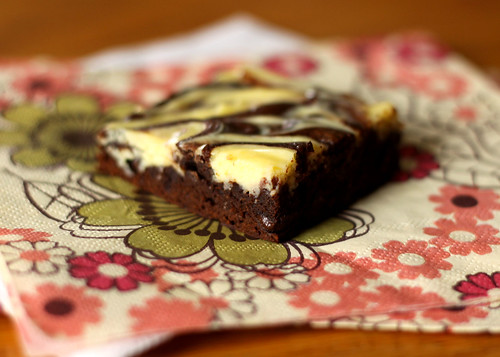
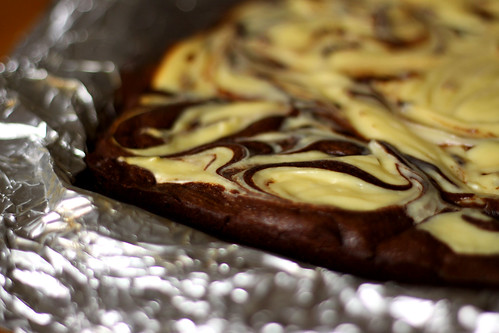
Cheesecake Brownies for the Birthday Girl

Yesterday was my oldest daughter's birthday. She turned 9 years old and I know I've said this before but, man time sure flies! Since her birthday was in the middle of the week this year we decided to have a party with her friends this coming Saturday. I'll make cake then, most probably cupcakes, so I didn't want to make cake twice in the same week. But, I still wanted her to have a special birthday dessert.

I asked her what she would like and all she said was "Something chocolate!". That's my girl! Brownies came to mind, being an easy dessert and all, and when I searched my favorite sites these Cheesecake Brownies on David Lebovitz' blog caught my eye. Still an easy recipe but with a little something extra that really says "Birthday!".


These are deliciously chocolaty but not too sweet, just perfect for a small birthday dinner, or to perk up any ordinary weekday meal. The birthday girl was quite happy with her special dessert and so was everyone else who had a square, or two! Please visit David's blog for the recipe!


Pin It!

Monday, October 12, 2009

Chocolate and Hazelnut Truffles

As if I didn't have enough cookbooks and baking books and foodie magazines that I love to bits already, I keep discovering new magazines that are so fabulous I can't help but to buy them on the spot! One of those magazines is Delicious. I think the first one I bought was last January and I promised myself I would stop looking for it in news stands because, well, I just have enough magazines, you know. But it just jumps out at me! The articles, the recipes, the pictures, oh, the pictures!

I do make it a point to write a list of recipes I want to try as soon as I get the magazine, which isn't very hard as all the recipes are mouthwatering! In the most recent one I got there was this recipe for a Chocolate and Hazelnut Slice, which I also found on their website but under the name Chocolate and Hazelnut Truffles. I think these are really more like truffles, considering the amount of chocolate and cream they contain! Perfect for the Holidays, which are just around the corner you know, better start baking!

Chocolate and Hazelnut Truffles
Adapted from Delicious Magazine

50g butter, plus extra for greasing

Unsweetened cocoa powder, for dusting
the pan
150g skinned hazelnuts
*
90g plain flour

100g caster sugar

1/2 tsp salt

500g bittersweet chocolate, roughly chopped

2 large eggs

225ml heavy cream


Preheat the oven to 180°C/350
°F. Grease the base and sides of a 20cm square cake pan with a little butter. Dust all over with cocoa powder, knocking out the excess. Or use a springform pan and line the bottom with parchment before buttering and dusting with cocoa powder.

In a food processor, place 100g of hazelnuts, the flour, sugar and salt and process until coarsely ground. Roughly chop the rest of the nuts and stir in. Melt the butter in a saucepan over a low heat, then add 150g of chocolate. Let it melt slightly, then whisk until smooth. Remove from the heat, add the eggs, one at a time, whisking well between each addition. Stir in the nut mixture until well combined. Spoon into your prepared pan and spread evenly. Bake for 15-20 minutes. Leave to cool in the pan.

To make the ganache, put the rest of the chocolate in a heat proof bowl. Bring the cream just to the boil and pour over the chocolate. Let it sit for a few minutes then gently stir until melted and thickened. Spoon over the cold hazelnut base and spread out. Tap the pan on the counter to smooth the ganache evenly. Cover with plastic wrap and refrigerate for 3 hours. Cut into squares with a warmed knife, wiping the knife after each cut. If you used a round springform pan, cut the round parts off and then cut the rest into squares. The baker needs a treat too, right?

To assemble as a gift: put in a decorative box or cellophane bag and decorate as you wish. Keeps in the fridge for up to a week.

*To skin the hazelnuts: Put the hazelnuts on a baking sheet and roast in a 350F oven for about 10 minutes. Place the hazelnuts on a clean dish towel and rub them with the towel to remove skins.
Pin It!

Friday, September 25, 2009

Orange Almond Cream Whoopie Pies

Have you ever become so obsessed with getting something right that you just can't rest until you do? Well, that happened to me with Whoopie Pies. A few months back (yes, months) my cousin,LP ,invited me over to her place for an afternoon cooking/baking session. We decided to make a Chicken Tetrazzini for dinner and Whoopie Pies for dessert.

The Whoopie Pies were to be of the traditional chocolate with marshmallow filling variety. The cookies came out really well, but the filling, not so much. They were quite tasty but a little too sticky and gooey, so to speak. So, LP and I each set out to find the perfect filling recipe for Whoopie Pies. I went the homemade Fluff route, which was a great success, but sadly, since I have no photos as proof of that, you'll have to take my word for it until I decide to make some again. LP went the cream cheese frosting route and, I have to say, she won the Whoopie Pie filling challenge hands down. She came up with this Orange Almond Cream variation and I just had to steal it from her. I'm sure she won't mind, right LP?


Orange Almond Cream Whoopie Pies

For the cookies:

2 cups all-purpose flour

1 tsp baking soda

1/2 tsp baking powder

1/4 tsp salt

1 egg

1/3 cup vegetable oil

Zest of 1 to 2 oranges (depending on their size and how orangey you want the cookies)

1 cup granulated sugar

3/4 cup buttermilk


For the Almond Cream filling:

8 oz cream cheese, room temperature

5 tbsp butter, room temperature

3 1/2 cups sifted powdered sugar

1/2 to 3/4 tsp almond extract


Preheat your oven to 350F and line a baking sheet with parchment paper.

In a bowl, mix the flour, baking soda, baking powder and salt; set aside. In another bowl, mix the egg, oil, orange zest, and sugar. Add the dry ingredients to the wet, alternating with the buttermilk, until all the ingredients are well combined.

Drop the dough, a teaspoonful at a time, onto the prepared baking sheet, taking care to leave enough space between the cookies as they expand a little while baking, but not too much. Also try to keep the shape as round and even as possible, it makes it easier to match the cookies after they are baked. Bake the cookies about 8 minutes, until they are slightly golden around the edges, but do not over bake them, you want them to be tender, not hard. Once the cookies are done baking, transfer them to a wire rack to cool completely.

While the cookies are cooling, prepare the filling. In the bowl of your mixer of choice, preferably fitted with a paddle attachment, mix the cream cheese and the butter until light and well blended. Add the sifted powdered sugar, in batches, until the filling is perfectly smooth. Add the almond extract, mix well.

To fill the cookies, you can use a spoon or a pastry bag to spread some of the filling onto one of the cookies and then sandwich another cookie on top. Fill and sandwich cookies until all the cookies are matched. You might have some filling leftover, it makes a nice frosting on cupcakes or muffins.

Pin It!