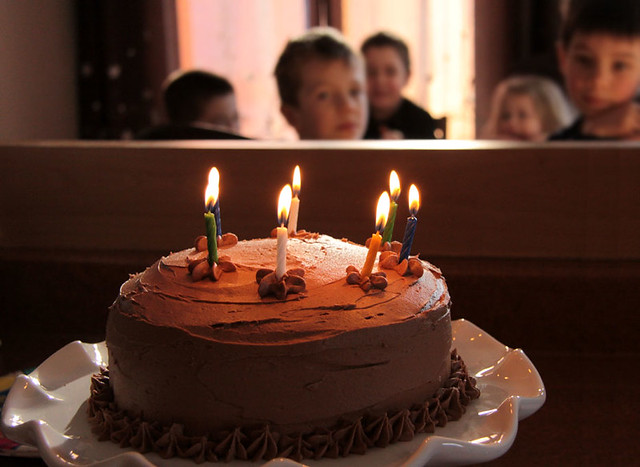
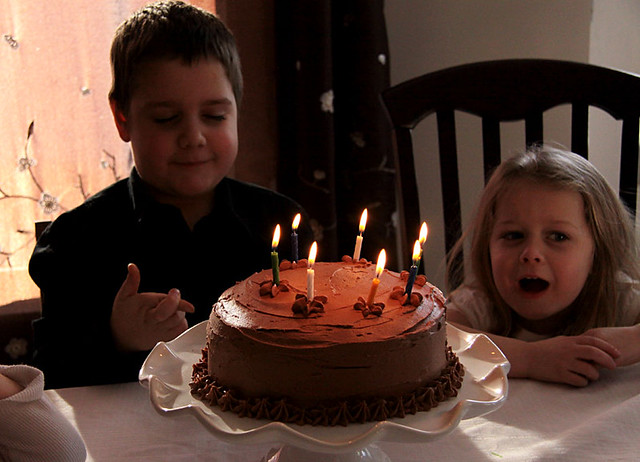
My son turned 7 yesterday and as I sit here typing these words, I still can't believe it. How in the world do kids grow up so fast? How did he become this little 7 year old boy who can now read and write, do math problems and figure out a video game way quicker than I can? Can you tell I'm feeling a little old right now? Yep, I am...
When I asked Tom if he wanted cupcakes or a real cake for his birthday party he replied: "A real cake, of course!" as if cupcakes were just for girls! And, of course, he wanted a chocolate cake. So I decided on my usual One Bowl Chocolate Cake with Chocolate Icing. A bunch of little boys eating chocolate cake at a birthday party, sounds fun, right? Can't be afraid of a little sugar high!
The reason I decided to do another post for this cake is that I used buttermilk instead of milk in the recipe. Doesn't sound like much of a change but it makes a great cake even better. Annabelle even told me the cake was just as good, if not better, without the icing. Without icing! OK, so I'm not sure the boys would have been quite as impressed if I had baked this as a bundt instead of a 3 layer cake but I'm sure going to try it when another chocolate craving strikes!
2 cups white sugar 1 3/4 cups all-purpose flour 3/4 cup unsweetened cocoa powder 1 1/2 teaspoons baking powder 1 1/2 teaspoons baking soda 1 teaspoon salt 2 eggs 1 cup buttermilk 1/2 cup vegetable oil 2 teaspoons vanilla extract 1 cup boiling water
Preheat oven to 350 degrees F (175 degrees C). Grease and flour two nine inch round pans (or 2 heart-shaped pans).
In a large bowl, stir together the sugar, flour, cocoa, baking powder, baking soda and salt. Add the eggs, buttermilk, oil and vanilla, mix for 2 minutes on medium speed of mixer. Stir in the boiling water last. Batter will be thin. Pour evenly into the prepared pans.
Bake 30 to 35 minutes in the preheated oven, until the cake tests done with a toothpick. Cool in the pans for 10 minutes, then remove to a wire rack to cool completely.
Note: For the layer cake pictured above, I used three 9-inch round cake pans and baked them for approximately 20 minutes. Check the layers and if a toothpick inserted in the center of the cakes comes out clean, they're done!
Chocolate Icing
4 cups sifted confectioner’s sugar 1 cup butter, at room temperature 2 tsp pure vanilla extract 1 to 2 tbsp milk, depending on the consistency you want 5 tbsp unsweetened cocoa powder
Cream butter, sugar and vanilla. Add a small amount of milk to reach desired spreading consistency. Add cocoa powder and beat well. Spread on cooled cake.
There are so many things going through my head right now. Has it really been three years since I hit "publish post" for the very first time? Have I reallymadecaramelthatmanytimessince? Did we eat all those desserts? Really? And how in the world did three years, three years, go by so freaking fast? Yes, today folks, this little webspace of mine is three years old. Yes, there has been a lot more sweet than savory appearing in these pages. Yes, we ate everything I made, but we did share a lot of it. And yes, there will be more baking, cooking and sharing in the coming years and I wouldn't have it any other way; I've been enjoying myself way too much to quit. I'm hoping you've also enjoyed reading my ramblings and trying some of the recipes I've posted. I've discovered so many new techniques and flavors since starting to blog and I suspect I'm not done learning!
I've made a few changes here and there and I'd like to share them with you. There are some tabs near the top there, under the header and I've finally got that recipe index I've always wanted! It's a work in progress as I'm not sure about the categories I've chosen, but it's there and functional! I've also decided to (finally) write an "About Page". I know, I know, about time, right? This one I've mentioned before, but if you haven't had a chance yet, go on over and visit And then I do the Dishes on Facebook, leave a comment, question, whatever you like! And, last but not least, there's this nifty little "print button" at the bottom of each post and I would not forgive myself if I didn't thank Taylor over at Print Friendly. Best product support ever! Thanks so very much! And thank you guys, readers and friends for your support. For reading and commenting and keeping this little project of mine going. I couldn't do it without you. Thank you!
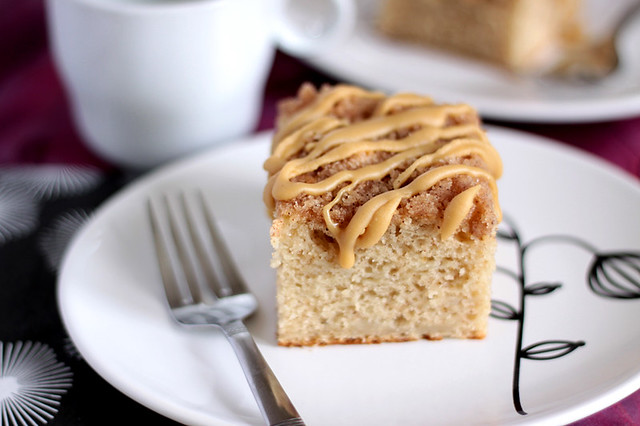
Now, onto the recipe! If you like coffee cake, this is the recipe you want! As you may already know, I have many, many recipe books and magazines but the best, tried and true recipes often come from those free recipe booklets handed out at grocery stores or stuck to pages of magazines. This recipe comes from such a booklet, Robin Hood Baking Festival 1992. I've long since adapted the recipe to suit my family's tastes but every time I find a little booklet of recipes, I can't help but keep it. You never know what little gem you might find inside.
Topping: Combine all ingredients. Mix well and set aside.
Cake: Preheat your oven to 350F. Lightly grease a 10-inch springform pan and set aside.
In a large bowl, combine flour, sugar, baking powder, baking soda, salt, cinnamon, nutmeg, ground cloves and tonka bean, if using. Mix well. In another bowl, beat eggs, sour cream or yogurt and melted butter. Stir into dry ingredients until just blended. Stir in grated apples. Spread batter evenly into the prepared pan and sprinkle topping over the batter.
Bake in preheated oven for 45 to 50 minutes or until a toothpick inserted in center of the cake comes out clean. Let the cake rest in the pan a few minutes before unmolding and placing it on a baking rack to cool. Serve warm or at room temperature.
I added this glaze as an afterthought because I thought the cake looked plain in the photos. It certainly doesn't need the glaze taste wise, but it does add a little more sweetness, and it looks nice. You could also drizzle some caramel sauce on top, that would be just decadent!
1/2 cup milk (I used 2%) 1/2 cup maple syrup Pinch of fleur de sel 1 tsp unsalted butter
In a saucepan, pour the milk and maple syrup. Add pinch of fleur de sel and bring to a boil. Whisk constantly until the mixture is thickened and starts to look like caramel. This can take from 5 to 10 minutes. When you're happy with the consistency, whisk in the butter, strain the glaze into a heatproof bowl and let it cool slightly. Now, you can pour the glaze directly onto the hot cake, in which case most of the glaze will be absorbed into the cake, which would be delicious. But, if you're going for the same look as in my photos, wait until the glaze and cake are cooled and drizzle the glaze onto the cake. If the glaze has hardened too much to pour, you can microwave it a few seconds to get it to the right consistency.
I am so completely addicted to food magazines, I even collect the little pamphlets they hand out in grocery stores. These days, they look a lot more like magazines though, as they're full of neatly styled recipes featuring, of course, said store's products. As most of you know, you don't really need to use the product in question and even when the recipe calls for a ready-made product, you can make it even better by using something homemade.
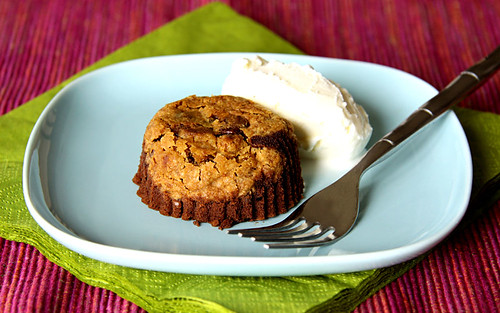
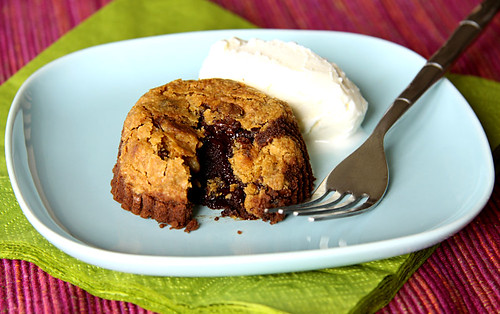
Case in point? These Chocolate Chip Cookie Lava Cakes. I noticed the recipe while I was "sifting" through magazines and stuff I could get rid of. Yes, I have too much stuff, go figure, and I need to get organized. Anyhoo, I was looking through a pile of Kraft's What's Cooking Magazine and when I spotted those cakes I had to make them right away! Well, first I had to make chocolate chip cookies, then I could make the cakes.
I made my favorite chocolate chip cookie recipe, used a round cookie-cutter to cut 12 cookies to the desired size and then made the cake batter. Easy-peasy! And when they're finally out of the oven, you flip them onto a plate, and you go to chocolate heaven. First you experience the crisp, crunchy and buttery taste of the cookie, then, as you cut into it, you find a rich, molten chocolate cake swimming in melting vanilla ice cream. Did I mention you have to pair this with vanilla ice cream? Well, you do!
Chocolate Chip Cookie Lava Cakes adapted from kraftcanada.com
OK, first you have to make some chocolate chip cookies. I suggest this recipe; it contains walnuts, which are a nice addition to these little cakes.
12 chocolate chip cookies, cut into circles with a 2 1/2-inch cookie cutter 4 ounces of bittersweet chocolate, chopped 1/2 cup unsalted butter 2 whole eggs 2 egg yolks 1 cup confectioners sugar 1/3 cup flour 1/2 teaspoon fleur de sel
Preheat your oven to 425F. Line a 12-cup muffin tin with paper liners. Place the cookies, upside down, into the muffin liners. Press them into the bottom, they might be a bit big but don't worry about squishing them in, they're like the crust of these tatin-like cakes! OK, now set that aside while you make the batter.
Place the chocolate and the butter in a large microwaveable bowl, then microwave on high for about 2 minutes. At that point the butter should be melted and a little stirring will get the rest of the chocolate melted too. Alternately, you could do this on a double boiler.
In another bowl whisk together the eggs, egg yolks, confectioners sugar, flour and fleur de sel. Slowly add the chocolate mixture, stirring as you go, until well blended. Pour the batter over the cookies in your prepared muffin tin. Bake in preheated oven for about 8 minutes. The cakes will be slightly firm around the edges but still soft in the middle. Let the cakes stand a minute or 2 before serving. Remove each cake from its tin, invert it onto a plate (just like a tarte tatin!), remove its liner and serve with your favorite vanilla ice cream.
Chocolate, cinnamon and espresso powder combined in a beautiful, moist and delicious cake. That's what Tracey chose for us this week for Tuesdays with Dorie, and to think I almost didn't make it! It was supposed to be square, but I made it as a bundt. Just for fun. :)
Don't make the same mistake I did, trust Dorie. Get the recipe from Tracey's blog, Tracey's Culinary Adventures, and make this cake! Now!
I went back and forth a lot on this one as I've never had Tiramisu but the concept has always intrigued me. To me it's sort of a cross between a cake and a cheesecake with coffee flavor thrown in the mix. Megan of My Baking Adventures chose this recipe for us Tuesdays with Dorie bakers to try this week and I'm glad I finally decided to make it.
It's not a very difficult cake to make, it just has a few different components and once everything is put together it needs time to rest a little so you need to think ahead if you want to make this for your next dinner party. The cake part is a straight forward vanilla flavored cake that, once baked and cooled, you soak with a coffee flavored syrup. Next time I make this, I'll make more syrup as I thought the finished product was a bit dry. I was expecting a much moister cake. Then, you make a filling and frosting consisting of mascarpone cheese, whipped cream, sugar and espresso extract. That's the cheesecake part. I was supposed to finely chop some chocolate to sandwich in between the two cakes but it was late when I put the cake together and I totally forgot. Oh, well, next time, right?
By the way, that little hand there in the background of the second picture? That's Olivia, "helping" me. Maybe she'll be a food stylist when she grows up... In any case, the cake went over well with the tasters at my house. Martin even said that it reminded him of a Tiramisu he'd had at a restaurant a long time ago. Isn't that sweet? He took half the cake in to work to share with his co-workers. Thank goodness! I don't even want to know how many calories are in a slice of that cake. Maybe it's just as well I forgot the chocolate, huh? I'll let you know how the cake went over with his co-workers, as soon as I find out... In the mean time, check out Megan's blog for the recipe and take a look at what the rest of the Tuesdays with Dorie gang came up with. There's bound to be a few creative Tiramisu Cakes out there today!
EDIT: It seems Martin's co-workers enjoyed the cake! Yay! I think I might send more goodies their way very, very soon... :)
This is the kind of cake you want to wake up to on a Sunday morning. You want to slice off a piece and eat it right then and there, still warm, straight out of the pan, picking off chunks with your fingers, crumbs falling all over the place. And it's OK. Pair it with a steaming cup of coffee and you're ready to start your day.
This is the kind of cake that you don't mind eating leftovers of, warmed up slightly, with a huge scoop of your favorite vanilla ice cream, melting into the sweet, crunchy crumb. Sharing it makes it even tastier.
This is the kind of cake that you can't wait to make again with every kind of sweet, ripe, summer berry under the sun. Combined with orange, lemon or lime zest, you could have a different taste combination for just about any occasion.
Sihan of Befuddlement chose this versatile cake as this week's Tuesdays with Dorie recipe. Please visit her blog! And check out the rest of the TWD gang for further crumb cake inspiration. Then grab your mixer and bake a crumb cake!
The first time I tasted Yogurt Cake was at a friend's house. I was amazed at how moist and delicious it was. She was almost apologetic when she told me what kind of cake it was. "C'est juste un gâteau au yaourt"... It's just a yogurt cake...
The beauty of this cake is in its simplicity. You could do so many flavor variations. I made the lemon version, but used Ground Cherry and Vanilla Compote for the glaze. It was fantastic! I also made an orange version, using half the oil called for in the recipe and substituting unsweetened apple sauce for the rest. I made a simple syrup using orange juice and a little sugar in place of the glaze. It was just as moist and tender as the lemon version. We were almost fighting over the last slices! You could also add fresh or dried fruit, nuts, different jams or preserves for the glaze, endless possibilities!
The real secret to the wonderful citrus scent of the cake is in Dorie's special technique. The lemon (or orange) zest is rubbed into the sugar until the sugar is moist and fragrant. The oil from the zest permeates the sugar and its essence is then diffused throughout the cake, giving it a truly fantastic aroma.
So if you're looking for a last minute dessert or a sweet little afternoon snack to accompany your coffee or tea, I highly recommend that you visit Liliana over at My Cookbook Addiction for the recipe. Might I also suggest that you check out the rest of the Tuesdays with Dorie bakers? A little something tells me there might be a few interesting variations of Yogurt Cake floating about the web today.
The time has finally come! It was my turn to choose this week's recipe for Tuesdays with Dorie and let me tell you, for someone who has a hard time taking decisions, this was not an easy task. Baking from my Home to Yours is full of fantastic recipes, and every time I thought I had the one, I flipped a page and found another! But I kept coming back to the cake that got Dorie fired, Chocolate Armagnac Cake.
I love the story that goes along with the recipe about how Dorie got bored of making the same desserts every day, decided to change things up a bit and came up with this cake. Granted, she got fired for it, but I admire her for trying something different. I mean, come on, there are so many dessert recipes and variations in Baking from my Home to Yours, I can't imagine Dorie making the same dessert over and over again. And that's only one of her books!
So, anyways, I chose the cake because I liked the story, and I was lucky finding the ingredients. Out shopping one afternoon, I came upon a shelf full of Scharffen Berger chocolates, for a fraction of their usual price! There was milk chocolate, semi-sweet, dark and... bittersweet. Bingo! Then I found the moistest, fattest prunes ever, just like that, I wasn't even looking for them. And, I would get to flambé again, which is a plus. It was decided right then and there, I was making this cake, and so were all the other members of Tuesdays with Dorie who wanted to try it. I knew a lot of people would be put off by the prunes but I also knew that a lot of people would try it anyways and find out that prunes aren't so bad when they're mixed in with a little booze, loads of chocolate, butter and sugar!
So how was this cake, you ask? Like a really classy brownie. No ordinary brownie, a dense, moist, fruity, chocolaty, fabulous, divine, brownie. This rivals with the Gooey Chocolate Cakes, my friends. Served at room temperature, the cake and glaze just melt in your mouth, it's just fantastic. Served cold, it becomes the best fudge ever, with a hint of Armagnac in the background. I loved it both ways and if I had thought to buy some whipping cream, I could have made some Armagnac whipped cream to go with this. There's always next time...
I'm glad I didn't fiddle with this cake, it's perfect as is. I might just try the original version next time though, you know, just to change things up a bit. Thanks to all of you Tuesdays with Dorie members who baked along with me this week, I hope you had fun and discovered something new that you liked. And thank you Dorie, for daring to be different and inspiring us to try out new recipes every week.
12 plump, moist prunes, pitted if necessary and cut into bits
1/4 cup plus 3 tablespoons water
1/4 cup Armagnac (or cognac, brandy or Scotch whisky)
7 ounces bittersweet chocolate, coarsely chopped
1 stick (8 tablespoons) unsalted butter, cut into 4 pieces
3 large eggs, separated
2/3 cup sugar
For the glaze
3 ounces bittersweet chocolate, coarsely chopped
3 tablespoons confectioners’ sugar
3 tablespoons unsalted butter, at room temperature
Getting ready: Center a rack in the oven and preheat the oven to 375 degrees F. Butter an 8-inch springform pan, fit the bottom of the pan with a round of parchment or wax paper and butter the paper. Dust the inside of the pan with flour and tap out the excess. Put the pan on a baking sheet lined with parchment or a silicone mat.
To make the cake: Whisk together the nuts, flour and salt.
Put the prunes and 1/4 cup of the water in a small saucepan over medium heat and cook, being careful not to scorch the fruit, until the water almost evaporates. Pull the pan from the heat and pour in the Armagnac, stand back and set it aflame. When the flame dies out, transfer the fruit and any remaining liquid to a bowl and let cool. (If it’s more convenient, you can flame and steep the prunes up to 1 day ahead. Pack the prunes and their liquid in a covered jar and keep at room temperature.)
Combine the chocolate, butter and the remaining 3 tablespoons water in a heatproof bowl, set it over a pan of simmering water and stir occasionally until the chocolate and butter are melted; or do this in a microwave oven. Remove the chocolate from the heat just as soon as it is melted and not very hot—you don’t want the chocolate and butter to separate.
In a large bowl, whisk the egg yolks and sugar together until thick and pale, about 2 minutes. Switch to a rubber spatula and, one by one, stir in the chocolate and butter mixture, the nut mixture, and the prunes with any liquid.
Working with a stand mixer fitted with the whisk attachment or with a hand mixer in a large bowl, beat the egg whites until they hold firm, glossy peaks. Stir about one quarter of the beaten whites into the chocolate mixture, then gently fold in the remaining whites. Turn the batter into the pan.
Bake the cake for 28 to 32 minutes, or until it is puffed, firm on top and starting to come ever so slightly away from the sides of the pan; a thin knife inserted into the center will come out streaky—the cake should not be wet, but you don’t want it to be completely dry. Transfer the cake to a rack and let it cool for about 10 minutes, then carefully remove the sides of the pan. Invert the cake, pull off the paper and turn right side up to cool to room temperature. The cake should be absolutely cool before you glaze it.
Getting ready to glaze: If the cake has crowned, use a long serrated knife and a gentle sawing motion to even the top. Turn the cake over onto a cooling rack—you want the very flat bottom of the cake to be the top. Put a piece of wax paper or foil under the cooling rack to serve as a drip catcher.
To make the glaze: Melt the chocolate in a heatproof bowl over a pan of gently simmering water, or in a microwave oven. Remove it from the heat and, using a small spatula, stir in the sugar, then the butter, a bit at a time, stirring until you have a smooth glaze.
Have a long metal icing spatula at hand. Pour the glaze over the top of the cake, allowing the excess to rundown the sides, and use the spatula to smooth the top of the cake if necessary—usually the glaze is a self-spreader—and to even it around the sides of the cake. Let the glaze set at room temperature or, if you want to speed it up, slide the cake into the refrigerator for about 20 minutes. If you’d like the glaze to be more like a frosting, let it cool until it is thick enough to spread, then swirl it over the cake.
Serving: The cake should be served at room temperature—chill it, and you’ll diminish its flavor and compact its texture. That said, there are lots of people who like the cake cold, because then it becomes more fudgy. Cream, whipped or ice, is a welcome accompaniment.
Playing around
Chocolate Whiskey Cake: The original cake by Simone Beck featured raisins and Scotch, rather than prunes and Armagnac. If you’d like to use that combination, put 1/4 cup raisins and 1/4 cup Scotch whisky in a covered jar and shake the jar a few times. Let the raisins steep for at least 3 hours (or for up to 1 day), turning the jar upside down and then right side up from time to time. When you add the raisins to the batter, add whatever whisky remains as well.
Have you ever seen such a fluffy-looking cake? I didn't think so. Stephanie of Confessions of a City Eater chose THE recipe this week. Yes, Devil's Food White-Out Cake, the cover cake from Baking from my Home to Yours. It is a wonder that cake had not been chosen before and I think she made a lot of people happy with her choice.
She made a lot of people happy at my house, anyways! The cake, although a bit fussy to make, is worth all the effort. I did save myself a little work by baking it in a large cookie sheet and cutting it into rectangles instead of making a round cake. For the crumbs, I used the crusts, which I cut off the cake.
The frosting is a meringue-like, fluffy, sweet and oh, so delicious treat. I had made it before but in different proportions of egg whites/cream of tartar/sugar syrup. So I decided to use Dorie's recipe but instead of the sugar syrup, I used 1 cup of maple syrup. Oh. Yes. I. Did. The maple flavor is very subtle and complements the chocolate instead of competing with it. And that 3/4 tsp of cream of tartar really helps stabilize the meringue. I topped the cake with maple sugar flakes for a little more maple taste.
This will be my go-to meringue frosting recipe from now on. It's really easy and it stays fluffy longer than the one I used before. As for the cake, it is very good, but quite fussy to make. I might stick with my usual chocolate cake recipe and try it with this fluffy maple frosting. Check out Stephanie's blog for the cake recipe and the rest of the Tuesdays with Dorie bakers for chocolate cake overload!
I almost didn't make the Fresh Ginger and Chocolate Gingerbread this week. I was really intrigued by the recipe that Heather, of Sherry Trifle, had chosen, but I had so many things to do, I thought I wouldn't have time to make this. Plus, it was Tom's fifth birthday on the 23rd (my little boy is 5 years old!) and we all know that birthdays mean birthday cakes and this gingerbread was not going to cut it with a 5 year old. So, since I really wanted to taste it, I decided to make the gingerbread but halved the recipe.
When I halved the recipe, I thought I would be OK baking the cake in 2 mini springform pans and 1 ramekin. I should have used more ramekins. The cakes did a volcano effect in the oven. Luckily, I had put the pans on a baking sheet and the overflow ended up tasting like gingerbread cookies so, not a big problem. I trimmed the cakes, glazed them and they patiently awaited the time of their photo shoot, in the refrigerator.
I really liked the texture of the gingerbread right out of the refrigerator. It was dense but not too dense. The fresh ginger taste really came out and the chocolate glaze made it extra special. I'm so glad I decided to make this, I would have missed out on a great recipe.
For all you gingerbread fans, I strongly suggest trying out this recipe. It's not complicated and the results are stellar. Please visit Heather's blog for the recipe and the rest of the Tuesdays with Dorie members for variations on this week's gingerbread theme.
The surprise today is that this wasn't supposed to be a roll cake at all, but a round, tall-ish cake, filled with a creamy center. It was actually not supposed to be orange flavored either but I had oranges so, an orange cake it was! When Mary Ann of Meet Me in the Kitchen chose the Berry Surprise Cake as this week's Tuesdays with Dorie recipe, I have to admit, it wasn't a recipe that had caught my eye before. Upon reading said recipe, I thought it looked a tad bit complicated and I wasn't up for complicated.
What immediately came to mind was to make this a roll cake. Using the recipe I've had for years, I made a thin sponge cake, to which I added orange zest. Then to add more orange flavor, I added Grand Marnier in the syrup used to moisten the cake. Granted the creamy filling was a bit soft and adding orange segments didn't facilitate the rolling job, but, oh, my, the payoff was so worth the trouble. The creamy filling, made of cream cheese and heavy cream, gives this cake a cheesecake kind of taste and the orange paired so well with this, it reminded me of the Fresh Orange Cream Tart. I did have to sweeten the filling a bit more than Dorie suggests but I'm guessing with sweet summer berries, the filling wouldn't need any extra sugar. I also made candied orange slices but those didn't turn out as I would have liked. I made my slices too thick and I didn't have enough syrup for all the oranges I had. But I will try those again, at some point.
I'm not sure I would make this again as a roll cake though. I might take my thin sponge cake and cut it in thirds and then layer the cake and the filling together. It would be a lot easier, and less messy. One thing's for sure, I can't wait to make this cake with fresh berries next summer. If you want to see what this week's recipe is really supposed to look like, check out the rest of the TWD bakers. And don't forget to visit Mary Ann's blog for the recipe!
Roll Cake Recipe 1 cup flour 2 tsp baking powder 1/2 tsp salt 3 eggs 1 cup sugar 1/4 cup cold water 1 tsp vanilla Zest of 1 orange, finely grated (optional)
Preheat oven to 375F. Butter a 10 inch x 15 inch roll cake mold and line with parchment paper. Butter the paper and dust with flour.
In a small bowl, mix flour, baking powder and salt. Set aside.
In a large bowl, with your mixer of choice, beat the eggs at medium-high speed, until thick and pale, about 5 minutes. Add the sugar gradually and keep beating until the mixture is light and fluffy. Add cold water and vanilla, mixing well.
Slowly fold in the dry ingredients, trying not to deflate the egg mixture. Pour the batter in the prepared mold and bake in preheated oven for 12 to 15 minutes.
While the cake is baking, place a clean kitchen towel on a work surface and place a piece of parchment paper over the towel. As soon as the cake is ready, unmold it onto the parchment lined towel. With a serrated knife, cut the edges of the cake. Place another piece of parchment paper over the cake and, starting with the short end, roll the whole thing, towel and all, into a log, but not too tight. The parchment paper will keep the cake from sticking to the towel. Place the log on a cooling rack and let it come to room temperature.
Once the cake is cool you're ready to unroll, remove the towel and parchment papers, and fill it with either a good jam or a filling of your choice. Dust the finished cake with confectioner's sugar or cover with lightly sweetened whipped cream.
Being the sucker that I am for anythingcaramel, I couldn't pass up the chance to make a brownie cake topped with homemade caramel and nuts. The nuts in question were supposed to be peanuts but, my apologies to all of you peanut lovers out there, I was not going to make this cake with salted peanuts.
I thought about pecans, which would have been lovely, I'm sure, but I got a flash when I saw a tin of cashews at the grocery store. "Aha! Yes, cashews, that's it!" I love it when that happens. Anyways, I decided to halve the recipe because, again, knowing how much I love caramel, making the whole cake would have been dangerous. I even bought a few mini-springform pans for the occasion. Ah, how nice it is to have an excuse to shop for kitchen stuff!
Once my cutie cakes were baked and out of the oven, I noticed a little something was amiss. They both had huge craters in the middle! Hmmm, Dorie warns about the cake forming a small crater upon cooling but this was not a small crater! OK, moving on to the caramel, I must give you one word of advice: don't let yourself be distracted while the sugar is caramelizing! It will turn from a beautiful amber color to an awful burnt brown in a matter of seconds. If that happens, don't even bother with the cream and butter, just start over with a new batch of sugar.
My second batch of sugar, water and corn syrup was watched much more closely and became the gorgeous caramel called for in the recipe. The crater-cakes were then filled with spoonfuls of cashews and caramel and left alone to rest. The caramel wasn't runny at all once it had a chance to set, but it wasn't hard either, just the perfect texture. All my taste testers were in awe of the cake and so was I.
This cake... This cake... It's driving me nuts. This Dimply Plum Cake, chosen by Michelle, of Bake-En, as this week's Tuesdays with Dorie recipe, is now my new favorite recipe from Baking From My Home to Yours. I never thought that a cake, with plums, could be so delicious.
The first time I made it, I halved the recipe, because, well, I didn't know just how good it would be. And then I realized what a huge mistake I'd made. The combination of plums with the orange zest and tonka bean instead of cardamom, was just fabulous.
And if it wasn't for Isabelle who piqued my curiosity by using tonka bean in her Black and White Banana Loaf, I wouldn't have looked twice at the small container of tonka beans at the farmer's market fancy spice shop. Again, that would have been a huge mistake! Just the smell of the beans is enough to drive anyone nuts. They smell like amaretto and vanilla, and the tiniest amount adds something to a recipe that will have you wondering, what is that?
Along with the tonka beans and orange zest, I used tiny, almost cherry sized plums from, again, my favorite farmer's market. They are incredibly sweet and juicy, and so deeply purple. Being so tiny, they seem to just melt into the cake. So, you see, I had to make it again. And I did, just yesterday. And I keep going back for one more slice. And then, oh, just one more tiny slice.
I'm telling you, this cake is beyond delicious. Have I said that before? It's REALLY delicious! So, Michelle will probably have the recipe up soon, but for now either open up your favorite baking book to page 41 or visit Deb of Smitten Kitchen who made the exact same cake last month. Have fun baking!
Cheesecake is one of my all time favorite desserts. When we lived in Montreal, my mom would take me and my brother for walks and stop off at this wonderful bakery, of which I don't remember the name, typical. We would share a huge piece of the thickest, creamiest, strawberry cheesecake ever. To this day, I've never been able to find a cheesecake to top that one. Maybe it's the memories attached to the cake that makes it so special, or maybe my tastes have changed since those early days, but one thing's for sure, I still love cheesecake.
A little more than a week ago, I got this undeniable comfort food/dessert craving. This all started when I was looking for recipes to use up some Quark cheese I had in the fridge. Of course, I turned to Food Blog Search and came across this wonderful recipe. I printed it out and started thinking about how I could switch things up a little. I had some raspberries to use up as well and I remembered this post from Elle about raspberry-lime muffins. As soon as I made these muffins using lime zest instead of lemon, I knew why Elle had become obsessed with those flavors! So, raspberry-lime cheesecake it was!
My craving was totally satisfied. This cake is not too moist which makes it perfect with the raspberries bursting in every bite. And the lime pulls it all together, it just makes the flavors pop! I'm sure this would be great with lemon and blueberries, or maybe strawberries and orange. Really there are so many possibilities, I don't know why you guys are still here! Get baking already!
And because I liked this cake so much, I decided to send it to sweet Susan from Food Blogga who is hosting Sugar High Friday #45. The theme is berries, what else! I can't wait for the berry-liscious round-up! SHF is a monthly event created by Jennifer, The Domestic Goddess.
Raspberry-Lime Cheesecake Adapted from Kedai Hamburg
Preheat oven to 350F (180C). Line a 26 cm (10 inch) spring form pan with parchment paper. Also grease the pan well.
In a small bowl, mix the flour with the baking powder. In another bowl, mix the sugar with the lime zest, mashing it together with a fork. Set these aside. In a large bowl, with your mixer of choice, combine the cream cheese with the Quark cheese until well blended. Add the eggs, one at a time, mixing well in between each addition. Add the sugar mixture, then the melted butter and the lime juice. Add the dry ingredients and mix well. Pour the batter in the prepared pan and distribute the raspberries evenly throughout the surface of the cake. Bake in the preheated oven for about 45 to 50 minutes, until the edges of the cake are golden brown. Let the cake cool in the pan. Once the cake has cooled, run a knife in between the cake and the pan before unmolding.
PS: I apologize to those of you who don’t have a kitchen scale, I was too lazy to convert to imperial units. That being said, I highly recommend purchasing a kitchen scale. I just got one recently and I love it!
It's Tuesdays with Dorie time again! This was my first time making a cobbler and from the look of the photo in the book, it looked more like a fruit soup topped with a pie crust. Needless to say, it wasn’t one of the recipes that had caught my eye so I decided to tweak it a bit and end up with something that might suit my taste a bit better.
I started by halving the recipe, cutting the butter a bit and replacing it with some Quark cheese, and I used whole milk instead of cream. Then I decided to use half whole wheat flour, half all purpose, added some vanilla extract and used a bit more sugar than was called for. I ended up with a dough that was a bit stickier, like a dumpling, which is what I wanted. For the filling I used a mix of fresh fruit : cherries, blueberries, raspberries and strawberries. I mixed it up with some sugar, cornstarch, lime zest and a bit of lime juice.
I divided the fruit filling into baking dishes, topped it with my dumpling-like dough and sprinkled it with some coarse sugar. I ended up with more of an upside down fruit cake which was quite delicious with a bit of whipped cream. Using the soft cheese and a bit of vanilla in the dough gave it a lot of flavor. Of course, this might not be a traditional cobbler, but we liked it well enough.