Monday, February 14, 2011

Happy Valentine's Day!!! (Nutella Brownies and Red Velvet Cupcake Recipes)

I couldn't have had a better surprise this morning than to wake up to a snowstorm and closed schools! I was really happy to have the kids at home, I made an army of tiny Red Velvet Cupcakes, found an Origami Heart pattern on the net then invited a few friends over for sweets and crafts!


It was my first time making Red Velvet anything and I thought Valentine's Day was the ideal day to try these cupcakes. I was pleasantly surprised by their texture, they were soft and fluffy with just a hint of cocoa and the color, wow, very impressive. The cream cheese icing, well, it's just over the top sweet and creamy but I wouldn't have it any other way!


And with all this talk about Nutella lately, combined with a serious craving for brownies, well it was just a matter of time before I gave in and made Nutella Brownies. Armed with a recipe by one of my faves, Ricardo, of course, I knew I couldn't fail! The brownies were just delightful, the hazelnut taste of the Nutella really came through and the texture, oh boy, just dreamy! Perfect for a Valentine's Day weekend!


I hope everyone had a great Valentine's Day!!!

For the Red Velvet Cupcake recipe please visit Brown Eyed Baker. I made the recipe pretty much as is except for using gel food coloring (about 1 tbsp) instead of liquid and baking the cupcakes in mini muffin pans for about 12 minutes.

For the Nutella Brownies recipe please visit Ricardo's website.
Pin It!

Friday, February 11, 2011

Homemade Pretzels with Cheese Sauce

I know I'm late to the party as talking about Superbowl food and stuff is sooooo last week (Yay Packers, by the way!) but, even though I made these pretzels for the event in question, I want to make sure they don't stay labeled as "party food". No, in fact I think you should make these any time, special event or not.

First, they are really easy to make, just like making bread. Second, they're impressively tasty, think bagels but with a fun shape factor. And third, they are endlessly adaptable: they could be salty, sweet, with sesame or poppy seeds, served with a cheesy sauce or an onion dip, or even, oh my, with a cinnamon coating and served with a cream cheese dip! I just thought of that one, I might have to make some this weekend!


Homemade Pretzels
adapted from Chuck Hughes via Food Network Canada

1 1/2 cups warm water (between 110F and 115F)
1 tbsp granulated sugar
2 tsp active dry yeast
3 cups all purpose flour
2 tsp kosher salt
2 tbsp melted butter

10 cups water
2/3 cup baking soda
Egg wash: 1 egg, beaten with 1 tsp water
Coarse salt, sesame seeds, your choice of toppings

Lightly oil a large bowl and set aside.

In a measuring cup, combine warm water, sugar and active dry yeast. Allow to sit 5 minutes so the yeast can start doing its thing. In a large bowl, mix the flour and salt. Once the yeast mixture starts to foam, add the melted butter and pour into the flour mixture. Using a wooden spoon, start mixing the dough until it comes together. Place the dough onto a lightly floured surface and knead for about 5 minutes, adding flour as necessary to obtain a smooth ball of dough. Place the ball of dough in your previously oiled bowl, cover with plastic wrap and leave to rise in a warm place until the dough has doubled in size, about one hour.

Once your dough has risen, line a baking sheet with parchment paper and oil it lightly. Take the dough out of the bowl and divide it into 12 equal pieces. Roll each piece of dough into an approximately 20-inch rope. Make a U shape with the rope, holding the ends of the rope, cross them over each other and press onto the bottom of the U in order to form the classic pretzel shape. Proceed that way with each of the 12 pieces of dough and place the pretzels on the baking sheet and refrigerate for one hour. This step allows the surface of the pretzels to dry and makes them easier to handle.

Preheat the oven to 450F.

In the largest pot you have, bring the 10 cups of water to a boil. Once the water is boiling, add the baking soda, very carefully, a little bit at a time, as it will cause the water to boil over.

Place the pretzels in the boiling water, one at a time, 30 seconds each. Remove the pretzels from the water with a large spatula and place them back on the parchment lined baking sheet. The boiling step will help the pretzels get that signature brown, crunchy exterior.

Brush the top of each pretzel with the egg wash, sprinkle with your topping of choice and bake in the preheated oven for about 12 minutes, until the pretzels get that dark golden brown we're looking for. Transfer the pretzels to a cooling rack and let rest 5 minutes before serving.

Note: If you're not sure you're going to eat your pretzels all in the same day, may I suggest you omit sprinkling them with salt. The salt will make them soggy the next day.

Cheese Sauce
adapted from Ricardo Magazine

1 tbsp cornstarch
1 (370 ml) can of evaporated milk
2 tbsp olive oil
1 onion, finely chopped
1/2 green bell pepper, finely chopped
1 garlic clove, finely minced
1 tbsp tomato paste
1 tbsp ground smoked chipotle pepper
2 cups grated sharp cheddar cheese, preferably orange
Salt and pepper, to taste

In a bowl, whisk the cornstarch and evaporated milk together; set aside.

In a saucepan, heat the olive oil and add the onion, bell pepper and garlic. Sauté until softened, about 5 minutes. Add the tomato paste and smoked chipotle pepper and cook for another minute. Add the evaporated milk mixture and bring to a boil, whisking constantly. Simmer for about 2 minutes. Add the grated cheddar and whisk until the cheese is melted and the sauce is smooth. Add salt and pepper to taste and serve warm with the pretzels.

Note: This sauce is terrific in burgers as well. And if you have any leftovers, you can make a great quickie mac 'n cheese with it the next day.


Pin It!

Saturday, February 5, 2011

Nutella Filled Cream Cheese Cookies for World Nutella Day!!!

Ah, World Nutella Day! A few years ago I made myself a cup of Nutella Hot Chocolate, posted it on my blog and sent the link to Sara of Ms. Adventures in Italy and Michelle of Bleeding Espresso, so I could participate in World Nutella Day. I never thought it would become one of my most popular recipes to date!


So, this year, I prepared a bit better and started thinking of Nutella recipes a little more in advance. I knew I wanted to make something with cream cheese but not a cheesecake. I thought of brownies but I wanted to taste the cream cheese and the Nutella. Then I found this dough recipe that could be easily adapted, added some cream cheese to it, filled the dough with Nutella and tadaaa! I got my Nutella Filled Cream Cheese Cookies! They are moist, not too sweet, you get a hint of cream cheese in each bite and the Nutella, well, that's just the most wonderful surprise to get inside a cookie! And it works so well with the cream cheese, the cookies stay moist and they are even better the next day.


Tell me, are you making Nutella recipes today or are you dipping your spoon into a jar and enjoying Nutella "au naturel"? We'll probably be doing a little of both around here today!


Nutella Filled Cream Cheese Cookies
(dough recipe adapted from Michael Smith via Food Network Canada)

1/2 cup unsalted butter, room temp.

1 - 250g package of cream cheese, room temp.

1 1/2 cups granulated sugar

2 eggs, room temp.

1 tbsp vanilla extract

1 tbsp corn syrup

3 cups all purpose flour

1 tsp baking powder

1 tsp baking soda
1/4 tsp salt

Nutella, for filling

1/3 cup granulated sugar (for rolling)


Preheat your oven to 375F and line a few baking sheets with parchment paper.


In your mixer of choice, beat the butter, cream cheese and granulated sugar together until well mixed. Add eggs, one at a time, beating well after each one. Add the vanilla and corn syrup and mix until incorporated.
In a separate bowl, whisk the flour, baking powder, baking soda and salt. Slowly add to the butter/cream cheese mix and beat until the batter comes together.

Refrigerate the dough for at least an hour, otherwise it will be sticky, very had to work with and the cookies won't keep their shape as well.

Once your dough has been refrigerated, use a cookie scoop or a tablespoon and form little balls of dough. Make an indentation in each one and dollop about 1/2 tsp of Nutella in it. Close the dough around the Nutella as much as you can then
use a small piece of dough to close up the hole. Form into a ball shape and roll into the remaining 1/3 cup of granulated sugar. Place on the parchment lined cookie sheet, 6 cookies to a sheet.

Bake (one sheet at a time) in preheated oven for about 12 minutes or until the cookies are slightly golden. Transfer to a wire rack to cool completely. Makes about 36 large cookies.


Pin It!

Monday, January 24, 2011

Growing up (One Bowl Chocolate Cake Recipe - Redux)

My son turned 7 yesterday and as I sit here typing these words, I still can't believe it. How in the world do kids grow up so fast? How did he become this little 7 year old boy who can now read and write, do math problems and figure out a video game way quicker than I can? Can you tell I'm feeling a little old right now? Yep, I am...


When I asked Tom if he wanted cupcakes or a real cake for his birthday party he replied: "A real cake, of course!" as if cupcakes were just for girls! And, of course, he wanted a chocolate cake. So I decided on my usual One Bowl Chocolate Cake with Chocolate Icing. A bunch of little boys eating chocolate cake at a birthday party, sounds fun, right? Can't be afraid of a little sugar high!

The reason I decided to do another post for this cake is that I used buttermilk instead of milk in the recipe. Doesn't sound like much of a change but it makes a great cake even better. Annabelle even told me the cake was just as good, if not better, without the icing. Without icing! OK, so I'm not sure the boys would have been quite as impressed if I had baked this as a bundt instead of a 3 layer cake but I'm sure going to try it when another chocolate craving strikes!


One Bowl Chocolate Cake
adapted from Allrecipes


2 cups white sugar
1 3/4 cups all-purpose flour
3/4 cup unsweetened cocoa powder
1 1/2 teaspoons baking powder
1 1/2 teaspoons baking soda
1 teaspoon salt
2 eggs
1 cup buttermilk
1/2 cup vegetable oil
2 teaspoons vanilla extract
1 cup boiling water

Preheat oven to 350 degrees F (175 degrees C). Grease and flour two nine inch round pans (or 2 heart-shaped pans).

In a large bowl, stir together the sugar, flour, cocoa, baking powder, baking soda and salt. Add the eggs, buttermilk, oil and vanilla, mix for 2 minutes on medium speed of mixer. Stir in the boiling water last. Batter will be thin. Pour evenly into the prepared pans.

Bake 30 to 35 minutes in the preheated oven, until the cake tests done with a toothpick. Cool in the pans for 10 minutes, then remove to a wire rack to cool completely.

Note: For the layer cake pictured above, I used three 9-inch round cake pans and baked them for approximately 20 minutes. Check the layers and if a toothpick inserted in the center of the cakes comes out clean, they're done!

Chocolate Icing

4 cups sifted confectioner’s sugar
1 cup butter, at room temperature
2 tsp pure vanilla extract
1 to 2 tbsp milk, depending on the consistency you want
5 tbsp unsweetened cocoa powder

Cream butter, sugar and vanilla. Add a small amount of milk to reach desired spreading consistency. Add cocoa powder and beat well. Spread on cooled cake.
Pin It!

Friday, January 14, 2011

Three Years!!! (Apple Coffe Cake Recipe)

There are so many things going through my head right now. Has it really been three years since I hit "publish post" for the very first time? Have I really made caramel that many times since? Did we eat all those desserts? Really? And how in the world did three years, three years, go by so freaking fast? Yes, today folks, this little webspace of mine is three years old. Yes, there has been a lot more sweet than savory appearing in these pages. Yes, we ate everything I made, but we did share a lot of it. And yes, there will be more baking, cooking and sharing in the coming years and I wouldn't have it any other way; I've been enjoying myself way too much to quit. I'm hoping you've also enjoyed reading my ramblings and trying some of the recipes I've posted. I've discovered so many new techniques and flavors since starting to blog and I suspect I'm not done learning!

I've made a few changes here and there and I'd like to share them with you. There are some tabs near the top there, under the header and I've finally got that recipe index I've always wanted! It's a work in progress as I'm not sure about the categories I've chosen, but it's there and functional! I've also decided to (finally) write an "About Page". I know, I know, about time, right? This one
I've mentioned before, but if you haven't had a chance yet, go on over and visit And then I do the Dishes on Facebook, leave a comment, question, whatever you like! And, last but not least, there's this nifty little "print button" at the bottom of each post and I would not forgive myself if I didn't thank Taylor over at Print Friendly. Best product support ever! Thanks so very much! And thank you guys, readers and friends for your support. For reading and commenting and keeping this little project of mine going. I couldn't do it without you. Thank you!

Now, onto the recipe! If you like coffee cake, this is the recipe you want! As you may already know, I have many, many recipe books and magazines but the best, tried and true recipes often come from those free recipe booklets handed out at grocery stores or stuck to pages of magazines. This recipe comes from such a booklet, Robin Hood Baking Festival 1992. I've long since adapted the recipe to suit my family's tastes but every time I find a little booklet of recipes, I can't help but keep it. You never know what little gem you might find inside.

Apple Coffee Cake
Adapted from Robin Hood

Topping:
3 tbsp granulated sugar
2 tbsp all-purpose flour
1/2 tsp cinnamon
1 tbsp unsalted butter, melted
1/2 cup chopped pecans (optional)

Cake:
2 cups all-purpose flour
1 1/4 cups granulated sugar
1 tbsp baking powder
1/2 tsp baking soda
1/2 tsp salt
1 tsp cinnamon
1/4 tsp nutmeg, freshly grated
1/8 tsp ground cloves
1/8 tsp tonka bean, freshly grated (optional)
2 eggs
1 cup sour cream or plain yogurt
1/4 cup unsalted butter, melted
2 cups peeled and grated apples, lightly packed

Topping:
Combine all ingredients. Mix well and set aside.

Cake:
Preheat your oven to 350F. Lightly grease a 10-inch springform pan and set aside.

In a large bowl, combine flour, sugar, baking powder, baking soda, salt, cinnamon, nutmeg, ground cloves and tonka bean, if using. Mix well. In another bowl, beat eggs, sour cream or yogurt and melted butter. Stir into dry ingredients until just blended. Stir in grated apples. Spread batter evenly into the prepared pan and sprinkle topping over the batter.

Bake in preheated oven for 45 to 50 minutes or until a toothpick inserted in center of the cake comes out clean. Let the cake rest in the pan a few minutes before unmolding and placing it on a baking rack to cool. Serve warm or at room temperature.

Maple Glaze
adapted from Comfy Belly

I added this glaze as an afterthought because I thought the cake looked plain in the photos. It certainly doesn't need the glaze taste wise, but it does add a little more sweetness, and it looks nice. You could also drizzle some caramel sauce on top, that would be just decadent!

1/2 cup milk (I used 2%)
1/2 cup maple syrup
Pinch of fleur de sel
1 tsp unsalted butter

In a saucepan, pour the milk and maple syrup. Add pinch of fleur de sel and bring to a boil. Whisk constantly until the mixture is thickened and starts to look like caramel. This can take from 5 to 10 minutes. When you're happy with the consistency, whisk in the butter, strain the glaze into a heatproof bowl and let it cool slightly. Now, you can pour the glaze directly onto the hot cake, in which case most of the glaze will be absorbed into the cake, which would be delicious. But, if you're going for the same look as in my photos, wait until the glaze and cake are cooled and drizzle the glaze onto the cake. If the glaze has hardened too much to pour, you can microwave it a few seconds to get it to the right consistency.
Pin It!

Friday, January 7, 2011

Mexican Lasagna

When Winter rolls around, all I feel like eating is comforting casseroles and warming dishes. Now, I know that after the sweet treats and decadent meals of the Holiday season, many people tend to look for low-fat, healthy salad recipes but with three kids to feed, salad ain't cuttin' it around here! You can serve this fantastic lasagna with a side salad though, you know, to lighten the guilt factor. This dish was such a hit, we all looked forward to having it for lunch the next day, which is saying a lot! I have a feeling this is one of those recipes that will be on permanent rotation on my meal plans!


Mexican Lasagna

1 1/2 lbs lean ground beef

1 green bell pepper, diced

1 onion, chopped

2 cloves of garlic, minced

1-28 oz can of diced tomatoes (don't drain it)
1 packet of taco spices (I use the low salt kind)
1 to 2 tsp Chipotle chili powder

1-12 oz can of corn kernels, drained (or use frozen)

1-19 oz can of red kidney beans, drained and rinsed

1 tbsp cornstarch (optional)
9 large flour tortillas

2 cups of sharp cheddar cheese, grated (or TexMex blend, or Monterey Jack)


Lightly grease a 9x13 inch baking dish; set aside.

In a dutch oven, brown ground beef until no longer pink. Drain off all fat and transfer to a heat proof bowl. In the same dutch oven, heat a tablespoon or two of olive oil and sauté bell pepper, onion and garlic until onion is translucent. Put the ground beef back in the pot and also add the tomatoes, taco spices and chili powder. Mix well then add the corn and the red kidney beans and mix again. Let simmer for a few minutes. If you find that your "chili" is a bit watery, make a slurry of a tbsp of cornstarch with some cold water and add it to the pot. Let it simmer a little and it should thicken up enough not to water down your lasagna.


Preheat your oven to 375F.


Ladle a little bit of chili on the bottom of your prepared baking dish. Cover with 3 of the tortillas, overlapping them to fit the dish. Ladle a third of your chili over the tortillas, sprinkle with a third of the cheese and cover with 3 more tortillas. Layer the ingredients that way, ending with the cheese on top of the casserole.


Bake for 35 to 40 minutes, until the filling is bubbly and the cheese is nicely browned. To further brown the cheese, broil the casserole for about 1 minute. Let the casserole stand for 5 minutes before serving.


Serve with sour cream, chopped green onions and a salad.
Pin It!

Friday, December 31, 2010

Another Year Over...

Christmas has come and gone and I can't believe it's New Year's Eve already. As I look back on 2010 all I can think of is how incredibly lucky I am. We are all healthy and happy, all five of us. I had wonderful opportunities this year to showcase my blog and photography, and for a stay at home mom who hasn't worked outside the home for about 10 years, it gave a real boost to my self esteem. I hope to keep the ball rolling in 2011, work on my photography and find new ideas to upgrade and renew this little webspace of mine.


For now I want to share with you another recipe from Kraft's Recipe for Joy program. These Pecan Bars are an absolute perfect choice to end the year on a sweet note. Gooey caramel and crunchy pecans baked on a sweet cream cheese dough. Wonderful by itself or put it over the top with a scoop of vanilla ice cream or even whipped cream! And don't forget, you still have a few hours to send some last minute holiday wishes with some free e-cards. Let's all help
Kraft reach their goal of a $50,000 donation to Food Banks Canada.

Happy New Year everyone!!! Have fun and be safe!!!

For the recipe, please visit the Kraft Canada Website:

Pecan Bars

Pin It!

Monday, December 20, 2010

Kraft Recipe for Joy

There is nothing like a good cause to get me in a Holiday mood. Well, that and Christmas is right around the corner! If you're like me and you're being pulled in a hundred different directions with cleaning, baking and gift shopping you'll appreciate the Kraft Recipe for Joy Program. You can send your friends and family some free Holiday e-cards and help fight hunger at the same time! That's right, because for every e-card sent, Kraft will donate 2$ to Food Banks Canada. Now, that is one of the best deals ever! Of course, you get some great recipes with that e-card and having tried a few of them I can tell you, they are easy and delicious. Just what the doctor ordered for this busy season! You can even install a nifty virtual recipe box on your computer's desktop for easy access to the recipes.


So far, our 2 favorite recipes are for Chocolate Raspberry Thumbprints and Crunch "Bars". The Raspberry Thumbprints are almost brownie-like in texture and the cream cheese they contain gives them this slight cheesecake taste, they are quite addictive. And they stay moist and tender for days!


The Crunch Bars were also a big hit here. The caramel soaked Premium Plus crackers take on a wonderful flaky pie dough quality and the thick layer of chocolate and chopped nuts totally take these over the top. And they are easy-peasy! Just be sure to watch the oven and have everything ready because mine baked a lot quicker than I expected.


So can I just recommend you try these during the Holidays, please? Make yourself happy! And make hungry families happy too by helping Kraft reach their goal of a $50,000 donation to Food Banks Canada. Go send some e-cards!

For the recipes please visit the Kraft Canada website:

Chocolate-Raspberry Thumbprints
Crunch "Bars"

Please note: I was sent a gift package from Kraft Foods in exchange for sharing the Kraft Recipe for Joy Program and recipes with my readers. The opinions in this post, about the program and recipes, are my own.
Pin It!

Friday, December 10, 2010

Novica Product Review

Cue the first of my Holiday posts, complete with photos of twinkling lights and presents to boot! One catch though: there's no food involved. Instead I wish to talk to you about Novica, one of the leading fair trade artisan websites, which I discovered recently. Here is an excerpt of their mission statement:

"We want to give artists and artisans around the world a global platform to express their true artistic talents and to spur their creativity. And, we want to provide you with access to unique, hard-to-find items at great values that only the Internet infrastructure can allow.

At the deepest essence of our philosophy, we want to create a bridge between you and the many talented artisans across the globe.

We want you to know about who you're buying from. We want you to feel that attachment to the product and to the hands that created it."

In association with National Geographic, Novica gives talented artisans around the world a place to express their artistic talents and provide access to the world market. They have thousands of top fair trade corporate gifts and home decor items on their website. Seriously, all kinds of jewelry, bracelets, earrings, gifts for mom, gifts for him, clothing, handbags, I could go on!

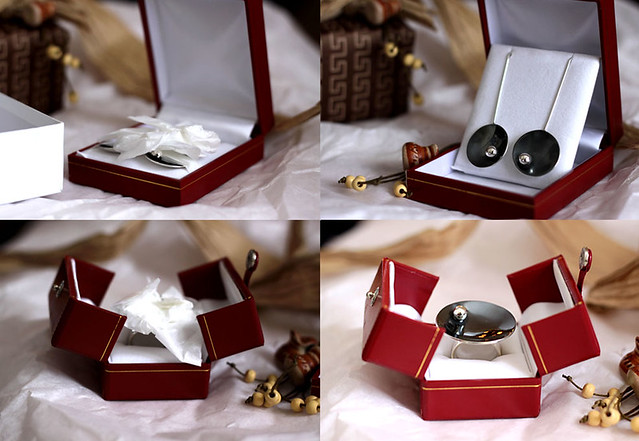
I was lucky enough to get an offer to review their products and website, and I absolutely jumped at the chance to do so. What really got me was the uniqueness of each item. I don't know if I've ever mentioned this but I am a sucker for huge, unique rings and, although I had such a hard time choosing among the literally hundreds of gorgeous rings on the website, when I spotted Venus Moon, I knew I had to have it! The ordering process is really easy, you can find out the cost of shipping for any country you would like to have your gift shipped to and if you order right now, until December 13th, they guarantee shipping on many items for December 24th.

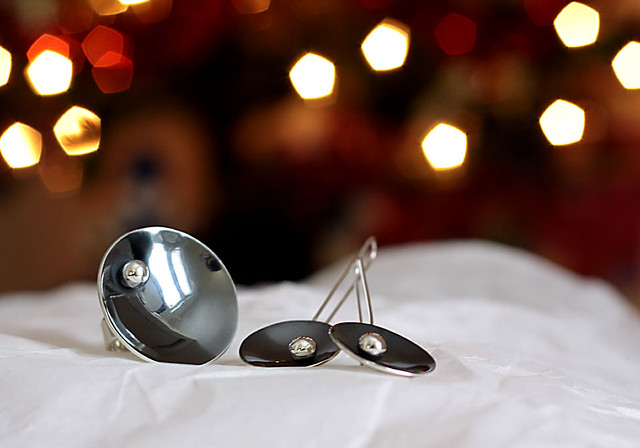
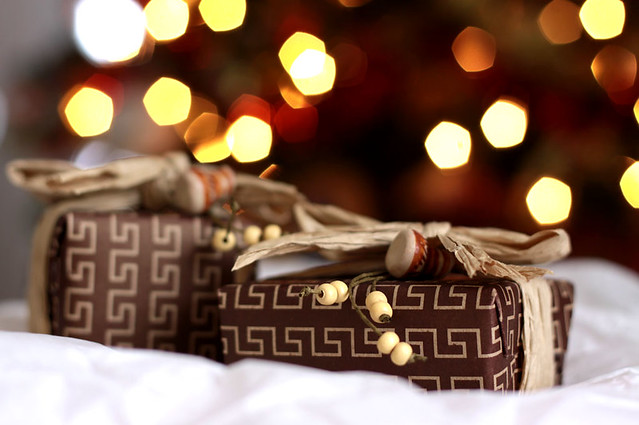
Whether you decide to shop for Christmas or any other occasion, shipping is quick and the product packaging is flawless. For us folks living in Canada, some international fees apply and must be paid upon receiving the package, but it's well worth it. My items even came gift wrapped, and very cutely so! And I was totally blown away by the quality craftsmanship of the jewelry I ordered. I recommend Novica to everyone who loves distinctive, fair trade gifts. I mean, come on, who wouldn't want something so unique and thoughtful wrapped up under the tree? I know I still have quite a few items on my wishlist so I think I'll forward it to Santa ASAP!

Please note: The nice folks at Novica sent me a gift code so that I could order a few items of my choice from their website (including shipping but not international fees). The opinions expressed in this post are my own.

Pin It!

Tuesday, December 7, 2010

Most Ordinary/Extraordinary Banana Bread

Aaaaah! You guys! I miss my blog so much! I know by now I should be posting Holiday appropriate recipes and photos with backgrounds-full of lit-up Christmas trees and decorations but you know what? I'm not there yet. Soon, very soon, but for now, I will share with you my most ordinary/extraordinary recipe.

Ordinary because, really, does the internet need yet another banana bread recipe? No, probably not. But also extraordinary because it is the only one in my repertoire that I know by heart, that I go to almost every week and also, because we all love it, all 5 of us. So I thought it was time that it got the respect it deserves and a rightful place alongside the other banana bread recipes floating about the web.


Ordinary/Extraordinary Banana Bread

1 3/4 cups all-purpose flour
2 tsp baking powder
1/2 tsp salt
1/4 tsp baking soda
1 egg
1/3 cup canola oil
2/3 cup granulated sugar
3 medium bananas, mashed (about 1 cup)
1 tbsp lemon juice
1/2 cup semi-sweet or milk chocolate chips

Preheat your oven to 350F. Grease a 9 x 5 inch loaf pan and set aside.

In a bowl, mix flour, baking powder, salt and baking soda; set aside.

In a large bowl, mix the egg, oil and granulated sugar. Mix the lemon juice with the mashed bananas. Add the dry ingredients to the egg mixture alternately with the bananas, starting and ending with the dry ingredients. Fold in the chocolate chips. Pour the batter into the greased loaf pan and bake in preheated oven for 60 to 70 minutes, until a skewer inserted in the center of the bread comes out clean. Invert onto a wire rack and let cool completely.
Pin It!