Showing posts with label cookies. Show all posts

Friday, June 24, 2011

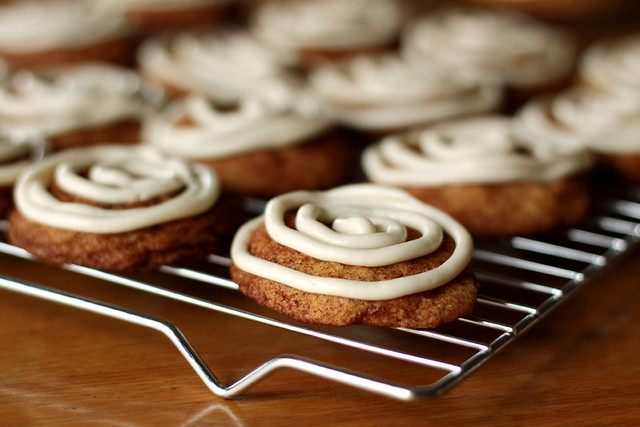
Snickerdoodles aka Cinnamon Roll Cookies

Yesterday was the last day of school and let me just say, it's been a looooong year. Not that my kids have trouble in school or anything but Tom was in first grade this year as opposed to Kindergarten and it was something else altogether to have both him and Annabelle doing homework and needing my help with something all the time and also Olivia who felt a little left out at not having any homework (I'll let you know how she feels when she does have some homework in a few years...) and me just trying to keep everything up so that all hell will not break loose. Time for blogging? Not so much.


So, yesterday was the traditional Breakfast at School day and all the parents were invited to bring a little something and have breakfast with the kids and teachers. I decided to make Snickerdoodle Cookies, because you know, when do you get to eat cookies for breakfast other than the last day of school? The night before as I was making them (at about 9pm) Martin commented that they smelled like Cinnamon Rolls. And that's when I had a flash: frosting!!! So the next morning I whipped up a small batch of frosting, made a cute little swirl on each cookie and voilà! Cinnamon Roll Cookies! They were a huge hit, the breakfast was once again a success and finally, summer's here (albeit a little cool still, though I'm not complaining) and hopefully we can relax, relax and, uh, relax some more.
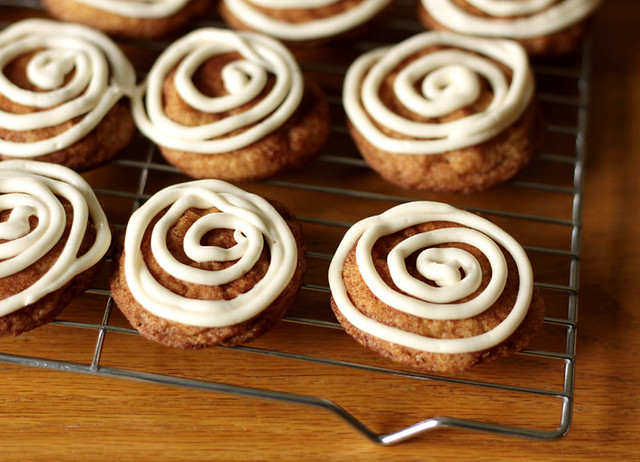

Cinnamon Roll Cookies
adapted from Michael Smith's Snickerdoodle recipe

1 cup unsalted butter, softened
1 1/2 cups granulated sugar
2 eggs
1 tbsp vanilla extract
1 tbsp corn syrup
3 cups all-purpose flour
1 tsp baking powder
1 tsp baking soda
1/4 tsp salt

1/4 cup granulated sugar
2 tbsp cinnamon

Preheat your oven to 375F and line a baking sheet with parchment paper.

In a large bowl with your mixer of choice, beat butter and 1 1/2 cups of granulated sugar until light and fluffy. Add the eggs, one at a time, beating well after each one and then add the vanilla and corn syrup. Mix well.

In a separate bowl, whisk together flour, baking powder, baking soda and salt. Add to the wet ingredients and mix until smooth.

In a small bowl, whisk remaining 1/4 cup of sugar with the cinnamon. With a tablespoon or a small ice cream scoop, form the dough into balls (about 1 to 1 1/2 inch in size) and roll the balls in the cinnamon sugar to coat. Place them on the parchment lined baking sheet, leaving about 2 inches between each cookie, and bake for 10 to 12 minutes. Cool the cookies completely on a wire rack before icing them.

Cream Cheese Icing
1 tbsp unsalted butter, softened
1 tbsp cream cheese, softened
1 cup confectioner's sugar, sifted
1 tsp vanilla extract
1 tsp warm water

In a stand mixer using the whisk attachment, beat the butter and cream cheese together until smooth. Add the sifted confectioner's sugar slowly, then the vanilla extract and beat well. If needed, add a little warm water until desired consistency. Using a pastry bag with a small round tip, or a ziptop bag with one of the corners cut, make swirls on the cooled cookies. The icing does not completely set so if you want to make them ahead of time and serve them later, I suggest you ice them just before serving.

Makes about 42 1 1/2 to 2 inch cookies.

Pin It!

Saturday, February 5, 2011

Nutella Filled Cream Cheese Cookies for World Nutella Day!!!

Ah, World Nutella Day! A few years ago I made myself a cup of Nutella Hot Chocolate, posted it on my blog and sent the link to Sara of Ms. Adventures in Italy and Michelle of Bleeding Espresso, so I could participate in World Nutella Day. I never thought it would become one of my most popular recipes to date!


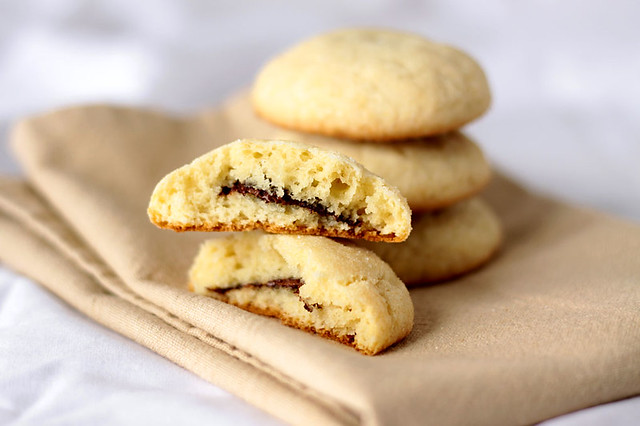
So, this year, I prepared a bit better and started thinking of Nutella recipes a little more in advance. I knew I wanted to make something with cream cheese but not a cheesecake. I thought of brownies but I wanted to taste the cream cheese and the Nutella. Then I found this dough recipe that could be easily adapted, added some cream cheese to it, filled the dough with Nutella and tadaaa! I got my Nutella Filled Cream Cheese Cookies! They are moist, not too sweet, you get a hint of cream cheese in each bite and the Nutella, well, that's just the most wonderful surprise to get inside a cookie! And it works so well with the cream cheese, the cookies stay moist and they are even better the next day.


Tell me, are you making Nutella recipes today or are you dipping your spoon into a jar and enjoying Nutella "au naturel"? We'll probably be doing a little of both around here today!


Nutella Filled Cream Cheese Cookies
(dough recipe adapted from Michael Smith via Food Network Canada)

1/2 cup unsalted butter, room temp.

1 - 250g package of cream cheese, room temp.

1 1/2 cups granulated sugar

2 eggs, room temp.

1 tbsp vanilla extract

1 tbsp corn syrup

3 cups all purpose flour

1 tsp baking powder

1 tsp baking soda
1/4 tsp salt

Nutella, for filling

1/3 cup granulated sugar (for rolling)


Preheat your oven to 375F and line a few baking sheets with parchment paper.


In your mixer of choice, beat the butter, cream cheese and granulated sugar together until well mixed. Add eggs, one at a time, beating well after each one. Add the vanilla and corn syrup and mix until incorporated.
In a separate bowl, whisk the flour, baking powder, baking soda and salt. Slowly add to the butter/cream cheese mix and beat until the batter comes together.

Refrigerate the dough for at least an hour, otherwise it will be sticky, very had to work with and the cookies won't keep their shape as well.

Once your dough has been refrigerated, use a cookie scoop or a tablespoon and form little balls of dough. Make an indentation in each one and dollop about 1/2 tsp of Nutella in it. Close the dough around the Nutella as much as you can then
use a small piece of dough to close up the hole. Form into a ball shape and roll into the remaining 1/3 cup of granulated sugar. Place on the parchment lined cookie sheet, 6 cookies to a sheet.

Bake (one sheet at a time) in preheated oven for about 12 minutes or until the cookies are slightly golden. Transfer to a wire rack to cool completely. Makes about 36 large cookies.


Pin It!

Monday, December 20, 2010

Kraft Recipe for Joy

There is nothing like a good cause to get me in a Holiday mood. Well, that and Christmas is right around the corner! If you're like me and you're being pulled in a hundred different directions with cleaning, baking and gift shopping you'll appreciate the Kraft Recipe for Joy Program. You can send your friends and family some free Holiday e-cards and help fight hunger at the same time! That's right, because for every e-card sent, Kraft will donate 2$ to Food Banks Canada. Now, that is one of the best deals ever! Of course, you get some great recipes with that e-card and having tried a few of them I can tell you, they are easy and delicious. Just what the doctor ordered for this busy season! You can even install a nifty virtual recipe box on your computer's desktop for easy access to the recipes.


So far, our 2 favorite recipes are for Chocolate Raspberry Thumbprints and Crunch "Bars". The Raspberry Thumbprints are almost brownie-like in texture and the cream cheese they contain gives them this slight cheesecake taste, they are quite addictive. And they stay moist and tender for days!


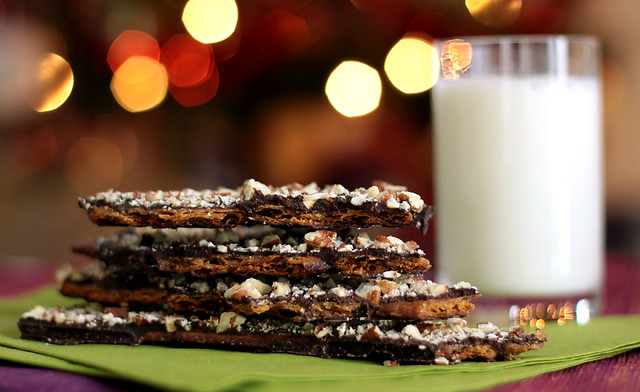
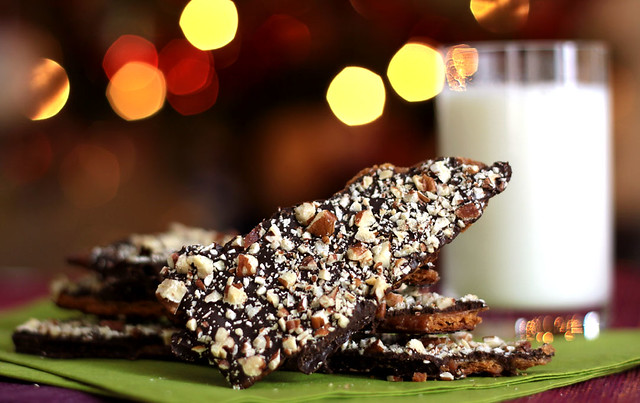
The Crunch Bars were also a big hit here. The caramel soaked Premium Plus crackers take on a wonderful flaky pie dough quality and the thick layer of chocolate and chopped nuts totally take these over the top. And they are easy-peasy! Just be sure to watch the oven and have everything ready because mine baked a lot quicker than I expected.


So can I just recommend you try these during the Holidays, please? Make yourself happy! And make hungry families happy too by helping Kraft reach their goal of a $50,000 donation to Food Banks Canada. Go send some e-cards!

For the recipes please visit the Kraft Canada website:

Chocolate-Raspberry Thumbprints
Crunch "Bars"

Please note: I was sent a gift package from Kraft Foods in exchange for sharing the Kraft Recipe for Joy Program and recipes with my readers. The opinions in this post, about the program and recipes, are my own.
Pin It!

Wednesday, September 8, 2010

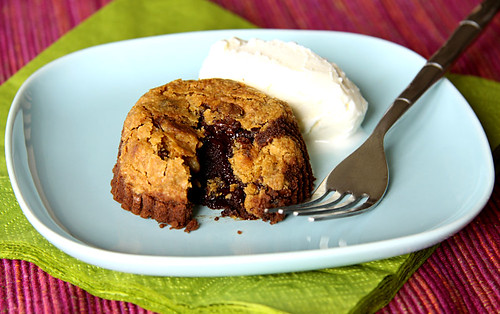
Chocolate Chip Cookie Lava Cakes

I am so completely addicted to food magazines, I even collect the little pamphlets they hand out in grocery stores. These days, they look a lot more like magazines though, as they're full of neatly styled recipes featuring, of course, said store's products. As most of you know, you don't really need to use the product in question and even when the recipe calls for a ready-made product, you can make it even better by using something homemade.


Case in point? These Chocolate Chip Cookie Lava Cakes. I noticed the recipe while I was "sifting" through magazines and stuff I could get rid of. Yes, I have too much stuff, go figure, and I need to get organized. Anyhoo, I was looking through a pile of Kraft's What's Cooking Magazine and when I spotted those cakes I had to make them right away! Well, first I had to make chocolate chip cookies, then I could make the cakes.

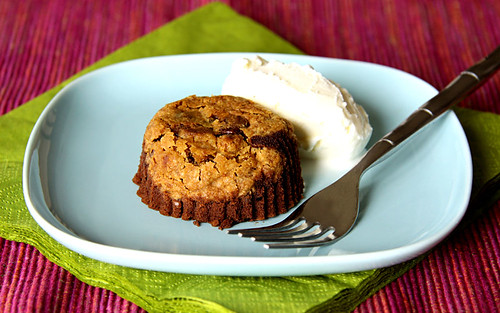
I made my favorite chocolate chip cookie recipe, used a round cookie-cutter to cut 12 cookies to the desired size and then made the cake batter. Easy-peasy! And when they're finally out of the oven, you flip them onto a plate, and you go to chocolate heaven. First you experience the crisp, crunchy and buttery taste of the cookie, then, as you cut into it, you find a rich, molten chocolate cake swimming in melting vanilla ice cream. Did I mention you have to pair this with vanilla ice cream? Well, you do!


Chocolate Chip Cookie Lava Cakes
adapted from kraftcanada.com

OK, first you have to make some chocolate chip cookies. I suggest this recipe; it contains walnuts, which are a nice addition to these little cakes.

12 chocolate chip cookies, cut into circles with a 2 1/2-inch cookie cutter
4 ounces of bittersweet chocolate, chopped
1/2 cup unsalted butter
2 whole eggs
2 egg yolks
1 cup confectioners sugar
1/3 cup flour
1/2 teaspoon fleur de sel

Preheat your oven to 425F. Line a 12-cup muffin tin with paper liners. Place the cookies, upside down, into the muffin liners. Press them into the bottom, they might be a bit big but don't worry about squishing them in, they're like the crust of these tatin-like cakes! OK, now set that aside while you make the batter.

Place the chocolate and the butter in a large microwaveable bowl, then microwave on high for about 2 minutes. At that point the butter should be melted and a little stirring will get the rest of the chocolate melted too. Alternately, you could do this on a double boiler.

In another bowl whisk together the eggs, egg yolks, confectioners sugar, flour and fleur de sel.
Slowly add the chocolate mixture, stirring as you go, until well blended.

Pour the batter over the cookies in your prepared muffin tin. Bake in preheated oven for about 8 minutes. The cakes will be slightly firm around the edges but still soft in the middle. Let the cakes stand a minute or 2 before serving. Remove each cake from its tin, invert it onto a plate (just like a tarte tatin!), remove its liner and serve with your favorite vanilla ice cream.

Pin It!

Sunday, December 20, 2009

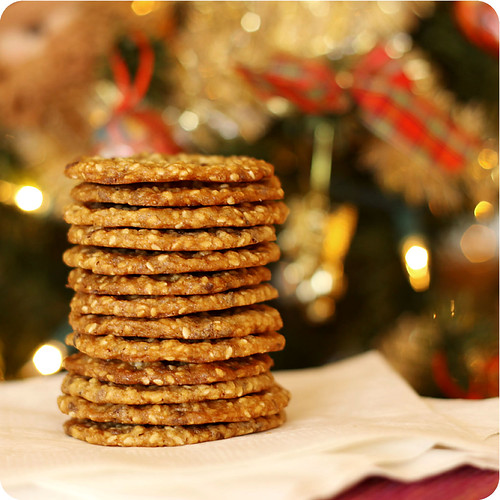
Eat Christmas Cookies - Sesame Snap Wafers

So, Christmas is in a few days, 2009 is almost over and frankly, I have a hard time believing it. I mean, where did this year go? There were so many things I wanted to do that will just have to wait for next year, and a few will probably have to wait even longer. Maybe it's just the Holiday Season, which always makes me a little weepy, well, OK, weepier than usual, but I just seem to notice that everything is changing around me at the speed of light. The kids are growing up way too fast, and I mean WAY too fast. One minute it was Fall and the next minute there was like 2 feet of snow on the ground. on November 17th, I was stoked when Susan of Food Blogga announced the 3rd season of her Eat Christmas Cookies event and I had a whole month to choose which cookie recipe I could send in. And now, it's December 20th (What?!) and I'm once again at the last minute. How did this happen? Your guess is as good as mine.


In any case, I still love baking cookies and I have baked my fair share since the beginning of December, but they were just my "usual" cookies, cookies that can already be found either here or on other great food blogs so I'll spare you the reruns. The recipe I want to share today is one that I've wanted to try for a long time but it just got to the bottom of the list and I forgot about it. This week, I happened to have all the ingredients handy so I went for it! These are so crispy and crunchy and fragrant, they remind me of Lace Cookies but with a nuttier flavor.

Santa, I hope you like sesame seeds!!! :) Please check out the Eat Christmas Cookies round-up page for more great cookie recipes!


Sesame Snap Wafers
adapted from Robin Hood Baking Festival 1999


2/3 cup all purpose flour

1/4 tsp baking powder

1/2 cup butter, softened

1 cup packed brown sugar

1 egg

1 tsp vanilla extract

1 1/4 cup sesame seeds*


Start by toasting your sesame seeds. I like to do this in a dry, nonstick pan, over medium heat. Watch them carefully and move them around often as they could burn easily. Toast the seeds until they're fragrant and golden. Be sure to do this a little in advance, you want them to have time to cool before you make the cookie dough.


When your seeds have cooled to room temperature, preheat your oven to 350F and line a baking sheet with parchment paper.


In a small bowl, combine the flour and baking powder; set aside.


In another bowl, cream the butter with the sugar, egg and vanilla. Add the dry ingredients and the sesame seeds and mix well.


Drop the dough onto the prepared baking sheet, about a teaspoon's worth per cookie, leaving enough space between the cookies as they spread while baking.


Bake the cookies about 6 to 8 minutes, or until golden. You can leave them a little longer if you like them crispier. The cookies will be soft right out of the oven so leave them on the baking sheet a minute or so before you transfer them to a wire rack to cool completely.

* You can use all sesame seeds or a combination of sesame seeds, black sesame seeds and flax seeds. I used 1 cup of sesame seeds and 1/4 cup of flax seeds.

Pin It!

Tuesday, November 10, 2009

TWD - Sugar-Topped Molasses Spice Cookies

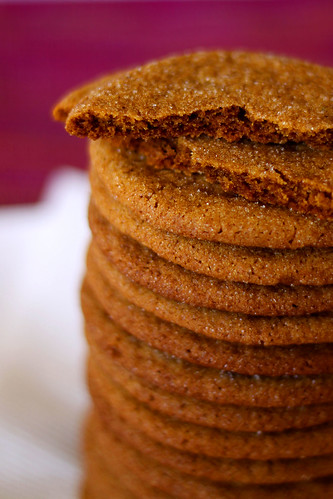
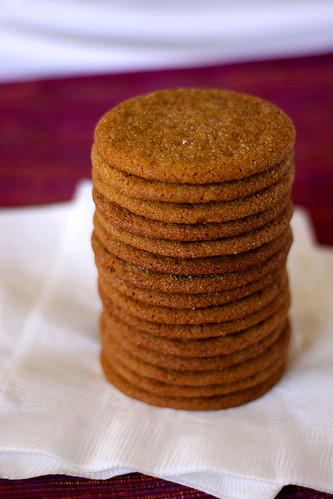
Sugar-Topped Molasses Spice Cookies... How can someone say those words and not think that Christmas is just around the corner? How can someone smell the slightly spicy, molasses scented batter and not feel like taking the Christmas decorations out of storage right this minute? I tell ya, I almost did!

These cookies really do smell like Christmas and they are perfect in every way. Just the right amount of spices, just sweet enough and crunchy like a ginger snap. Per-fect. The only thing I did differently is make twice the cookies specified because I like the smaller, crunchier cookies.

Thank you Pamela of Cookies with Boys for choosing this as one of the November recipes for Tuesdays with Dorie. This will also be my last Tuesdays with Dorie recipe, for a while anyways. I have so many cookbooks and magazines I want to bake recipes from and with all the weekly recipes, it's just too many desserts. Yes, ladies and gentlemen, there is such a thing as too much dessert!!! It was so much fun being part of such a great group of baking enthusiasts, I most certainly will miss it. But I'll keep visiting the members' blogs and hope my Tuesdays with Dorie friends will keep visiting me too. I just need a little more time to be creative, and bake what I feel like, when I feel like it. The Holidays are just around the corner, I'll be baking up a storm pretty soon, so stay tuned!
Pin It!

Friday, September 25, 2009

Orange Almond Cream Whoopie Pies

Have you ever become so obsessed with getting something right that you just can't rest until you do? Well, that happened to me with Whoopie Pies. A few months back (yes, months) my cousin,LP ,invited me over to her place for an afternoon cooking/baking session. We decided to make a Chicken Tetrazzini for dinner and Whoopie Pies for dessert.

The Whoopie Pies were to be of the traditional chocolate with marshmallow filling variety. The cookies came out really well, but the filling, not so much. They were quite tasty but a little too sticky and gooey, so to speak. So, LP and I each set out to find the perfect filling recipe for Whoopie Pies. I went the homemade Fluff route, which was a great success, but sadly, since I have no photos as proof of that, you'll have to take my word for it until I decide to make some again. LP went the cream cheese frosting route and, I have to say, she won the Whoopie Pie filling challenge hands down. She came up with this Orange Almond Cream variation and I just had to steal it from her. I'm sure she won't mind, right LP?


Orange Almond Cream Whoopie Pies

For the cookies:

2 cups all-purpose flour

1 tsp baking soda

1/2 tsp baking powder

1/4 tsp salt

1 egg

1/3 cup vegetable oil

Zest of 1 to 2 oranges (depending on their size and how orangey you want the cookies)

1 cup granulated sugar

3/4 cup buttermilk


For the Almond Cream filling:

8 oz cream cheese, room temperature

5 tbsp butter, room temperature

3 1/2 cups sifted powdered sugar

1/2 to 3/4 tsp almond extract


Preheat your oven to 350F and line a baking sheet with parchment paper.

In a bowl, mix the flour, baking soda, baking powder and salt; set aside. In another bowl, mix the egg, oil, orange zest, and sugar. Add the dry ingredients to the wet, alternating with the buttermilk, until all the ingredients are well combined.

Drop the dough, a teaspoonful at a time, onto the prepared baking sheet, taking care to leave enough space between the cookies as they expand a little while baking, but not too much. Also try to keep the shape as round and even as possible, it makes it easier to match the cookies after they are baked. Bake the cookies about 8 minutes, until they are slightly golden around the edges, but do not over bake them, you want them to be tender, not hard. Once the cookies are done baking, transfer them to a wire rack to cool completely.

While the cookies are cooling, prepare the filling. In the bowl of your mixer of choice, preferably fitted with a paddle attachment, mix the cream cheese and the butter until light and well blended. Add the sifted powdered sugar, in batches, until the filling is perfectly smooth. Add the almond extract, mix well.

To fill the cookies, you can use a spoon or a pastry bag to spread some of the filling onto one of the cookies and then sandwich another cookie on top. Fill and sandwich cookies until all the cookies are matched. You might have some filling leftover, it makes a nice frosting on cupcakes or muffins.

Pin It!

Tuesday, May 26, 2009

TWD - Chipster-Topped Brownies

I wanted to love these, I really did. I was so excited to see that Beth of Supplicious had chosen the Chipster-Topped Brownies as this week's Tuesdays with Dorie recipe. I mean, a brownie topped with a chocolate chip cookie dough... Where does Dorie come up with these ideas?!


But in the end, I was underwhelmed. The brownie, which contains soooo much chocolate, was just meh, and the cookie crust sort of detached from the brownie, so it was like eating a chocolate chip cookie on top of a brownie, literally. Maybe I just had too high expectations for this recipe, I haven't had any feedback yet as Martin took the rest of the brownie to work today. We'll see what his taste-testers have to say. Check out Beth's blog for the recipe and the Tuesdays with Dorie website to see how the other bakers fared this week!
Pin It!

Tuesday, February 24, 2009

TWD - Caramel Crunch Bars

I had such high hopes for these bars. I mean come on, Caramel Crunch Bars: toffee, chocolate and a sablé crust all rolled into one cookie. How can it not be good? Well, apparently, I must have done something wrong because I thought these were... meh. The toffee was great because I made David Lebovitz' Buttercrunch Toffee minus the chocolate. So good! But the cookie part of these turned out greasy. I must have overmixed the dough or worked it too much while trying to "cajole" it into the pan. And the chocolate I sprinkled on top? It wouldn't melt! It just would not melt. I spread it as best I could, pressed the toffee bits on top and hoped for the best. The key word here is "hoped". The best? That didn't happen.

They don't taste bad, per se, they're just not what I had expected. But, as I said, it's probably me. I have the attention span of a coconut these days. That, combined with the fact that I waited until Monday to make the bars, well, let's just say that success was not written in the stars. Don't let my failure deter you though, please check out Whitney's blog, What's left on the table? for the recipe. And now I'm off to sulk in my corner see if the rest of the Tuesdays with Dorie gang fared better with this recipe than I did.
Pin It!

Tuesday, February 3, 2009

TWD - Korova/World Peace Cookies

What could I say about these bring-Peace-to-the-World-while-satisfying-a-chocolate-craving cookie that hasn't been said before? They are chocolatey, buttery, crumbly, sophisticated yet approachable, possibly the easiest sablé recipe there is out there and dare I say, the best chocolate cookies I've ever had.

I just love the subtly sweet and salty taste of these. I've made them probably a dozen times, using different chocolates and they always turn out perfectly. I've even used the dough in Ina's Espresso Ice Cream recipe instead of the chocolate covered espresso beans that she calls for. That was a few summers ago. Now I'm craving World Peace Espresso Ice Cream for breakfast. Oh, what Tuesdays with Dorie do to me!

Visit Jessica's blog, Cookbookhabit, for the recipe. She's the one responsible for a few hundred bakers posting about World Peace Cookies on the same day. One small step towards a happier World.

Pin It!

Friday, December 19, 2008

Cookies for Santa

I've been meaning to tell you guys about these cookies for a while now but I've just never gotten around to it. Susan from Food Blogga has given me the perfect excuse with her event, Eat Christmas Cookies, Season 2. I make these cookies every year during the Holidays and a few of them always find their way onto Santa's plate.

The cookies are made up of three flavors of dough, vanilla, cherry and chocolate. They're meant to mirror the traditional look of Neapolitan ice cream. I know that usually, Neapolitan ice cream's pink is strawberry flavored but the candied cherries in this recipe give the cookies such a nice color and they taste good too! The recipe comes from the same Robin Hood booklet in which I found my recipe for Pouding Chômeur. I love that little booklet so much, I might have to "borrow" it next time I see my mom.

Being refrigerator cookies, once the dough is made they fall into the "I'll bake these when I have time" category, which I find really useful during the Holidays. The cookies do call for a little more prep than usual refrigerator cookies but they're so cute and fun, they're worth the extra work.

Part of the round-up for Eat Christmas Cookies is already up over on Food Blogga but you still have a few days to submit an entry. So go on and bake Christmas cookies! Hope you like these, Susan!


Neapolitan Cookies

2 1/4 cups all-purpose flour

1/2 teaspoon baking powder

1/8 teaspoon salt

1 cup butter, softened

3/4 cup granulated sugar

1 egg

1 teaspoon vanilla extract

1/4 cup of candied cherries, finely chopped

5 to 10 drops red food coloring

1 (1 ounce) square unsweetened chocolate, melted

1/4 cup toasted, finely chopped pecans


In a small bowl, mix together flour, baking powder and salt. Set aside.


With your mixer of choice, in a large bowl cream together butter and sugar. Add the egg and the vanilla, beating well. Add the dry ingredients and mix until blended.


Divide the dough into thirds. Keep one part as is. To one part add the candied cherries and the red food coloring. To the third part, add the chocolate and chopped pecans. Wrap each piece with plastic wrap and refrigerate for one hour.


After one hour, shape each piece of dough into a 12" X 2" X 1/2" rectangle. Place each rectangle one on top of the other, keeping the pink one in the middle.* Refrigerate the dough log for at least 4 hours, until firm.


When ready to bake, preheat your oven to 350F and line a baking sheet with parchment paper. Slice the log into 1/8" slices and place them 1/2" apart onto the prepared baking sheet.


Bake the cookies for 10 to 12 minutes. Let them rest for one minute on the cookie sheet before transferring them to racks to cool completely.


* The original recipe stated to keep the pink slice in the middle but after a little research, I think the traditional Neapolitan ice cream had the white part in the middle. Either way, still good! :)


Pin It!

Tuesday, December 16, 2008

Tuesdays with Dorie - Buttery Jam Cookies

See, I told you I made them. I spent Sunday afternoon baking cookies with a very good friend of mine and the Buttery Jam Cookies that Heather of Randomosity and the Girl chose as this week's TWD was one of the recipes that we made.

But, since I had only a few left, not enough for photos, I decided to make them again, this morning. In the batch I made with my friend we used a vanilla plum freezer jam I made a few months ago and they turned out great, really good with the ginger. This morning though, I wanted to do something a little different and as my friend had given me some sour cherry jam that she made I decided to use that in the cookies. I added some orange zest to give them a little Christmas-y feel and since I hadn't used tonka bean in a while I used that instead of the ginger. Those cookies smelled sooooo good. I rolled little balls of the dough, about a tablespoon's worth, in granulated sugar (as I had seen it done here) and flattened them with the bottom of a glass. These do not spread, you have to help them a little.

The orange zest and tonka bean complimented the sour cherry jam really well and the cookies ended up being just sweet enough. They're really tender, almost cake like in texture. Perfect with my morning coffee, I have to say. I'll definitely be making these again with different jams and spices. Please check out the rest of the Tuesdays with Dorie blogroll to see what variations the other members made and for the recipe, please visit Heather's blog.

Pin It!

Tuesday, December 9, 2008

TWD-Grandma's All Occasion Sugar Cookies

Well, I missed out on quite a few Tuesdays with Dorie lately and I want to apologize to our hosts of the past few weeks for not making their chosen recipes. Isabelle of Les gourmandises d'Isa, Vibi of La casserole carrée and Noskos of Living the Life all had chosen great recipes and I promise to do a rewind of all three recipes (seperately!) at some point in time. Promise!

This week's recipe, Grandma's All Occasion Sugar Cookies, comes courtesy of Ulrike of Küchenlatein. I have to admit when I first saw sugar cookies I knew I'd have a few problems because I am not very patient with cut-out cookies. But then I read the recipe (duh!) and saw that there was a slice and bake option. Ahhh, slice and bake cookies. I love those. They were certainly invented for busy moms or by a busy mom, because they are time savers! You can make the dough when you have a few minutes, shape it into a log, throw it in the fridge for future use and when feel like/have time to bake you just slice and bake. Voilà! They can be baked in minutes when you need a lift when you're say, knee deep in gift wrapping and you think everyone will make it to Christmas on time except you. A few cookies, a tall glass of milk and you're back on track!

I found this recipe came together very easily. But then I have no other sugar cookie recipe to compare it with. They were my very first sugar cookies and they were delicious! This recipe is a keeper. It is begging to be tweaked though, as in adding some orange zest or finely chopped chocolate or nuts, or extracts of some kind. So many possibilities. And even if you just roll them in coarse sugar for a little crunch, you'll still get people to say "you made those yourself?!". Not too shabby for a few minutes' work. So visit the the rest of the TWD baking guys and gals to see how Dorie's recipe compared to their Grandma's recipes and if you'd like to try them yourselves, visit Ulrike's blog for the recipe!

Pin It!

Tuesday, November 4, 2008

TWD - Rugelach

I think I've wanted to make rugelach ever since I saw Ina Garten make them on Barefoot Contessa, probably like 4 years ago! So I was really excited when I saw that Grace of Piggy's Cooking Journal had picked rugelach for this week's Tuesdays with Dorie. I had so much stuff to do last week though that I almost had to skip this recipe. But I didn't. Sunday night, at a quarter to ten, I decided I was making rugelach dough.

Since I have no food processor (Santa, if you're reading this, hint, hint!) I got out my trusty pastry cutter, gathered my ingredients and 15 minutes later my 2 little discs of dough were ready and waiting in the refrigerator. Another 5 minutes and the dishes were washed and put away! w00t! My dough was definitely crumbly, but still workable. OK with me! The next day, I had to decide what I was going to use as a filling. I decided on two different fillings. One batch was filled with some homemade spiced plum jam, chopped hazelnuts and mini chocolate chips. And the other batch was a bit more traditional: orange marmelade, chopped pecans, dried blueberries and mini chocolate chips. I had a little trouble rolling the dough into a circle. It looked more like lace than a smooth pastry!

But the end result is so worth the work! These cookies are fantastic! I have to say, I preferred the spiced plum jam version. The chocolate and the plums go surprisingly well together. And it was a little less sweet than the marmelade version. I'm sure these would work with pretty much any good jam or preserve. And I'm sure the rest of the Tuesdays with Dorie gang tried out a lot of different versions of these fabulous little crescent cookies, so go check out the blogroll, won't you! For the recipe you can read this article on NPR, about Dorie's rugelach secrets or check out Grace's blog.


For those of you who are interested, here's the spiced plum jam recipe. It's really good!

Spiced Plum Jam
from What's For Dinner

Makes 8 cups of jam

Ingredients
3 pounds plums (weight with pits removed)
6 cups sugar
1 teaspoon cinnamon
1/4 teaspoon nutmeg
1/4 teaspoon allspice
1/4 teaspoon cloves

Directions
Prepare 8 8-ounce jars for canning.

Put chopped, pitted plums in food processor or blender and puree.

Pour plum puree into large stockpot. Stir in sugar and spices, then bring to boil over high heat, stirring constantly. Boil for 5 minutes, continuing to stir constantly to avoid burning the jam.

Pour into sterilized jars and seal. Store in cool dark place until ready to use; when opened, store in refrigerator.

Plain Plum Jam Alternative
Follow all instructions as above, but leave out spices.

Note: I used tonka bean instead of allspice and I let the jam boil longer than the specified 5 minutes, probably 20 minutes or so. It got thicker and darker and more "jam-like".
Pin It!

Tuesday, October 14, 2008

TWD-Lenox Almond Biscotti

This week's Tuesdays with Dorie recipe was chosen by the lovely Gretchen of Canela & Comino. I was really happy about her choice because I love biscotti. I hadn't made any in a while so I was really looking forward to dunking a few of them in a good cup of coffee.

These were a bit different from the biscotti I've made before. The dough is really sticky and spreads while baking, whereas my favorite biscotti recipe yields a very thick and crumbly dough to begin with that keeps its shape in the oven. I had to double the first baking time because the logs were still raw in the middle after the specified amount of time. I also had to let them bake a while longer for the second round in the oven, that's why they're a bit more "golden" than they should be.

They are very good, though I'm not sure the cornmeal added much to this recipe. Perhaps I should have used medium cornmeal instead of fine? Who knows. Will I make these again? I'm not sure. I might try tweaking the recipe and using something else, perhaps ground almonds, instead of the cornmeal.

I'm sure the other members of this fabulous group came up with a myriad of variations on the biscotti theme so why don't you give them a visit? And if it's the recipe you'd like, well then, visit Gretchen's blog!

Pin It!

Tuesday, September 16, 2008

Tuesdays with Dorie - Chocolate Chunkers

Alrighty then! It's Tuesday and we all know what that means! Claudia of Fool for Food chose Dorie's Chocolate Chunkers for this week's installment of Tuesdays with Dorie. These cookies are not called chunkers for nothing folks. They are full of "crunchies" as Dorie calls them. Too much crunchies for me, to tell you the truth.

I don't mean to say that these weren't good, because that wouldn't be true. I ate one or two, but I felt it was like eating a handful of cranberries, nuts and chocolate chips. Not enough cookie dough for my tastes. Martin liked them a lot and so did his coworkers. The kids, well, they said I should leave out the cranberries next time. Typical. So I guess we can say the opinions are mixed on this one. Honestly, I'd rather tweak last week's Chocolate Malted Whopper Drops and change the add-ins than make these again.

If you like chunky cookies with lots and lots of "crunchies", turn to page 70 of Baking from my Home to Yours or visit Claudia for the recipe. And don't forget to go see what the rest of the group thought of the cookies! Me, I'll stick with my underbaked Whopper Drops and Peanut Butter Chipsters, thank you very much. :)


Pin It!

Tuesday, September 9, 2008

Tuesdays With Dorie - Chocolate Malted Whopper Drops

Hello dear readers. Are you ready for another Tuesdays with Dorie? Are you sure? Because Rachel of Confessions of a Tangerine Tart chose a doozy of a recipe! Chocolate Malted Whopper Drops. Yes, malted milk powder, chocolate chips and chocolate covered malted milk balls combined in a fabulously chocolatey cookie.

I hadn't had a Whopper in ages and there was a reason for that. I can't be trusted around an opened package of Whoppers. I even decided that I would try Maltesers as well just to compare and see how different they were from Whoppers. The Maltesers are actually lighter and fluffier, for lack of a better word, than the Whoppers. But you know what? I love'em both! Martin doesn't like Whoppers but he actually liked their lighter counterparts so I decided to use the Maltesers for the cookies. The kids couldn't have cared less which ones I used as long as they could eat the leftover candy!

I used Chocolate Ovaltine instead of malted milk as I have never even seen malted milk in any grocery store around here. I was actually quite surprised to find Ovaltine, for that matter, and I almost did a little dance right there in the store. But I didn't want to embarrass the kids so I refrained.

The cookie dough came together quite easily. I actually refrigerated the dough overnight and when it came time to bake, I kept the dough cold, rolled it into balls and I didn't flatten them because I wanted to get really thick cookies. I underbaked them a little bit and once they'd cooled, they were like brownies in cookie form! I found that because I underbaked them a bit, the Maltesers didn't caramelize so much and didn't get sticky. And, although I really liked these, I might try using pecans or walnuts instead of Maltesers or Whoppers next time. This dough was just fabulous, and I'm sure other add-ins would work really well with it.

A word to the wise: these are really sweet cookies so make sure you have someone to share them with! I was lucky enough to have my mom visiting this past week-end and I sent her home with cookies to share with my dad. So go ahead and give Rachel a visit for the recipe and then you'll have the perfect excuse to get those Whoppers you haven't had in such a long time!


Pin It!