Is there a way to find more hours in a day? Anyone? Anyone? I'm not trying to make excuses, I'm just wondering if anyone else is feeling overwhelmed by the amount of things to do in a day and how it affects creativity. I try to do everything I should do: get up, get dressed, cook, clean, homework with the kids, exercise, volunteer at the kids' school, smile and wave and say everything's fine and dandy, and even all that isn't easy to fit in a day's worth of hours... But when do I find the time to do what I want to do? Blogging, writing, photography, see friends, read a book... When do these things come into play? Seriously, how does everyone do it? Is it at all possible to get everything done? I'm not down in the dumps or anything, just in a rut I guess, just out of juice maybe, trying to get back in the swing of being creative without letting any of the other stuff get out of hand. Is it possible? Not sure yet...
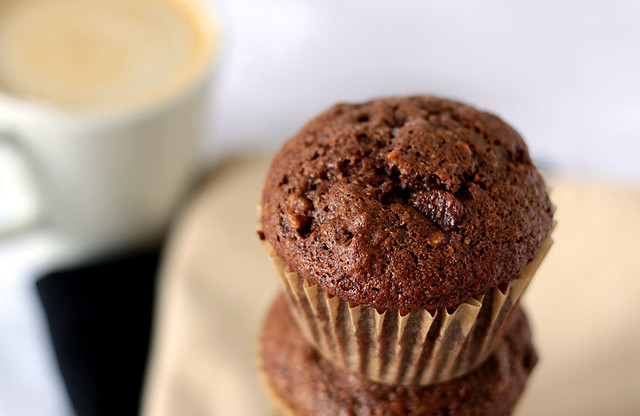
Let's get started with these muffins. They're quick, they take care of those few overripe bananas on the counter and they're packed full of chocolate, not a bad combo if you ask me. And on a rainy day like today, I sure need a dose of quick, easy and chocolate! A cup of strong coffee doesn't hurt either. ;)
Chocolate Banana Muffins
1/3 cup canola oil 1 cup sugar 2 eggs 1 tsp vanilla extract 2 medium bananas, mashed 1 1/2 cups flour 1/4 cup unsweetened cocoa powder 1 1/2 tsp baking powder 1/2 tsp baking soda 1/4 tsp salt 1/2 cup milk chocolate chips
In a large bowl, mix together first 5 ingredients. In another bowl, mix all the other ingredients; add dry ingredients to wet mixing just until blended. Fill muffin tins lined with jumbo paper liners. Bake in a 375°F preheated oven for 30 minutes or until a toothpick inserted in center comes out clean. Cool on wire rack.
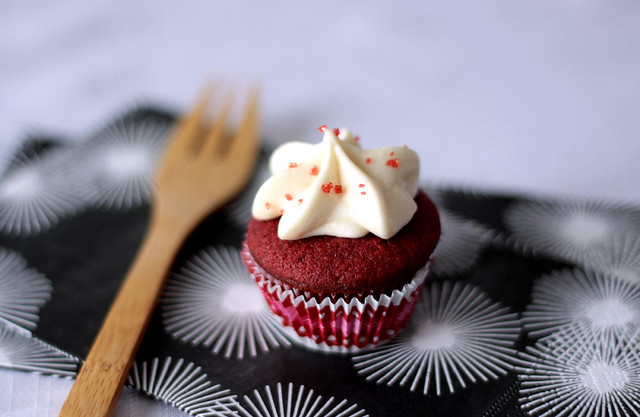
I couldn't have had a better surprise this morning than to wake up to a snowstorm and closed schools! I was really happy to have the kids at home, I made an army of tiny Red Velvet Cupcakes, found an Origami Heart pattern on the net then invited a few friends over for sweets and crafts!
It was my first time making Red Velvet anything and I thought Valentine's Day was the ideal day to try these cupcakes. I was pleasantly surprised by their texture, they were soft and fluffy with just a hint of cocoa and the color, wow, very impressive. The cream cheese icing, well, it's just over the top sweet and creamy but I wouldn't have it any other way!
And with all this talk about Nutella lately, combined with a serious craving for brownies, well it was just a matter of time before I gave in and made Nutella Brownies. Armed with a recipe by one of my faves, Ricardo, of course, I knew I couldn't fail! The brownies were just delightful, the hazelnut taste of the Nutella really came through and the texture, oh boy, just dreamy! Perfect for a Valentine's Day weekend!
I hope everyone had a great Valentine's Day!!!
For the Red Velvet Cupcake recipe please visit Brown Eyed Baker. I made the recipe pretty much as is except for using gel food coloring (about 1 tbsp) instead of liquid and baking the cupcakes in mini muffin pans for about 12 minutes.
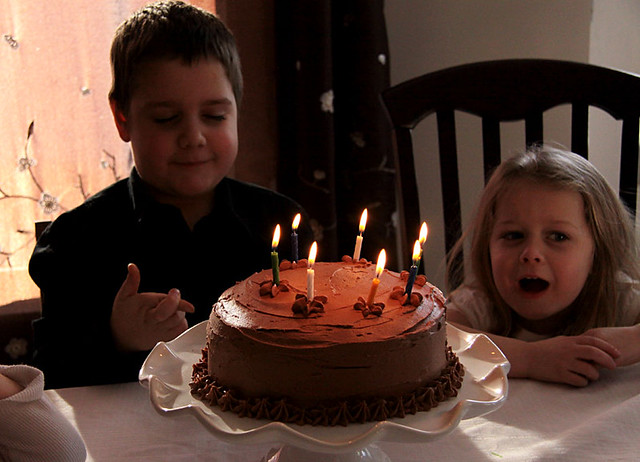
My son turned 7 yesterday and as I sit here typing these words, I still can't believe it. How in the world do kids grow up so fast? How did he become this little 7 year old boy who can now read and write, do math problems and figure out a video game way quicker than I can? Can you tell I'm feeling a little old right now? Yep, I am...
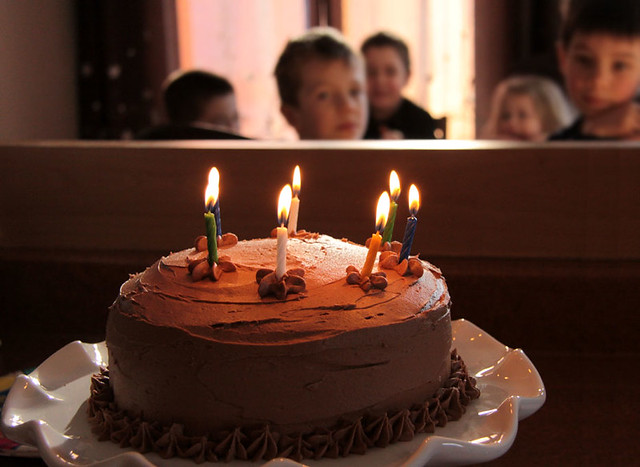
When I asked Tom if he wanted cupcakes or a real cake for his birthday party he replied: "A real cake, of course!" as if cupcakes were just for girls! And, of course, he wanted a chocolate cake. So I decided on my usual One Bowl Chocolate Cake with Chocolate Icing. A bunch of little boys eating chocolate cake at a birthday party, sounds fun, right? Can't be afraid of a little sugar high!
The reason I decided to do another post for this cake is that I used buttermilk instead of milk in the recipe. Doesn't sound like much of a change but it makes a great cake even better. Annabelle even told me the cake was just as good, if not better, without the icing. Without icing! OK, so I'm not sure the boys would have been quite as impressed if I had baked this as a bundt instead of a 3 layer cake but I'm sure going to try it when another chocolate craving strikes!
2 cups white sugar 1 3/4 cups all-purpose flour 3/4 cup unsweetened cocoa powder 1 1/2 teaspoons baking powder 1 1/2 teaspoons baking soda 1 teaspoon salt 2 eggs 1 cup buttermilk 1/2 cup vegetable oil 2 teaspoons vanilla extract 1 cup boiling water
Preheat oven to 350 degrees F (175 degrees C). Grease and flour two nine inch round pans (or 2 heart-shaped pans).
In a large bowl, stir together the sugar, flour, cocoa, baking powder, baking soda and salt. Add the eggs, buttermilk, oil and vanilla, mix for 2 minutes on medium speed of mixer. Stir in the boiling water last. Batter will be thin. Pour evenly into the prepared pans.
Bake 30 to 35 minutes in the preheated oven, until the cake tests done with a toothpick. Cool in the pans for 10 minutes, then remove to a wire rack to cool completely.
Note: For the layer cake pictured above, I used three 9-inch round cake pans and baked them for approximately 20 minutes. Check the layers and if a toothpick inserted in the center of the cakes comes out clean, they're done!
Chocolate Icing
4 cups sifted confectioner’s sugar 1 cup butter, at room temperature 2 tsp pure vanilla extract 1 to 2 tbsp milk, depending on the consistency you want 5 tbsp unsweetened cocoa powder
Cream butter, sugar and vanilla. Add a small amount of milk to reach desired spreading consistency. Add cocoa powder and beat well. Spread on cooled cake.
There is nothing like a good cause to get me in a Holiday mood. Well, that and Christmas is right around the corner! If you're like me and you're being pulled in a hundred different directions with cleaning, baking and gift shopping you'll appreciate the Kraft Recipe for Joy Program. You can send your friends and family some free Holiday e-cards and help fight hunger at the same time! That's right, because for every e-card sent, Kraft will donate 2$ to Food Banks Canada. Now, that is one of the best deals ever! Of course, you get some great recipes with that e-card and having tried a few of them I can tell you, they are easy and delicious. Just what the doctor ordered for this busy season! You can even install a nifty virtual recipe box on your computer's desktop for easy access to the recipes.
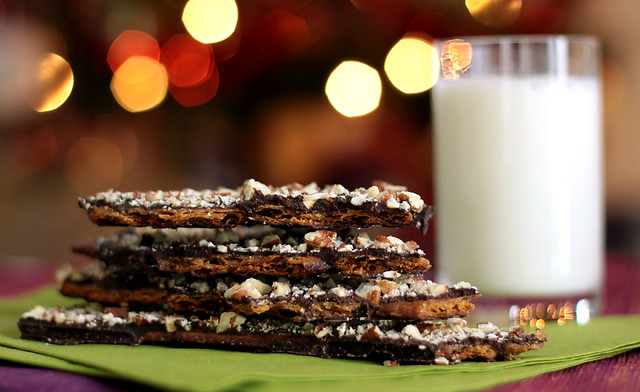
So far, our 2 favorite recipes are for Chocolate Raspberry Thumbprints and Crunch "Bars". The Raspberry Thumbprints are almost brownie-like in texture and the cream cheese they contain gives them this slight cheesecake taste, they are quite addictive. And they stay moist and tender for days!
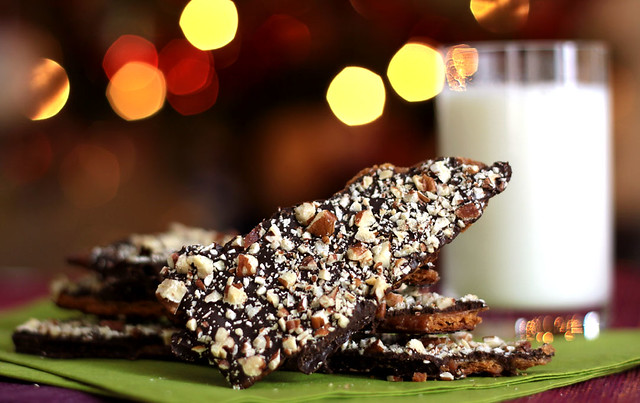
The Crunch Bars were also a big hit here. The caramel soaked Premium Plus crackers take on a wonderful flaky pie dough quality and the thick layer of chocolate and chopped nuts totally take these over the top. And they are easy-peasy! Just be sure to watch the oven and have everything ready because mine baked a lot quicker than I expected.
So can I just recommend you try these during the Holidays, please? Make yourself happy! And make hungry families happy too by helping Kraft reach their goal of a $50,000 donation to Food Banks Canada. Go send some e-cards!
Please note: I was sent a gift package from Kraft Foods in exchange for sharing the Kraft Recipe for Joy Program and recipes with my readers. The opinions in this post, about the program and recipes, are my own.
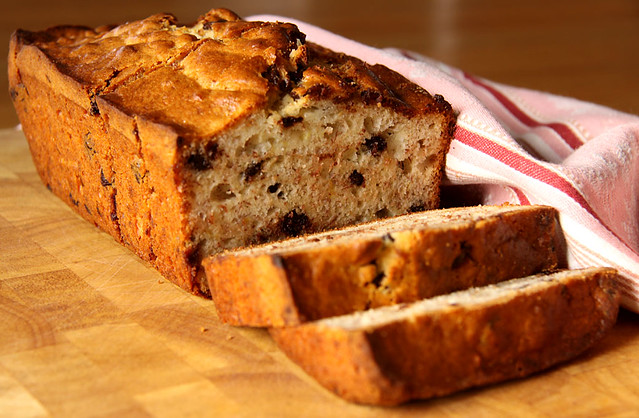
Aaaaah! You guys! I miss my blog so much! I know by now I should be posting Holiday appropriate recipes and photos with backgrounds-full of lit-up Christmas trees and decorations but you know what? I'm not there yet. Soon, very soon, but for now, I will share with you my most ordinary/extraordinary recipe.
Ordinary because, really, does the internet need yet another banana bread recipe? No, probably not. But also extraordinary because it is the only one in my repertoire that I know by heart, that I go to almost every week and also, because we all love it, all 5 of us. So I thought it was time that it got the respect it deserves and a rightful place alongside the other banana bread recipes floating about the web.
Ordinary/Extraordinary Banana Bread
1 3/4 cups all-purpose flour 2 tsp baking powder 1/2 tsp salt 1/4 tsp baking soda 1 egg 1/3 cup canola oil 2/3 cup granulated sugar 3 medium bananas, mashed (about 1 cup) 1 tbsp lemon juice 1/2 cup semi-sweet or milk chocolate chips
Preheat your oven to 350F. Grease a 9 x 5 inch loaf pan and set aside.
In a bowl, mix flour, baking powder, salt and baking soda; set aside.
In a large bowl, mix the egg, oil and granulated sugar. Mix the lemon juice with the mashed bananas. Add the dry ingredients to the egg mixture alternately with the bananas, starting and ending with the dry ingredients. Fold in the chocolate chips. Pour the batter into the greased loaf pan and bake in preheated oven for 60 to 70 minutes, until a skewer inserted in the center of the bread comes out clean. Invert onto a wire rack and let cool completely.
I am so completely addicted to food magazines, I even collect the little pamphlets they hand out in grocery stores. These days, they look a lot more like magazines though, as they're full of neatly styled recipes featuring, of course, said store's products. As most of you know, you don't really need to use the product in question and even when the recipe calls for a ready-made product, you can make it even better by using something homemade.
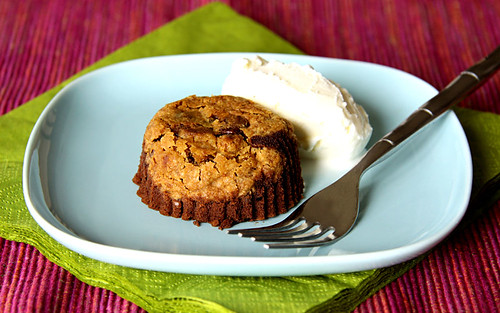
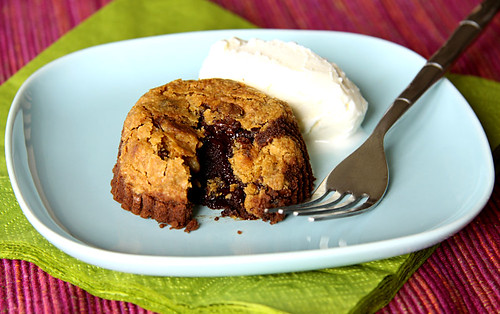
Case in point? These Chocolate Chip Cookie Lava Cakes. I noticed the recipe while I was "sifting" through magazines and stuff I could get rid of. Yes, I have too much stuff, go figure, and I need to get organized. Anyhoo, I was looking through a pile of Kraft's What's Cooking Magazine and when I spotted those cakes I had to make them right away! Well, first I had to make chocolate chip cookies, then I could make the cakes.
I made my favorite chocolate chip cookie recipe, used a round cookie-cutter to cut 12 cookies to the desired size and then made the cake batter. Easy-peasy! And when they're finally out of the oven, you flip them onto a plate, and you go to chocolate heaven. First you experience the crisp, crunchy and buttery taste of the cookie, then, as you cut into it, you find a rich, molten chocolate cake swimming in melting vanilla ice cream. Did I mention you have to pair this with vanilla ice cream? Well, you do!
Chocolate Chip Cookie Lava Cakes adapted from kraftcanada.com
OK, first you have to make some chocolate chip cookies. I suggest this recipe; it contains walnuts, which are a nice addition to these little cakes.
12 chocolate chip cookies, cut into circles with a 2 1/2-inch cookie cutter 4 ounces of bittersweet chocolate, chopped 1/2 cup unsalted butter 2 whole eggs 2 egg yolks 1 cup confectioners sugar 1/3 cup flour 1/2 teaspoon fleur de sel
Preheat your oven to 425F. Line a 12-cup muffin tin with paper liners. Place the cookies, upside down, into the muffin liners. Press them into the bottom, they might be a bit big but don't worry about squishing them in, they're like the crust of these tatin-like cakes! OK, now set that aside while you make the batter.
Place the chocolate and the butter in a large microwaveable bowl, then microwave on high for about 2 minutes. At that point the butter should be melted and a little stirring will get the rest of the chocolate melted too. Alternately, you could do this on a double boiler.
In another bowl whisk together the eggs, egg yolks, confectioners sugar, flour and fleur de sel. Slowly add the chocolate mixture, stirring as you go, until well blended. Pour the batter over the cookies in your prepared muffin tin. Bake in preheated oven for about 8 minutes. The cakes will be slightly firm around the edges but still soft in the middle. Let the cakes stand a minute or 2 before serving. Remove each cake from its tin, invert it onto a plate (just like a tarte tatin!), remove its liner and serve with your favorite vanilla ice cream.
Have you ever told anyone you like tofu just to have them look at you like you were crazy or from another planet? Well, I used to be that person. I couldn't believe that tofu could be made to taste good. I mean how could anything so bland be useful anyways? It turns out tofu's blandness is what makes it interesting because, lo and behold, it is like a sponge and absorbs whatever flavors are around it. Most of you have probably known this for a while but I've had this epiphany only recently.
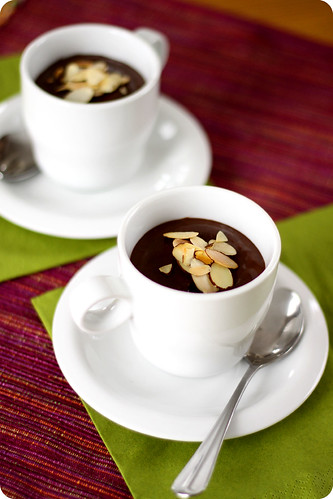
I discovered marinated and baked tofu, which, with a fresh, crunchy salad makes a great meal in itself. But what made me REALLY like tofu is this chocolate mousse I made yesterday. Yes, just yesterday! It's that good, I had to tell you guys about it right. this. minute!
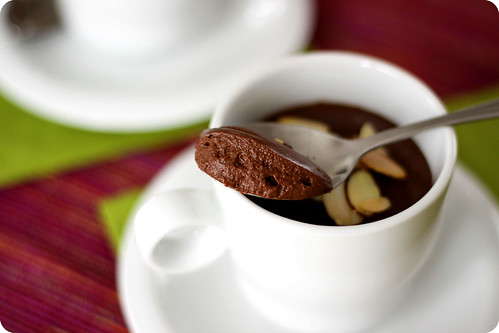
I know what you're all thinking: "Tofu, in a dessert, and it's good? She's gone mad for sure!" But no! I'm telling you, it is good! I mean, it's no heavy-cream-with-eggs-and-a-ton-of-sugar chocolate mousse, but the texture is beautifully silky and all you taste is the chocolate. Unless of course you decide to add a little almond, vanilla or peppermint extract, or even some instant espresso powder, then you've got a whole different dessert. You could even use almond flavored silken tofu, which I did, but it was a bit too sweet, next time I'll try it with plain silken tofu and add some flavor to it myself. The true test of this recipe came when I served it to my kiddos and my better half. They all loved it! Even when I finally told them it was tofu! Now, if that isn't a success, I don't know what is!
Silken Tofu and Chocolate Mousse Adapted from Michael Smith via Food Network Canada 8 oz (about 300g) package of silken tofu 8 oz (about 300g) of bittersweet chocolate, chopped 1 tbsp vanilla extract (optional)
Start by melting your chocolate in a double boiler; set aside.
Next, you need to puree the tofu until it is smooth. Now, you can use your food processor for this, but I used my stand mixer with the whip attachment and I'm pretty sure you could use any kind of mixer you like. When the tofu is nice and smooth, add the melted chocolate and mix until the tofu and chocolate are blended very well.
Here's when you can add any kind of flavoring you like: vanilla extract, almond extract, peppermint extract, instant espresso powder, it's all up to you! Divide the mousse into 6 individual serving dishes and set in the refrigerator for a few hours. Garnish with nuts, fruits, a little whipped cream, make it fun and enjoy!
Yesterday was my oldest daughter's birthday. She turned 9 years old and I know I've said this before but, man time sure flies! Since her birthday was in the middle of the week this year we decided to have a party with her friends this coming Saturday. I'll make cake then, most probably cupcakes, so I didn't want to make cake twice in the same week. But, I still wanted her to have a special birthday dessert.
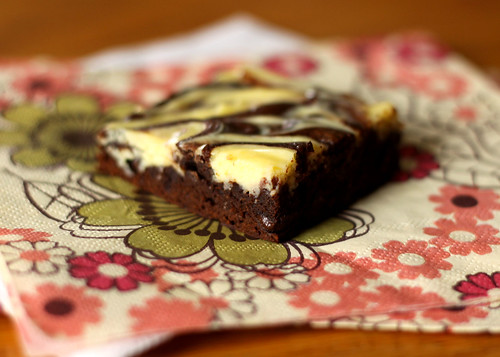
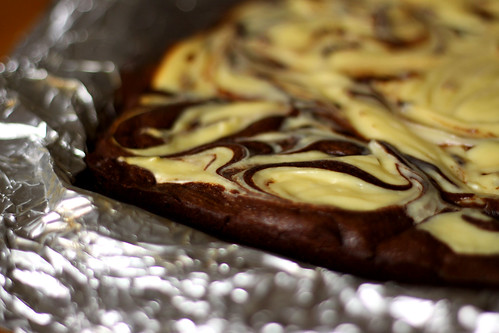
I asked her what she would like and all she said was "Something chocolate!". That's my girl! Brownies came to mind, being an easy dessert and all, and when I searched my favorite sites these Cheesecake Brownies on David Lebovitz' blog caught my eye. Still an easy recipe but with a little something extra that really says "Birthday!".
These are deliciously chocolaty but not too sweet, just perfect for a small birthday dinner, or to perk up any ordinary weekday meal. The birthday girl was quite happy with her special dessert and so was everyone else who had a square, or two! Please visit David's blog for the recipe!
As if I didn't have enough cookbooks and baking books and foodie magazines that I love to bits already, I keep discovering new magazines that are so fabulous I can't help but to buy them on the spot! One of those magazines is Delicious. I think the first one I bought was last January and I promised myself I would stop looking for it in news stands because, well, I just have enough magazines, you know. But it just jumps out at me! The articles, the recipes, the pictures, oh, the pictures!
I do make it a point to write a list of recipes I want to try as soon as I get the magazine, which isn't very hard as all the recipes are mouthwatering! In the most recent one I got there was this recipe for a Chocolate and Hazelnut Slice, which I also found on their website but under the name Chocolate and Hazelnut Truffles. I think these are really more like truffles, considering the amount of chocolate and cream they contain! Perfect for the Holidays, which are just around the corner you know, better start baking! Chocolate and Hazelnut Truffles Adapted from Delicious Magazine
50g butter, plus extra for greasing Unsweetened cocoa powder, for dusting the pan 150g skinned hazelnuts* 90g plain flour 100g caster sugar 1/2 tsp salt 500g bittersweet chocolate, roughly chopped 2 large eggs 225ml heavy cream
Preheat the oven to 180°C/350°F. Grease the base and sides of a 20cm square cake pan with a little butter. Dust all over with cocoa powder, knocking out the excess. Or use a springform pan and line the bottom with parchment before buttering and dusting with cocoa powder.
In a food processor, place 100g of hazelnuts, the flour, sugar and salt and process until coarsely ground. Roughly chop the rest of the nuts and stir in. Melt the butter in a saucepan over a low heat, then add 150g of chocolate. Let it melt slightly, then whisk until smooth. Remove from the heat, add the eggs, one at a time, whisking well between each addition. Stir in the nut mixture until well combined. Spoon into your prepared pan and spread evenly. Bake for 15-20 minutes. Leave to cool in the pan.
To make the ganache, put the rest of the chocolate in a heat proof bowl. Bring the cream just to the boil and pour over the chocolate. Let it sit for a few minutes then gently stir until melted and thickened. Spoon over the cold hazelnut base and spread out. Tap the pan on the counter to smooth the ganache evenly. Cover with plastic wrap and refrigerate for 3 hours. Cut into squares with a warmed knife, wiping the knife after each cut. If you used a round springform pan, cut the round parts off and then cut the rest into squares. The baker needs a treat too, right? To assemble as a gift: put in a decorative box or cellophane bag and decorate as you wish. Keeps in the fridge for up to a week.
*To skin the hazelnuts: Put the hazelnuts on a baking sheet and roast in a 350F oven for about 10 minutes. Place the hazelnuts on a clean dish towel and rub them with the towel to remove skins.
Pudding is a comforting dessert and with the cooling temperatures and rainy days we've been having lately, this was really a perfect choice for this week's Tuesdays with Dorie. Garett of Flavor of Vanilla chose this for us and what a great pick it was!
Quite a simple recipe (if you forgo the whole food processor thing and just use a good ol' whisk) it can be made in advance as it has to chill for a bit, unless you like warm pudding, whatever floats your boat. I wanted to see the layers of the pudding so I used clear glasses, warmed up some leftover ganache I had from the Chocolate-Crunched Caramel Tart and let it chill before spooning the pudding on top. Then, after the pudding had a little R&R in the fridge, I whipped up a little cream, shaved a little chocolate and voilà! Perfect rainy day dessert.
My fave pudding is still the Real Butterscotch Pudding but this one is very good, especially with the chocolaty surprise at the bottom of the glass. Since the ganache sets, it gets almost truffle-like and it's a great contrast to the silky pudding. Thanks Garett for a fun pick! Visit the other Tuesdays with Dorie members for infinite variations on today's pudding!
I remember the day I got Baking from my Home to Yours in the mail. I was so excited to finally flip through its pages and look at all the drool-worthy photos and read the delightful descriptions Dorie writes of every recipe. They were all quite tempting but one caught my eye and it has been known around these parts as the "I-have-to-make-this-tart-now" tart. Since I was just starting Tuesdays with Dorie at the time, I didn't want to try any one recipe just to have it be chosen by someone soon after. I really wanted to make the recipes as they were chosen. So I waited. Why didn't I choose that recipe when my turn came up? Perhaps because of the tart crust (I've always been a wee bit scared of them), or perhaps I was just as intrigued by the Chocolate Armagnac Cake as I was tempted by the Chocolate-Crunched Caramel Tart. In any case, here we are now and I finally had THE perfect excuse to make this tart!
You guys all know how much Iloooooovecaramel, right? And chocolate, well that goes without saying. But peanuts, eh, they're not my thing. Since the recipe calls for honey roasted peanuts I always thought I might use pecans, almonds or cashews in the tart, but then on one trip to the grocery store, I came across a bag of honey roasted cashews. Honey Roasted Cashews! I couldn't believe my luck! This was going to be one great tart.
I had really, really high expectations of this tart and it lived up to them and then some! The silky ganache, the perfectly sweet and salty caramel, the crunchy contrast of the honey roasted cashews and the crispy cookie-like crust, all come together into one perfect dessert! It couldn't even be wrecked by the fact that I forgot to buy some unsalted butter last weekend and had only half of what was needed for the ganache. Even if it really was worth the wait, I would recommend you not to wait as long as I did to make this tart. If you don't have THE book (and you should!) visit Carla over at Chocolate Moosey and get thee that recipe right now! You will not regret it! And be sure to pay a visit to the rest of the Tuesdays with Dorie bakers for a massive dose of baking inspiration!
OK, so I was telling my better half how uninspired I've been feeling lately and how I miss blogging and how I wish I had more time to bake and take pictures and all that. And do you know what he said to me? "Don't feel bad, statistically speaking, people who start a blog usually lose interest after about 18 months." Whaaah? Seriously? Is that what me and my little blog are? Just another statistic in a sea of abandoned blogs? Um, no. No, not in a long shot. I'm too stubborn for that.
With that, I decided I would not be too hard on myself, always trying to come up with original and never before seen recipes and photos. I will blog for fun again and enjoy myself in the process. Because frankly, I haven't been doing nearly enough fun stuff since the kids started school. Routine has hit me harder than ever and I don't like it.
So in the spirit of blogging for fun, here is the recipe for the muffins I made this morning, just because it was an off day from school and it was raining and I just felt like it. These are my go-to buttermilk muffins. I found it on a day I was looking for a recipe to use up the buttermilk I had in the fridge that was about to go bad. They were so tender and comforting that now, I buy buttermilk just to make these muffins.
I'm not promising a post a day, but I'll do my best to update regularly, and I will remember to make it fun. Oh, and thanks Darling for the unintended swift kick in the a**. I needed it. :)
Preheat oven to 400 F. Grease a muffin tin or line with paper muffin cups.
In a bowl, soak oats in buttermilk for 15 minutes. Stir in eggs, sugar, oil, applesauce and vanilla. Combine flour, baking powder, baking soda and salt; stir into oat mixture just until moistened. Fill prepared muffin tin three-fourths full. Sprinkle with chocolate chips, if using. Bake in preheated oven for 18-20 minutes or until muffins test done. Cool in pan 5 minutes before removing to a wire rack.
Chocolate, cinnamon and espresso powder combined in a beautiful, moist and delicious cake. That's what Tracey chose for us this week for Tuesdays with Dorie, and to think I almost didn't make it! It was supposed to be square, but I made it as a bundt. Just for fun. :)
Don't make the same mistake I did, trust Dorie. Get the recipe from Tracey's blog, Tracey's Culinary Adventures, and make this cake! Now!
I wanted to love these, I really did. I was so excited to see that Beth of Supplicious had chosen the Chipster-Topped Brownies as this week's Tuesdays with Dorie recipe. I mean, a brownie topped with a chocolate chip cookie dough... Where does Dorie come up with these ideas?!
But in the end, I was underwhelmed. The brownie, which contains soooo much chocolate, was just meh, and the cookie crust sort of detached from the brownie, so it was like eating a chocolate chip cookie on top of a brownie, literally. Maybe I just had too high expectations for this recipe, I haven't had any feedback yet as Martin took the rest of the brownie to work today. We'll see what his taste-testers have to say. Check out Beth's blog for the recipe and the Tuesdays with Dorie website to see how the other bakers fared this week!
So this week's Tuesdays with Dorie was supposed to be a Chocolate Cream Tart as chosen by Kim of Scrumptious Photography. But, as I read the P&Q section, Katya of Second Dinner suggested that the pastry cream used in the pie made excellent ice cream. And, as my ice cream maker was feeling a bit left out lately, I decided it was time to let it shine! It didn't hurt that I was saving myself the calories from the pie crust and whipped cream topping either...
Well, in any case, Katya was right! This makes the most fantastic chocolate ice cream I've ever tasted. A little caramel drizzled in at the last minutes of churning also adds a little "je ne sais quoi"... Really makes this a special treat! So if you're in the mood for something easy, chocolaty, creamy and cold, go for the ice cream. If you're looking for something a little more dressed up and classy, check out the other Tuesdays with Dorie bakers for Chocolate Cream Tarts galore. Have fun today!
I've always thought of bread pudding as one of the most perfect of comfort foods but I'd never have thought to pair it with chocolate. It's usually cinnamon, raisins, cranberries, pecans and such for me. But thanks to Lauren of Upper East Side Chronicle (A Baking Blog), and Dorie, of course, I now know the joys of Chocolate Bread Pudding.
As I usually do for bread pudding, I didn't just use stale bread, I used stale cinnamon rolls from this little coffee shop we go to sometimes. The hint of cinnamon went really well with the chocolate, it gave it even more depth. And the richness of the cinnamon rolls made this even more sinful than it already was! Just as last week's Chocolate Amaretti Torte though, this recipe is for the serious chocolate lover. I paired it with a light fruit salad, for color and contrast.
I'm sure all the other Tuesdays with Dorie bakers have many surprises in store for us this week in the way of fantastic bread pudding variations. So with that, please check out Lauren's blog for the Chocolate Bread Pudding recipe and may you all have a fabulously chocolaty day!
Chocolate lovers, listen up! This torte is not only chocolaty, it is chocolate overload. But, in a good way. The fabulous Holly of Phe.Mom.enon chose 15 Minute Magic: Chocolate Amaretti Torte for us as this week's installment of Tuesdays with Dorie and all I can say is: Thank you, Holly! Hints of amaretto from pulverized amaretti cookies which, along with ground almonds, take the place of flour in this pleasantly dense and moist cake.
I was really happy to have my mom over this weekend and she was one of the lucky taste testers. She loved it, no, she raved about it, as did everyone else! Even the kids, and we all know that they already are in chocolate overload after being gifted an impressive amount of chocolate by the Easter Bunny. Not enough, it seems... The torte is, as its name implies, quite easy to pull together, even without the use of a food processor. Add almond scented whipped cream and a few crushed amaretti cookies for effect, and you end up with an impressive dessert for remarkably little work. Score!
Please visit Holly's blog Phe.Mom.enon for the recipe (and other fun stuff!) and don't forget to visit the rest of the Tuesdays with Dorie bakers for further inspiration!
The time has finally come! It was my turn to choose this week's recipe for Tuesdays with Dorie and let me tell you, for someone who has a hard time taking decisions, this was not an easy task. Baking from my Home to Yours is full of fantastic recipes, and every time I thought I had the one, I flipped a page and found another! But I kept coming back to the cake that got Dorie fired, Chocolate Armagnac Cake.
I love the story that goes along with the recipe about how Dorie got bored of making the same desserts every day, decided to change things up a bit and came up with this cake. Granted, she got fired for it, but I admire her for trying something different. I mean, come on, there are so many dessert recipes and variations in Baking from my Home to Yours, I can't imagine Dorie making the same dessert over and over again. And that's only one of her books!
So, anyways, I chose the cake because I liked the story, and I was lucky finding the ingredients. Out shopping one afternoon, I came upon a shelf full of Scharffen Berger chocolates, for a fraction of their usual price! There was milk chocolate, semi-sweet, dark and... bittersweet. Bingo! Then I found the moistest, fattest prunes ever, just like that, I wasn't even looking for them. And, I would get to flambé again, which is a plus. It was decided right then and there, I was making this cake, and so were all the other members of Tuesdays with Dorie who wanted to try it. I knew a lot of people would be put off by the prunes but I also knew that a lot of people would try it anyways and find out that prunes aren't so bad when they're mixed in with a little booze, loads of chocolate, butter and sugar!
So how was this cake, you ask? Like a really classy brownie. No ordinary brownie, a dense, moist, fruity, chocolaty, fabulous, divine, brownie. This rivals with the Gooey Chocolate Cakes, my friends. Served at room temperature, the cake and glaze just melt in your mouth, it's just fantastic. Served cold, it becomes the best fudge ever, with a hint of Armagnac in the background. I loved it both ways and if I had thought to buy some whipping cream, I could have made some Armagnac whipped cream to go with this. There's always next time...
I'm glad I didn't fiddle with this cake, it's perfect as is. I might just try the original version next time though, you know, just to change things up a bit. Thanks to all of you Tuesdays with Dorie members who baked along with me this week, I hope you had fun and discovered something new that you liked. And thank you Dorie, for daring to be different and inspiring us to try out new recipes every week.
12 plump, moist prunes, pitted if necessary and cut into bits
1/4 cup plus 3 tablespoons water
1/4 cup Armagnac (or cognac, brandy or Scotch whisky)
7 ounces bittersweet chocolate, coarsely chopped
1 stick (8 tablespoons) unsalted butter, cut into 4 pieces
3 large eggs, separated
2/3 cup sugar
For the glaze
3 ounces bittersweet chocolate, coarsely chopped
3 tablespoons confectioners’ sugar
3 tablespoons unsalted butter, at room temperature
Getting ready: Center a rack in the oven and preheat the oven to 375 degrees F. Butter an 8-inch springform pan, fit the bottom of the pan with a round of parchment or wax paper and butter the paper. Dust the inside of the pan with flour and tap out the excess. Put the pan on a baking sheet lined with parchment or a silicone mat.
To make the cake: Whisk together the nuts, flour and salt.
Put the prunes and 1/4 cup of the water in a small saucepan over medium heat and cook, being careful not to scorch the fruit, until the water almost evaporates. Pull the pan from the heat and pour in the Armagnac, stand back and set it aflame. When the flame dies out, transfer the fruit and any remaining liquid to a bowl and let cool. (If it’s more convenient, you can flame and steep the prunes up to 1 day ahead. Pack the prunes and their liquid in a covered jar and keep at room temperature.)
Combine the chocolate, butter and the remaining 3 tablespoons water in a heatproof bowl, set it over a pan of simmering water and stir occasionally until the chocolate and butter are melted; or do this in a microwave oven. Remove the chocolate from the heat just as soon as it is melted and not very hot—you don’t want the chocolate and butter to separate.
In a large bowl, whisk the egg yolks and sugar together until thick and pale, about 2 minutes. Switch to a rubber spatula and, one by one, stir in the chocolate and butter mixture, the nut mixture, and the prunes with any liquid.
Working with a stand mixer fitted with the whisk attachment or with a hand mixer in a large bowl, beat the egg whites until they hold firm, glossy peaks. Stir about one quarter of the beaten whites into the chocolate mixture, then gently fold in the remaining whites. Turn the batter into the pan.
Bake the cake for 28 to 32 minutes, or until it is puffed, firm on top and starting to come ever so slightly away from the sides of the pan; a thin knife inserted into the center will come out streaky—the cake should not be wet, but you don’t want it to be completely dry. Transfer the cake to a rack and let it cool for about 10 minutes, then carefully remove the sides of the pan. Invert the cake, pull off the paper and turn right side up to cool to room temperature. The cake should be absolutely cool before you glaze it.
Getting ready to glaze: If the cake has crowned, use a long serrated knife and a gentle sawing motion to even the top. Turn the cake over onto a cooling rack—you want the very flat bottom of the cake to be the top. Put a piece of wax paper or foil under the cooling rack to serve as a drip catcher.
To make the glaze: Melt the chocolate in a heatproof bowl over a pan of gently simmering water, or in a microwave oven. Remove it from the heat and, using a small spatula, stir in the sugar, then the butter, a bit at a time, stirring until you have a smooth glaze.
Have a long metal icing spatula at hand. Pour the glaze over the top of the cake, allowing the excess to rundown the sides, and use the spatula to smooth the top of the cake if necessary—usually the glaze is a self-spreader—and to even it around the sides of the cake. Let the glaze set at room temperature or, if you want to speed it up, slide the cake into the refrigerator for about 20 minutes. If you’d like the glaze to be more like a frosting, let it cool until it is thick enough to spread, then swirl it over the cake.
Serving: The cake should be served at room temperature—chill it, and you’ll diminish its flavor and compact its texture. That said, there are lots of people who like the cake cold, because then it becomes more fudgy. Cream, whipped or ice, is a welcome accompaniment.
Playing around
Chocolate Whiskey Cake: The original cake by Simone Beck featured raisins and Scotch, rather than prunes and Armagnac. If you’d like to use that combination, put 1/4 cup raisins and 1/4 cup Scotch whisky in a covered jar and shake the jar a few times. Let the raisins steep for at least 3 hours (or for up to 1 day), turning the jar upside down and then right side up from time to time. When you add the raisins to the batter, add whatever whisky remains as well.
I had such high hopes for these bars. I mean come on, Caramel Crunch Bars: toffee, chocolate and a sablé crust all rolled into one cookie. How can it not be good? Well, apparently, I must have done something wrong because I thought these were... meh. The toffee was great because I made David Lebovitz' Buttercrunch Toffee minus the chocolate. So good! But the cookie part of these turned out greasy. I must have overmixed the dough or worked it too much while trying to "cajole" it into the pan. And the chocolate I sprinkled on top? It wouldn't melt! It just would not melt. I spread it as best I could, pressed the toffee bits on top and hoped for the best. The key word here is "hoped". The best? That didn't happen.
They don't taste bad, per se, they're just not what I had expected. But, as I said, it's probably me. I have the attention span of a coconut these days. That, combined with the fact that I waited until Monday to make the bars, well, let's just say that success was not written in the stars. Don't let my failure deter you though, please check out Whitney's blog, What's left on the table? for the recipe. And now I'm off to sulk in my corner see if the rest of the Tuesdays with Dorie gang fared better with this recipe than I did.