Showing posts with label breakfast. Show all posts

Friday, January 20, 2012

Craving Cinnamon (Recipe: Cinnamon Oatmeal Raisin Muffins)

I have been on a huge cinnamon kick lately and I don't usually over think these things, but I wonder if this craving means anything in particular. Is my diet lacking in some way? Perhaps I'm just missing the warmth of the holiday season and the tastes that go with it? Or maybe I'm feeling cold because of all this snow we've been getting and cinnamon is just my way of getting a little warmth and comfort?

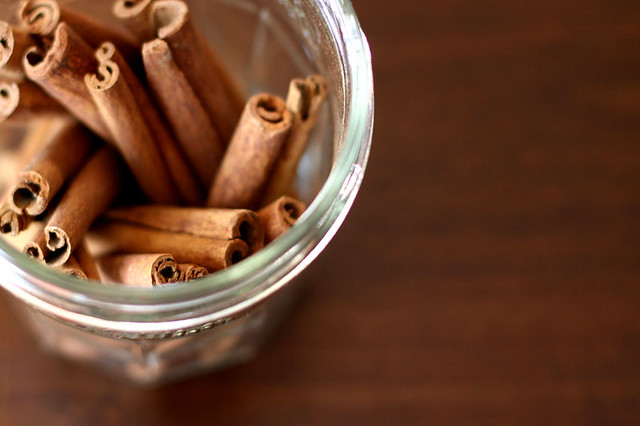
Cassia Sticks


In any case, I decided to give in to the craving because cinnamon, it seems, has many health benefits. There is of course all this debate of true cinnamon vs Cassia. Having never tried true cinnamon (also called Ceylon cinnamon) before a few weeks ago, I had never given it much thought. But after a trip to my local health food store, I came back home with a small packet of true cinnamon and I was really surprised at how much different it was from the cinnamon I had always used.

Ground Cassia on the left, true cinnamon on the right


True cinnamon has a lighter color and is much more subtle in flavor than Cassia. Less spicy, I would say. I've found though that I have to use more of it in baked goods to get that expected cinnamon-y kick. I think true cinnamon would be better for sprinkling over oatmeal after cooking or in a recipe where a subdued spiciness is preferable. I'm thinking rice pudding or maybe warmed milk. I guess I am craving comfort!

What are you craving lately?


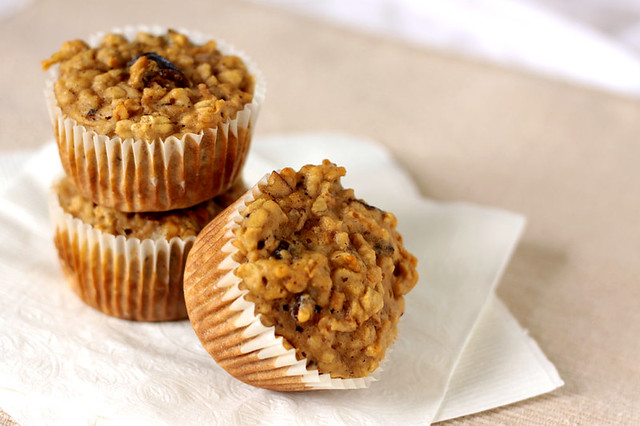
Cinnamon Oatmeal Raisin Muffins
Makes 18 small-ish muffins

I used true cinnamon in this recipe so I used 2 teaspoons of it. If you use Cassia and you're not a cinnamon fanatic, reduce it to 1 teaspoon. You can also adapt this recipe by incorporating dried cranberries instead of raisins, adding nuts or other seeds, even chocolate chips if you feel like it!

1 1/2 cups of regular or old fashioned oats
1 1/2 cups of buttermilk*
2 large eggs, beaten
1/2 cup of packed brown sugar
1/4 cup of vegetable oil
1/4 cup of unsweetened apple sauce
2 tsp of vanilla extract
1 cup of whole wheat flour
1/2 cup of all purpose flour
3 tbsp of ground flax seeds
2 tsp of true cinnamon (or 1 to 2 tsp of Cassia cinnamon, to taste)
1 1/2 tsp of baking powder
3/4 tsp of baking soda
1/2 tsp salt
1/2 cup of raisins

Preheat oven to 400 F. Grease a muffin tin or line with paper muffin cups.

In a bowl, soak oats in buttermilk for 15 minutes. Stir in eggs, sugar, oil, applesauce and vanilla extract. In another bowl, combine flours, ground flax seeds, cinnamon, baking powder, baking soda and salt; stir into oat mixture just until moistened. Fold in raisins. Fill prepared muffin tin three-fourths full. Bake in preheated oven for 18-20 minutes or until muffins test done. Cool in pan 5 minutes before removing to a wire rack.

* Sometimes, when I don't have buttermilk, I use 1/2 cup of milk mixed with 1 cup of low-fat sour cream or yogurt. Other times, when I don't have buttermilk, sour cream or yogurt, I mix in 1 tbsp of lemon juice with 1 1/2 cups of milk and let it rest for 5 minutes before adding it to the recipe.
Pin It!

Wednesday, December 14, 2011

Maple Almond Butter - Homemade!

I am aware that, as it is mid-December, most bloggers have been working overtime, baking and cooking and writing Christmas-y posts galore, giving everyone tips and tricks and fantabulous recipes to make their holidays easier. And here I am, having not blogged in ages, yes I know, ages, and what do I post? A nut butter recipe. But, hear me out! Not an ordinary, run-of-the-mill-butter-your-toast-and-run nut butter, it's more a sit-down-and-enjoy, how-in-the-world-have-I-survived-without-this nut butter!

OK, OK, let me explain a little further how this came about. The fantastic Brilynn of Jumbo Empanadas fame had a giveaway on her blog a few weeks ago, I left a comment and didn't think about it until I got an email, from Brilynn, telling me I had won a 13-cup Kitchenaid food processor!!! So yesterday, I received THE food processor and, of course, all I had time to do was unpack and wash it, set it on the counter and gawk at it as I was already starting on dinner when the doorbell rang. On a side note, that food processor is huge! I've no idea where I'm going to store it.

Luscious!!!

Anyhoo, the first recipe I wanted to make with my new toy was hummus, but, since my cooked chickpeas are still frozen solid, I just had to find something else to do with it. A quick food blog search later, I found this recipe and I just knew I was making this! Maple Almond Butter. Just saying it makes me want to dip a spoon into the jar again! Maple. Almond. Butteeeeeeeeer! It's not just good, it's stellar! I promise, if you have a food processor and have never tried making your own nut butter, take the processor out of it's hiding place, roast some nuts, and get whizzing!

Maple Almond Butter
adapted from Food in Jars

Store bought nut butters are always too sweet for my tastes and although this is maple flavored, and the maple does come through loud and clear, it is not overly sweet. The maple flavor compliments the almonds perfectly. My favorite way to eat this is with slices of apples, delicious for breakfast or as a snack.

1 1/2 cup of almonds
3 tbsp of pure maple syrup
Fleur de sel or sea salt
2 to 3 tsp of canola oil

Line a baking sheet with parchment paper. Spread the almonds on the baking sheet and drizzle with the maple syrup giving the almonds a toss to coat them well. Roast the nuts in a 325F oven for about 20 minutes, tossing them once or twice, making sure they don't burn. When the nuts are ready, remove the baking sheet from the oven, place it on a cooling rack and let the almonds cool for a good 20 minutes.

Place the almonds in the bowl of your food processor along with a few pinches of fleur de sel and pulse a few times to break up the nuts. Add a teaspoon of oil, scrape the sides of the bowl and pulse again until the nuts break down further. Scrape the bowl and drizzle in some more oil as needed to get a creamy, luscious almond butter. Store in a jar, in the refrigerator.
Pin It!

Thursday, September 8, 2011

Oatmeal, Date and Apple Muffins

Summer has come and gone, vacation time flew by like it never existed and already we're back to school, in full swing, like nothing ever happened. And I know, I should, maybe, perhaps, explain where I've been, why I've neglected this blog, my readers, my friends, for such a long time but, I doubt you'd find any of it interesting. Really, it's been a case of I just don't get excited about food the way I used to... Weird, I know! And I miss getting excited about cooking, baking, finding new recipes, I really do. Summer was just all about the sandwiches and salads and taking the kids to their baseball practices and games, all the time, so everything had to be made quickly and eaten quickly and when we did have time to sit down and eat I just didn't have the energy to make anything complicated interesting blog worthy... 

But, lately I've become obsessed with finding the perfect date muffin. One that isn't so sweet it's more like a cupcake, or so moist and fluffy it falls apart. I wanted a muffin worthy of being eaten for breakfast, a sturdy muffin you can feel good about, not guilt ridden afterwards. And, after many tries, I think I've found it!


I tweaked my Buttermilk Oatmeal Muffin recipe and made it into the perfect (imho) Oatmeal, Date and Apple Muffins. Not too sweet, not too moist, full of texture from the dates and pecans, and healthy too! Each muffin has almost 3 g of fiber! Not too shabby, if I do say so myself. Maybe, just maybe, I'm getting excited about this food business again after all...

Oatmeal, Date and Apple Muffins
Makes 18 regular sized muffins

These make a quick, hearty breakfast you can grab on the go any day of the week; add fruit and some yogurt, and you've got yourself a pretty healthy breakfast!

1 1/2 cups quick cooking oats
1 1/2 cups all purpose flour
1 1/2 tsp baking powder
3/4 tsp baking soda
1/2 tsp salt
3 tbsp of granulated sugar
3/4 cup chopped, pitted dates
1/2 cup chopped, toasted pecans

2 eggs
1/4 cup canola oil
1 1/4 cups buttermilk
1 tbsp molasses
2 tsp vanilla
3 small apples, peeled and grated (about 1 cup packed of grated apples)

Preheat your oven to 400F. Line your muffin tins with paper liners and set aside.

In a large bowl mix together the oats, flour, baking powder, baking soda, salt, granulated sugar, date and pecans. Make sure to distribute the dates well throughout the dry ingredients to prevent them from sticking together.

In another bowl mix the eggs, canola oil, buttermilk, molasses and vanilla. Fold in the grated apples. Pour the wet ingredients over the dry ones and mix just until the dry ingredients are moistened. If you over mix, you'll end up with tough muffins.

Distribute the batter evenly among 18 muffin cups and bake in the preheated oven for about 20 minutes or until a toothpick inserted in the center of a muffin comes out clean. Cool the muffins completely on a wire rack.

Nutritional information per muffin:
Calories: 165; Total Fat: 6.7g; Cholesterol: 21.2mg; Sodium: 184.3mg; Total Carbohydrate: 27.5g; Dietary Fiber: 2.8g; Sugars: 9.1g; Protein: 3.7g
Pin It!

Tuesday, April 5, 2011

Finding More Time (Chocolate Banana Muffins Recipe)

Is there a way to find more hours in a day? Anyone? Anyone? I'm not trying to make excuses, I'm just wondering if anyone else is feeling overwhelmed by the amount of things to do in a day and how it affects creativity. I try to do everything I should do: get up, get dressed, cook, clean, homework with the kids, exercise, volunteer at the kids' school, smile and wave and say everything's fine and dandy, and even all that isn't easy to fit in a day's worth of hours... But when do I find the time to do what I want to do? Blogging, writing, photography, see friends, read a book... When do these things come into play? Seriously, how does everyone do it? Is it at all possible to get everything done? I'm not down in the dumps or anything, just in a rut I guess, just out of juice maybe, trying to get back in the swing of being creative without letting any of the other stuff get out of hand. Is it possible? Not sure yet...


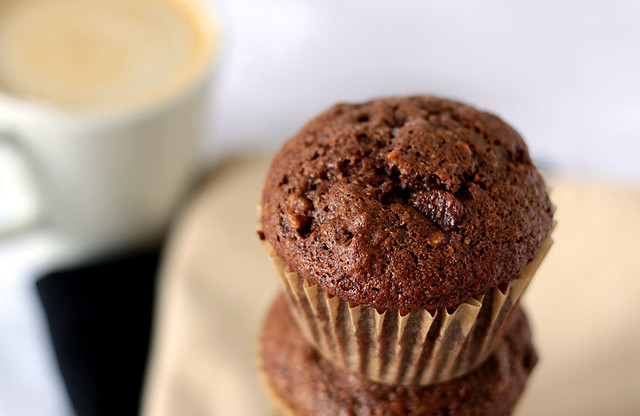
Let's get started with these muffins. They're quick, they take care of those few overripe bananas on the counter and they're packed full of chocolate, not a bad combo if you ask me. And on a rainy day like today, I sure need a dose of quick, easy and chocolate! A cup of strong coffee doesn't hurt either. ;)


Chocolate Banana Muffins

1/3 cup canola oil
1 cup sugar
2 eggs
1 tsp vanilla extract
2 medium bananas, mashed
1 1/2 cups flour
1/4 cup unsweetened cocoa powder
1 1/2 tsp baking powder
1/2 tsp baking soda
1/4 tsp salt
1/2 cup milk chocolate chips

In a large bowl, mix together first 5 ingredients. In another bowl, mix all the other ingredients; add dry ingredients to wet mixing just until blended. Fill muffin tins lined with jumbo paper liners. Bake in a 375°F preheated oven for 30 minutes or until a toothpick inserted in center comes out clean. Cool on wire rack.

Makes 12 jumbo muffins (about 15 smaller ones).

8UNC8YN64TNR
Pin It!

Tuesday, December 7, 2010

Most Ordinary/Extraordinary Banana Bread

Aaaaah! You guys! I miss my blog so much! I know by now I should be posting Holiday appropriate recipes and photos with backgrounds-full of lit-up Christmas trees and decorations but you know what? I'm not there yet. Soon, very soon, but for now, I will share with you my most ordinary/extraordinary recipe.

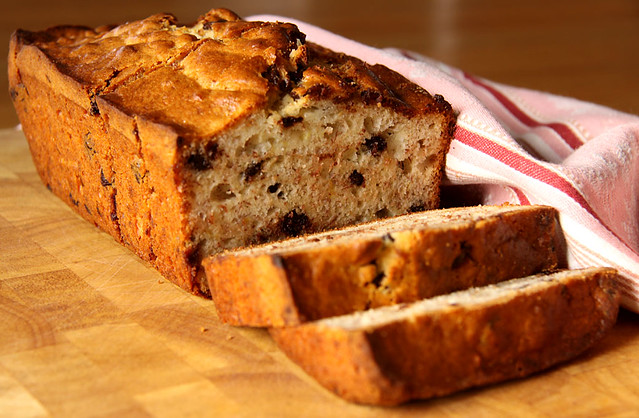
Ordinary because, really, does the internet need yet another banana bread recipe? No, probably not. But also extraordinary because it is the only one in my repertoire that I know by heart, that I go to almost every week and also, because we all love it, all 5 of us. So I thought it was time that it got the respect it deserves and a rightful place alongside the other banana bread recipes floating about the web.


Ordinary/Extraordinary Banana Bread

1 3/4 cups all-purpose flour
2 tsp baking powder
1/2 tsp salt
1/4 tsp baking soda
1 egg
1/3 cup canola oil
2/3 cup granulated sugar
3 medium bananas, mashed (about 1 cup)
1 tbsp lemon juice
1/2 cup semi-sweet or milk chocolate chips

Preheat your oven to 350F. Grease a 9 x 5 inch loaf pan and set aside.

In a bowl, mix flour, baking powder, salt and baking soda; set aside.

In a large bowl, mix the egg, oil and granulated sugar. Mix the lemon juice with the mashed bananas. Add the dry ingredients to the egg mixture alternately with the bananas, starting and ending with the dry ingredients. Fold in the chocolate chips. Pour the batter into the greased loaf pan and bake in preheated oven for 60 to 70 minutes, until a skewer inserted in the center of the bread comes out clean. Invert onto a wire rack and let cool completely.
Pin It!

Sunday, August 8, 2010

Sunday Kind of Breakfast

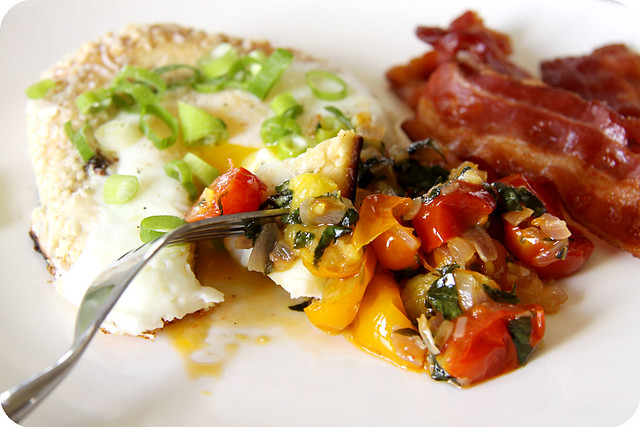
I love getting up on Sunday morning and taking my time deciding what to make for breakfast. I'll let the kids play their video games so I'll have time to make myself a cup of coffee, browse through my many, many bookmarks or magazines, and try to find THE recipe I feel like making that morning. Or perhaps I'll settle for a tried and true breakfast favorite like crêpes, scones, muffins or waffles. But some days, I feel like having more of a savory breakfast, something I usually make as "breakfast for dinner". Those most often involve eggs, bacon and some type of bread. We so very rarely have bacon for breakfast that once the bacon aroma started wafting through the house, my son walked into the kitchen with this surprised and happy look on his face and actually said: "Are you making BACON for breakfast?!?" He was one happy kid.

I also had a bunch of gorgeous grape tomatoes from the market which I turned into a nice little salsa to serve alongside some eggs cooked in a bagel nest. The bagels are from Bagels Tradition'L in Québec, where you can get pretty much THE best bagel in town. They're baked in a wood oven which gives them a distinctive taste, and they are very, very hard to resist! All in all, a great Sunday breakfast. Now, what to make for dinner... ;)


Oven Cooked Bacon

Once you start cooking your bacon in the oven you will never go back to making it in a pan. You can use the time the bacon is baking to make the rest of breakfast! Cool, right?

Preheat your oven to 400F. Lay the bacon slices down on a parchment lined baking sheet and bake in the oven for 25 to 30 minutes, depending on how thick your slices are and how crisp you like your bacon. Once cooked, place the slices on a piece of paper towel to absorb some of the fat. You can keep the bacon warm in a low oven, if you need to.

Fresh Tomato Salsa

Olive oil
About 20 small grape tomatoes (you could also use cherry tomatoes)
1 small red onion, diced
1 clove of garlic, minced
1/4 cup of fresh basil, chopped
Salt and pepper

In a pan, over medium heat, pour a few tablespoons of olive oil. Add the onion and sauté until it starts to soften, about 5 minutes. Add the tomatoes and let them warm up and get soft, again, about 5 minutes. Add the garlic, salt and pepper and let it cook for another 5 minutes. Add basil at the very last minute and keep the salsa warm until serving time.

Eggs in a Bagel Nest


Ingredients for each serving:
Butter and olive oil
1/2 a bagel
1 egg
Sliced green onions
Grated Parmesan
Salt and pepper

Heat a nonstick pan over medium heat. Add a little butter and olive oil and heat until the butter is melted and bubbly. Place your bagel half, cut side down, into the pan and let it warm up for a few minutes. Crack the egg into the bagel hole. The white will stream down the side and that's OK. Cover the pan and let the egg cook for a few minutes, depending on how done you want the yolk to be, check on it often. Sprinkle with grated Parmesan, salt, pepper and green onions. Serve with bacon, fresh tomato salsa and make sure you don't forget the coffee!
Pin It!

Thursday, July 22, 2010

Rhubarb Streusel Muffins

Judging from the heat and humidity we had the last few weeks, I think it's safe to say that summer is definitely here and has conspired against me so that I can't bake. And right when it gets a little cooler and I could stand to preheat the oven, we decided to paint. And not the colorful-artsy-fun kind of painting you hang on a wall. No, more of a the-dining-room-slash-living-room-needs-a-new-coat-of-paint kind of painting. At least we feel like we're in a completely new apartment and once we get those new curtains installed, it's gonna look pretty good too, if I do say so myself.


So, I give you today a treat of a recipe for Rhubarb Streusel Muffins I made a few months ago and never got around to posting. They are not too sweet, not too tart. They get a great crunch from the streusel but stay really moist from all the fruit they contain. And if I can find some fresh rhubarb at the market this weekend, and if the temperature stays a little cooler that 95F in my kitchen, I think I'll be making these again pretty soon!

Rhubarb Streusel Muffins adapted from Marzipan Mom who adapted from epicurious.com


Topping ingredients:

3/4 cup oatmeal

1/3 cup all-purpose flour

1/3 cup packed brown sugar

1/2 tsp cinnamon

1/8 tsp salt

4 tbsp unsalted butter, softened


Cake batter ingredients:

1 1/4 cups all-purpose flour

1 tsp baking powder
1 tsp salt

3/4 tsp cinnamon

1/2 cup canola oil (or 1/4 oil plus 1/4 cup unsweetened apple sauce)

2 large eggs

1/2 tsp vanilla

1/2 cup brown sugar

1/4 cup granulated sugar

1/2 cup buttermilk

3 cups fresh rhubarb stalks, cut into 1/4-inch dice

3 tbsp confectioners sugar


Preheat your oven to 375F and line muffin-tins with paper cups; set aside.


Start by making the topping: In a bowl, mix together oatmeal, flour, brown sugar, cinnamon and salt. Add the butter and mix well until the mixture forms coarse crumbs; set aside.


And now for the batter: In a bowl, mix flour, baking powder, cinnamon and salt. In another bowl, whisk together oil (or applesauce/oil mix), eggs, vanilla, brown sugar and granulated sugar; mix well. Switching to a wooden spoon, add the flour and buttermilk in 2 batches, alternating between the 2, beginning and ending with the flour mixture and mixing just until combined. Add the confectioners sugar to the rhubarb at the last minute and toss to coat the rhubarb well. Add the rhubarb to batter and fold it in.


Now, depending on how big your muffin tins are, you can divide the batter between 12 to 18 muffin cups. Fill the cups about 3/4 of the way full. Crumble the streusel on top of the muffins. Bake in the preheated oven for about 25 minutes or until a toothpick inserted in the center of a muffin comes out clean. Leave the muffins in the pan to cool a few minutes then transfer to a cooling rack to cool completely. If the muffins are sticking to the pan, you can use a small knife to loosen them from the pan.

Note: If you don't have quite enough rhubarb to make this recipe, you can use tart apples, peeled and diced, to make up the difference.
Pin It!

Thursday, June 24, 2010

Long Weekend (Blueberry Buttermilk Scones)

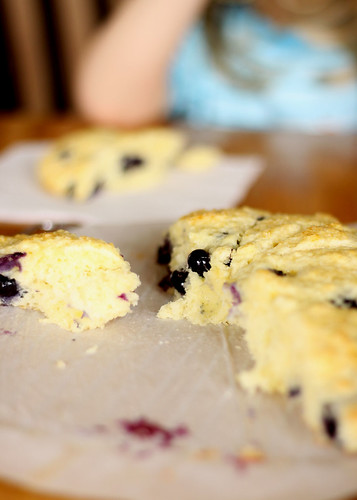
I woke up this morning more relaxed than I have in ages. School is finally out for the Summer, the kids woke up later than usual and we have a 4 day long weekend ahead of us! Coffee in one hand, Blueberry Buttermilk Scone in the other, I am enjoying watching the rain fall outside and looking forward to a quiet, peaceful day playing with the kids, cooking, baking and lazying around. Happy Summer!

Blueberry Buttermilk Scones
2 cups flour
1/4 cup sugar
3 tsp baking powder
1 tsp salt
1/2 cup butter
3/4 cup fresh blueberries
1/2 cup buttermilk
2 eggs
Coarse sugar

In a large bowl mix flour, sugar, baking powder and salt. Cut in butter until mixture resembles coarse crumbs. Add blueberries and mix lightly. Add buttermilk, one egg and one egg yolk (reserve the white). Mix carefully until blended. Drop dough onto a lightly floured surface and knead delicately (you don't want to crush the blueberries) to form a ball with the dough. With floured hands, transfer your ball of dough to a
parchment paper lined baking sheet and pat down into a 1/2 inch thick circle. With a sharp knife, score dough into 12 slices (as with a pie). Brush top with reserved egg white and sprinkle with coarse sugar. Bake in preheated 425°F oven for about 20 minutes. Serve warm.

Pin It!

Monday, March 15, 2010

Blurry Days and a Buttermilk Waffle Recipe

Having just read the date on my last post, all I can say, really, is the past few months went by in a blur consisting of three children, school, homework, house-work, march-break, a few books I read as if I would never have time to read again, a knitting project that finally got to be finished, and a bunch of breakfasts, lunches and dinners not really worth blogging about except for some buttermilk waffles I keep making over and over again.


Yes, folks, I am still cooking and baking although, I must admit, the scales tip way, way over on the cooking side and the baking has been less and less. Not to say that I'm bored with all the chocolate, cakes, cookies, pies and other assorted sweets floating around the blogosphere and tempting my taste buds in various cookbooks and magazines, just that I needed to "healthify" myself a little and not baking has been the way to go. Perhaps with Daylight Savings Time, I will be able to photograph our dinners once in a while.

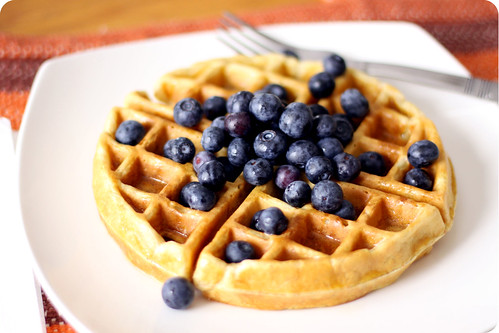
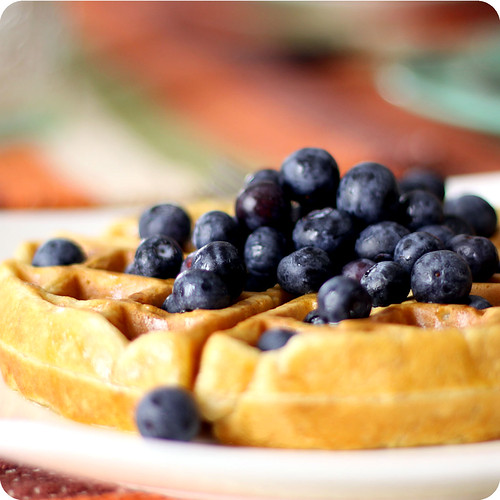
Sunday breakfasts are still decadent though as it is the only day in the week that we have a little time to sit together as a family and just breathe. Hence the making of the buttermilk waffles. I usually make a huge batch, freeze individual portions and reheat the leftovers in the toaster for the kids during the week. I don't know about you but I have a tough time getting my kids to eat breakfast before going to school and homemade waffles can work wonders for their appetites. Add fresh blueberries, a little maple syrup and watch whole platefuls disappear!

Buttermilk Waffles

adapted from Smitten Kitchen who first adapted the recipe from Mark Bittman


2 cups all-purpose flour

1 cup whole wheat flour

3/4 tsp salt

3 tbsp sugar

2 1/4 tsp baking soda

2 2/3 cups buttermilk*

3 eggs, separated

6 tbsp canola oil

1 tsp vanilla extract


In a large bowl, mix the all-purpose flour, whole wheat flour, salt, sugar and baking soda. In another bowl combine the buttermilk, egg yolks, oil and vanilla extract.


Preheat your waffle iron and brush it with a little oil. While it's preheating, beat the egg whites with your mixer choice until they form soft peaks. Pour the wet ingredients into the dry, mix well, then fold in the egg whites.


Ladle 1/2 to 3/4 cups of batter into your waffle iron. If you don't use enough batter the waffles won't rise; too much batter and it will spill. You'll need to experiment with quantities and cooking times to get your perfect waffle. It also depends on what kind of waffle iron you have.

Keep making waffles until you have used up all the batter. You can serve them as soon as they are ready or keep them warm in a low oven. Freeze all leftovers in individual portions and reheat in a toaster as needed.

* If you don't happen to have buttermilk around you can substitute 1 cup of milk mixed with 1 tbsp of lemon juice or vinegar for every cup of buttermilk needed. You can also thin out some plain yogurt with a little milk. But, to tell you the truth, between these waffles and the Buttermilk Oatmeal Muffins I make regularly, buttermilk has no time to reach its expiration date in my fridge anymore.
Pin It!

Friday, September 18, 2009

Buttermilk Oatmeal Muffins

OK, so I was telling my better half how uninspired I've been feeling lately and how I miss blogging and how I wish I had more time to bake and take pictures and all that. And do you know what he said to me? "Don't feel bad, statistically speaking, people who start a blog usually lose interest after about 18 months." Whaaah? Seriously? Is that what me and my little blog are? Just another statistic in a sea of abandoned blogs? Um, no. No, not in a long shot. I'm too stubborn for that.

With that, I decided I would not be too hard on myself, always trying to come up with original and never before seen recipes and photos. I will blog for fun again and enjoy myself in the process. Because frankly, I haven't been doing nearly enough fun stuff since the kids started school. Routine has hit me harder than ever and I don't like it.

So in the spirit of blogging for fun, here is the recipe for the muffins I made this morning, just because it was an off day from school and it was raining and I just felt like it. These are my go-to buttermilk muffins. I found it on a day I was looking for a recipe to use up the buttermilk I had in the fridge that was about to go bad. They were so tender and comforting that now, I buy buttermilk just to make these muffins.

I'm not promising a post a day, but I'll do my best to update regularly, and I will remember to make it fun. Oh, and thanks Darling for the unintended swift kick in the a**. I needed it. :)


Buttermilk Oatmeal Muffins (adapted from Sweet Savory Southern)

Makes 16 muffins

1 1/2 cups quick-cooking oats

1 1/2 cups buttermilk

2 eggs, beaten

3/4 cup packed brown sugar

1/4 cup vegetable oil

1/4 cup unsweetened applesauce

2 tsp vanilla

1 1/2 cups all-purpose flour

1 1/2 teaspoons baking powder

3/4 teaspoon baking soda

1/2 teaspoon salt

Handful of chocolate chips (optional)


Preheat oven to 400 F. Grease a muffin tin or line with paper muffin cups.

In a bowl, soak oats in buttermilk for 15 minutes. Stir in eggs, sugar, oil, applesauce and vanilla. Combine flour, baking powder, baking soda and salt; stir into oat mixture just until moistened. Fill prepared muffin tin three-fourths full. Sprinkle with chocolate chips, if using. Bake in preheated oven for 18-20 minutes or until muffins test done. Cool in pan 5 minutes before removing to a wire rack.


Pin It!

Saturday, July 11, 2009

Local Strawberries, Finally! (Strawberry Scones Recipe)

For me, Summer doesn't officially start with the last day of school, or the day the municipal pools open, not even when the sun has shined for one whole week in a row. No, for me, Summer officially starts when we go to the farmer's market and half the stalls there are filled with baskets full of the plumpest, juiciest, reddest local strawberries. Ah, Québec strawberries, how I love those little jewels!

We usually eat most of them strait out of the basket, unadulterated, no sugar, nothing. But, the few that are left will most likely end up in baked goods. I like making strawberry muffins, but one morning I felt like trying scones. I was concerned that the berries would make the scone dough too wet, but the scones ended up being just temptingly moist. So tempting the whole batch was gone in a flash. Looks like it's time for a trip to the market!

Strawberry Scones
2 cups flour
1/4 cup sugar
3 tsp baking powder
1 tsp salt
1/2 cup butter
1 cup fresh strawberries, diced

1/2 cup buttermilk
2 eggs
Coarse or granulated sugar, for sprinkling

In a large bowl mix flour, sugar, baking powder and salt. Cut in butter until mixture resembles coarse crumbs. Add strawberries, and mix carefully to coat them in flour.


Add buttermilk, one egg and one egg yolk (reserve the white). Mix until blended, trying not to crush the berries. Drop dough onto a lightly floured surface and knead delicately, just until the dough comes together.

With floured hands pat dough into a 1/2 inch thick circle. Transfer to a parchment paper lined baking sheet and with a sharp knife, score dough into 12 slices (as with a pie).

Brush top with reserved egg white and sprinkle with sugar.

Bake in preheated 425°F oven for about 20 minutes. Serve warm.

Pin It!

Tuesday, May 19, 2009

TWD - Fresh Mango Muffins

I have a weird relationship with mangoes. I want to like them but they always seem to have this funny aftertaste that I just can't get used to. So, when I saw that Kelly of Baking with the Boys had chosen Fresh Mango Bread for this week's Tuesdays with Dorie recipe, what I first tried to do was make the bread with another kind of fruit. I made lemon Raspberry bread, which was very good, but not photogenic at all! Then, when we went grocery shopping last weekend, there were mangoes on sale so I thought: "What the heck!" and threw caution to the wind.

I did cut the recipe in half though and make muffins, just in case the lime zest, cinnamon and ginger didn't hide the taste of the mango quite enough and I used slivered almonds instead of raisins for an added crunch. And now, I'm sort of sad I didn't make the entire recipe. What a great muffin! Very moist and tender from the mango, even more so the day after they're baked, and the spices and zest really make it interesting. And, I guess the mango loses its funny aftertaste after it's baked... Or, I just got mangoes without aftertaste, who knows?

I can see making this muffin with raspberries or blueberries or even pineapple chunks. Different every time but still delicious, I'm sure. So go check out Kelly's blog for the recipe and visit the other Tuesdays with Dorie members for further inspiration!
Pin It!

Thursday, May 7, 2009

Lemon Poppy Seed Muffins

Sometimes I get frustrated that I don't have a designated space for taking the photos I use on this blog. I wish I could have a place where all my bowls and spoons and plates and cups were right there when I need them and all my place mats and napkins and table cloths were always nicely ironed and ready to use. I wish I didn't have to clear the kitchen table of the crayons and papers and sippy cups and crumbs from breakfast or lunch.

But, other times, I just roll with it. I am, after all, a mom of three with the youngest, a soon to be 2 year old, getting way ahead of herself with the "terrible twos". So I just pop the cooling muffin tray on the table with the doodles and the crayons and I take the photos that I need. And sometimes, it doesn't turn out half bad. You have to go with what life gives you, right?

So if life gave you a few lemons, buttermilk you need to use up and poppy seeds you got for some dish ages ago and you have no idea what to do with, try these muffins, won't you? They're moist and fragrant and the perfect thing to wake up to on a cold and rainy morning.

Lemon Poppy Seed Muffins (Adapted from Tammy’s Recipes)


2 cups flour
1 1/2 teaspoons baking powder
1/2 teaspoon baking soda
1/4 teaspoon salt
1 1/2 tablespoons poppy seeds
1 egg
1/2 cup + 2 tablespoons sugar
2 tablespoons lemon zest (the zest from about two large lemons)
1/4 cup melted butter
1 1/4 cups buttermilk

1 tsp vanilla


Preheat oven to 350F.


In a large mixing bowl, whisk together the dry ingredients.


In a smaller bowl combine the sugar and lemon zest. Rub them together until the sugar is slightly moist and fragrant. Add the egg, the butter, the buttermilk and the vanilla. Mix well.


Add the wet mixture to the dry ingredients, and stir just until moistened. Do not over mix. The batter will be fairly thick.


Divide batter evenly into 12 paper-lined or greased muffin cups. Bake muffins on rack in the middle of the oven for 20-25 minutes, until muffins test done.


Allow muffins to cool in pan for about 5 minutes, then remove to a wire rack to finish cooling.

Pin It!

Thursday, January 1, 2009

Relaxing on New Year's Day

Sunny crêpes on New Year's Day. What else could I ask for? As a bonus, I can't cook a crêpe to save my life so, that's usually Martin's job. All I have to do is relax, have a cup of coffee and enjoy the first sunny day of 2009. Life is good. Happy New Year!

Crêpes
1/2 cup canola oil
4 eggs
1 cup milk
2 cups water
2 cups flour
1 tsp baking powder
1/3 tsp salt
1/2 cup sugar

In a large bowl, mix the oil, eggs, milk and water.

In a smaller bowl, mix the flour, baking powder, salt and sugar. Add the dry ingredients to the wet and beat well with a whisk.

In a slightly oiled, nonstick skillet over medium heat, ladle about 1/2 cup of the batter and swirl it around as to get a nice, round crêpe. Cook for a few minutes then flip and cook the other side a few minutes also. Adjust the heat to make sure the crêpes cook fairly quickly, but don't get scorched. Keep the crêpes warm in the oven, on its lowest heat possible. Serve with maple syrup, Nutella, caramel sauce, whatever suits your mood.
Pin It!

Tuesday, August 26, 2008

Blueberry Daze

Time is truly flying by these days. School starts this Friday and oh, my, it seems we didn't get enough summer. That's why the Chocolate Banded Ice Cream Torte chosen by Amy of Food, Family and Fun for this week's Tuesdays with Dorie won't be making an appearance on my blog today. It just didn't fit into my schedule but I'll be baking with Dorie next week, I promise!

I couldn't go another day without giving you guys a recipe though. I made this bread pudding a few weeks ago and I never got around to posting it, due to the aforementioned time flying by! But it is truly worth a post as it is full of blueberry, cinnamony and mapley goodness.

Since we did get a lot of cold and rainy days this summer, we took advantage of them by going shopping for school supplies and clothes for the kids. I know, how boring. Not for me though, as I kinda like shopping for school supplies, but shhh, don't tell the kids! So anyways, when we go shopping we often stop by this coffee shop where they sell cinnamon rolls. Towards the end of the day, they pack bits and pieces of day old cinnamon rolls into plastic bags. They are absolutely perfect for making bread pudding so I always grab a few. And as I had seen this post from Aimée just days before, I knew I had to add blueberries to my usual recipe.


The blueberries add such a nice touch to this, they get all juicy and pop in your mouth and they marry beautifully with the maple and the cinnamon. Of course, I know that there are those (Hi Grace!) who would add even more cinnamon to the pudding and I'm sure it would be fantastic but I find just the hint of spice from the cinnamon rolls to be perfect.


Blueberry Cinnamon Roll Bread Pudding

About 6 cups of day old cinnamon rolls, cut into cubes
6 eggs
2 cups milk
4 tbsp maple syrup
1 cup of fresh blueberries
Coarse sugar
Maple syrup for serving

The night before you want to serve your bread pudding, mix the eggs, milk and maple syrup in a large bowl. Arrange the cinnamon roll pieces in a buttered 9 x 13 inch baking dish. Sprinkle your blueberries over the cinnamon rolls. Pour the egg mixture over the cinnamon rolls and blueberries. Press lightly with your hands, making sure the rolls are mostly covered with the custard. Cover the dish with plastic wrap and let it rest in the refrigerator overnight.

The next morning, when you're ready to bake, preheat your oven to 375F. Sprinkle your bread pudding with some coarse sugar and bake for 50 to 60 minutes, or until it is golden and the custard is set. Serve warm with maple syrup.

Pin It!

Tuesday, May 27, 2008

Tuesdays With Dorie - Pecan Honey Sticky Buns

I’ve discovered lately that having a food blog gives you an excuse to do things you would not normally do. Take brioche dough, for example. I’ve wanted to make brioche since I saw an episode of Barefoot Contessa in which Ina Garten makes the cutest little breakfast treats I’ve ever seen. I checked out the recipe, and as with most of her recipes it contains an alarming amount of butter. So I had put off making brioche dough because, well, I had no excuse really!

Until last Friday when I started on Madam Chow’s pick for this week’s Tuesdays with Dorie, Pecan Honey Sticky Buns. Oh, yes, now I had the perfect excuse. And my best friend, Empire Red, was real happy to help me out. He even danced a little dance of joy on my kitchen counter while kneading the dough! He got quite the workout, but he’s OK, and real happy to have used his dough hook for the very first time.

After a night’s rest in the refrigerator, the dough was ready to be used to make the buns. Last Saturday morning, we had one of the sweetest and most indulging breakfast we’ve had in a long time! These buns are out of this world. So tender and flaky and meltingly delicious! Now I know what I’ve been missing! They are really easy to put together once the dough is done, and with a mixer, making the dough’s pretty easy too!

The only change I made to the recipe was to use maple syrup instead of honey in the glaze, I couldn't help it, I had to change a little something! Intrigued as to what the rest of the Tuesdays with Dorie gang thought of these gorgeous breakfast treats? Well, click on over there and check out the blog roll! Have fun!

Pecan Honey Sticky Buns
From Baking from my Home to Yours by Dorie Greenspan

Makes 15 buns

For the Glaze:
1 cup (packed) light brown sugar
1 stick (8 tablespoons) unsalted butter, cut into 4 pieces
1/4 cup honey
1-1/2 cups pecans (whole or pieces)

For the Filling:
1/4 cup sugar
3 tablespoons (packed) light brown sugar
1 tablespoon ground cinnamon
3 tablespoons unsalted butter, at room temperature

For the Buns:
1/2 recipe dough for Golden Brioche loaves (see below), chilled and ready to shape (make the full recipe and cut the dough in half after refrigerating it overnight).

Generously butter a 9-x-13-inch baking pan (a Pyrex pan is perfect for this).

To make the glaze: In a heavy-bottomed saucepan, bring the brown sugar, butter, and honey to a boil over medium-low heat, stirring frequently to dissolve the sugar. Pour the glaze into the buttered pan, evening it out as best you can by tilting the pan or spreading the glaze with a heatproof spatula. Sprinkle over the pecans.

To make the filling: Mix the sugars and cinnamon together in a bowl. If necessary, in another bowl, work the butter with a spatula until it is soft, smooth and spreadable.

To shape the buns: On a flour-dusted work surface, roll the chilled dough into a 16-inch square. Using your fingers or a pastry brush, spread the softened butter over the dough. Sprinkle the dough with the cinnamon sugar, leaving a 1-inch strip bare on the side farthest from you. Starting with the side nearest you, roll the dough into a cylinder, keeping the roll as tight as you can. (At this point, you can wrap the dough airtight and freeze it for up to 2 months . . . . Or, if you want to make just part of the recipe now, you can use as much of the dough as you'd like and freeze the remainder. Reduce the glaze recipe accordingly).

With a chef's knife, using a gentle sawing motion, trim just a tiny bit from the ends of the roll if they're very ragged or not well filled, then cut the log into 1-inch thick buns. (Because you trim the ragged ends of the dough, and you may have lost a little length in the rolling, you will get 15 buns, not 16.) Fit the buns into the pan cut side down, leaving some space between them.

Lightly cover the pan with a piece of wax paper and set the pan in a warm place until the buns have doubled in volume, about 1 hour and 45 minutes. The buns are properly risen when they are puffy, soft, doubled and, in all likelihood, touching one another.

Getting ready to bake: When the buns have almost fully risen , center a rack in the oven and preheat the oven to 375 degrees F.

Remove the sheet of wax paper and put the pan on a baking sheet lined with parchment or a silicone mat. Bake the sticky buns for about 30 minutes, or until they are puffed and gorgeously golden; the glaze will be bubbling away merrily. Pull the pan from the oven.

The sticky buns must be unmolded minutes after they come out of the oven. If you do not have a rimmed platter large enough to hold them, use a baking sheet lined with a silicone mat or buttered foil. Be careful - the glaze is super-hot and super-sticky.

What You'll Need for the Golden Brioche Dough
(this recipe makes enough for two brioche loaves. If you divide the dough in half, you would use half for the sticky buns, and you can freeze the other half for a later date, or make a brioche loaf out of it!):

2 packets active dry yeast (each packet of yeast contains approx. 2 1/4 teaspoons)
1/3 cup just-warm-to-the-touch water
1/3 cup just-warm-to-the-touch whole milk
3 1/3 cups all-purpose flour
2 teaspoons salt
3 large eggs, at room temperature
1/4 cup sugar
3 sticks (12 ounces) unsalted butter, at room temperature but still slightly firm

What You'll Need for the Glaze
(you would brush this on brioche loaves, but not on the sticky buns):

1 large egg
1 tablespoon water

To Make The Brioche: Put the yeast, water and milk in the bowl of a stand mixer and, using a wooden spoon, stir until the yeast is dissolved. Add the flour and salt, and fit into the mixer with the dough hook, if you have one. Toss a kitchen towel over the mixer, covering the bowl as completely as you can-- this will help keep you, the counter and your kitchen floor from being showered in flour. Turn the mixer on and off a few short pulses, just to dampen the flour (yes, you can peek to see how you're doing), then remove the towel, increase the mixer speed to medium-low and mix for a minute or two, just until the flour is moistened. At this point, you'll have a fairly dry, shaggy mess.

Scrape the sides and bottom of the bowl with a rubber spatula, set the mixer to low and add the eggs, followed by the sugar. Increase the mixer speed to medium and beat for about 3 minutes, until the dough forms a ball. Reduce the speed to low and add the butter in 2-tablespoon-size chunks, beating until each piece is almost incorporated before adding the next. You'll have a dough that is very soft, almost like batter. Increase the speed to medium-high and continue to beat until the dough pulls away from the sides of the bowl, about 10 minutes.

Transfer the dough to a clean bowl (or wash out the mixer bowl and use it), cover with plastic wrap and leave at room temperature until nearly doubled in size, 40 to 60 minutes, depending upon the warmth of your room.

Deflate the dough by lifting it up around the edges and letting it fall with a slap to the bowl. Cover the bowl with the plastic wrap and put it in the refrigerator. Slap the dough down in the bowl every 30 minutes until it stops rising, about 2 hours, then leave the uncovered dough in the refrigerator to chill overnight. (After this, you can proceed with the recipe to make the brioche loaves, or make the sticky buns instead, or freeze all or part of the dough for later use.)

The next day, butter and flour two 8 1/2-x-4 1/2-inch pans.

Pull the dough from the fridge and divide it into 2 equal pieces. Cut each piece of the dough into 4 equal pieces and roll each piece into a log about 3 1/2 inches long. Arrange 4 logs crosswise in the bottom of each pan. Put the pans on a baking sheet lined with parchment or a silicone mat, cover the pans lightly with wax paper and leave the loaves at room temperature until the dough almost fills the pans, 1 to 2 hours. (Again, rising time will depend on how warm the room is.)

Getting Ready To Bake: Center a rack in the oven and preheat the oven to 400 degrees F.

To Make the Glaze: Beat the egg with the water. Using a pastry brush, gently brush the tops of the loaves with the glaze.

Bake the loaves until they are well risen and deeply golden, 30 to 35 minutes. Transfer the pans to racks to cool for 15 minutes, then run a knife around the sides of the pans and turn the loaves out onto the racks. Invert again and cool for at least 1 hour.

Pin It!