Sunday, February 9, 2014

Pita Bread for #ElleaPalooza


This is by far one of the toughest posts I’ve had to write. Just trying to put my thoughts coherently into words is not an easy task. I know I’m not the only one trying very hard this weekend to write about what Elle (Lee Ann) of Elle’s New England Kitchen meant to me. I’m still shocked that she is gone. It just doesn’t seem possible to me that she could be there one day and gone the next. I can’t even imagine what her family is going through. One thing is for sure, it’s times like these we realize that life is indeed short and very fragile.

If other stay at home moms are reading this, you know, like me, that the years are short but some days seem very long. On those days I would log on to Facebook, browse for a while and then stumble onto a funny video or article Elle would have shared. We would comment back and forth (she was so incredibly funny and witty) and that interaction would put just a little bit of much needed sunshine in my day. I will miss that so much.

I loved reading her blog posts, she really had a way with words, and one post that stuck with me was “It’s not a P.I.T.A. to make pita bread!”; she had me giggling at the title and once I'd read the entire post, I wanted to make pita bread right away! And she was right, these are perfectly fluffy, delicious pockets of freshly baked goodness. And yes, I ate one strait out of the oven, with butter, as is the law.

I will miss you, Elle. Your spunk, your wit, your talent; you were an inspiration. Your thoughtfulness touched so many people and hopefully, you knew how much we all loved you. Rest in peace, friend.


The pita bread recipe is from Brown Eyed Baker and can be found here. Many other bloggers are posting recipes from Elle's blog as well as tributes, they can be found on the Facebook #ElleAPalooza page. More information about how you can donate to Elle's family or participate in an auction can be found on Friends of Elle.


Pin It!

Thursday, March 28, 2013

Decorating Eggs - A fun Easter craft!

We've been a crafty little bunch around here lately. I have a five (almost 6!) year old, who thinks a day without a craft is a day wasted. So I've been trying to be a creative mommy and find new ideas for us to have fun with. Since Easter is upon us, I thought it would be a good time to introduce my kiddos to egg decorating.

Easter Egg Garland

I must confess, this year is the first year we decorate eggs for Easter... I know, my kids have been missing out and it's all my fault. I hate the mess of dying or painting eggs. But this year I had an idea that would save me the mess: permanent markers! We found some in so many vibrant colors, plus, my three kids are all old enough this year to understand what "permanent" means so I didn't have to worry about them permanently "marking" their faces, hands, my kitchen table...

Easter Eggs

First off, I needed to empty a few eggs. I'm not sure the permanent marker technique would work for hard boiled eggs as the markers aren't food safe. And I wanted our eggs to last a little while so I went the empty shell route.

Emptying Eggsfor Decorating

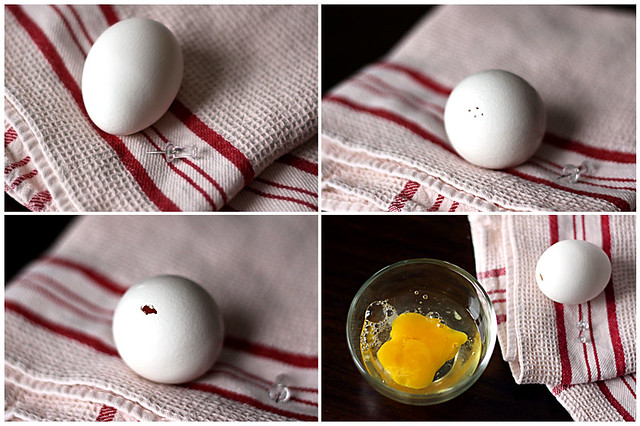
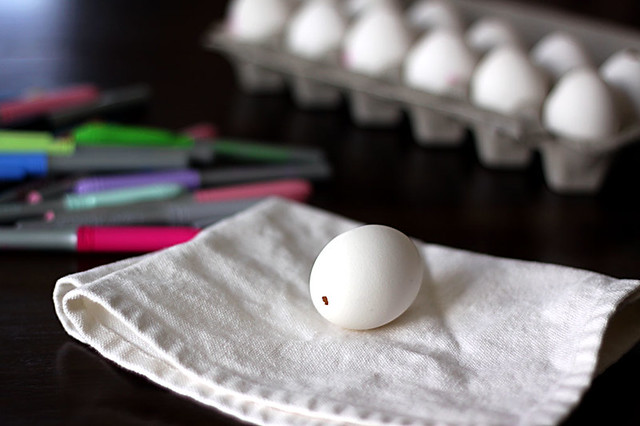
Here's what you do: use a thumbtack to make holes at each end of the egg, then use the pin to pry the little piece of eggshell off the egg. The holes don't need to be perfect and round. Once the holes are made, place a bowl under the egg and blow into one end. If your holes are big enough you shouldn't have any trouble getting the egg out of its shell. Then place the empty shell in some warm, soapy water (I used dish soap) and use a syringe to fill the shells with water. Shake it around a bit and let the egg shells soak for a few minutes. Then blow the water out, rinse the shells and place them on a clean towel to dry completely. Once they're dry, you're ready to decorate!

Decorating Easter eggs

Now, I have 2 girls and a boy, and we all know Easter rhymes with Spring and pastel colors and cutesy, girly stuff. I wasn't about to tell my 9 year old son he had to draw flowers and hearts and pink bows on his eggs, but I never expected him to make a zombie egg! Or an alien spaceship Easter egg, but, boys will be boys and I love that he has enough imagination to think of that stuff.

Easter Eggs
See what I mean? A 9 year old boy's idea of Easter eggs!

We had a blast decorating all our eggs and when we were done I made a simple garland out of yarn and hung the eggs onto it. It makes a really cute decoration for the kitchen. I like it so much I think it'll be there way past Easter. I might not wait until next Easter to do this again. I'm thinking Birthday Eggs, Halloween Eggs, Christmas... The possibilities are endless!

Easter Egg Garland

As to what you can do with the eggs, the possibilities are endless here too. I usually make french toast, a frittata, a quiche or just simply scrambled eggs. We are big fans of breakfast for dinner so I never have any trouble with using up some eggs. So go on, grab a few eggs and get your craft on! Happy Easter!!!

Easter Eggs Follow my blog with Bloglovin
Pin It!

Friday, March 16, 2012

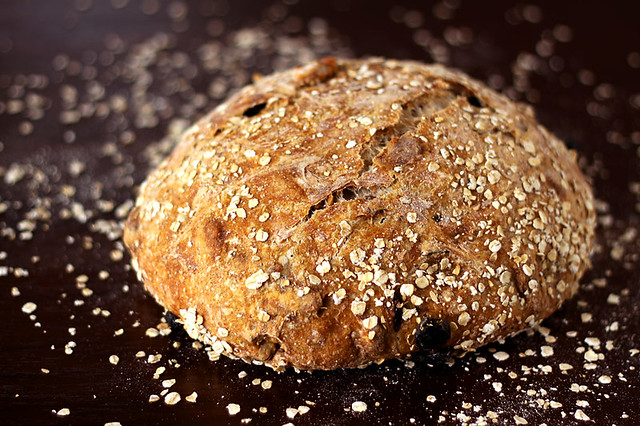
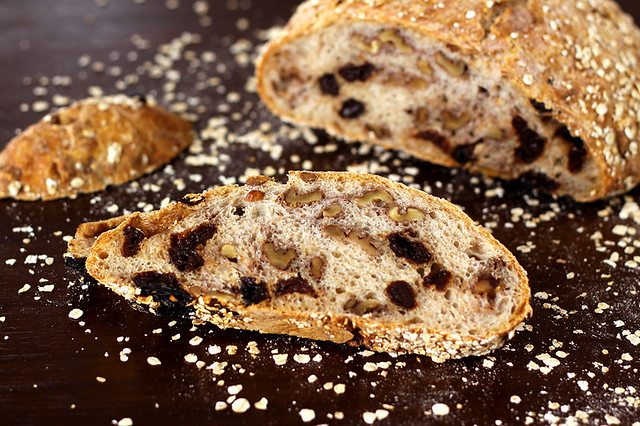
Walnut and Tart Cherry No-Knead Bread

I've mentioned before that when I was younger, my parents owned a restaurant and at the beginning, they weren't very experienced at cooking and baking for large groups of people. So, they asked for help from family members for any tips and tricks that they might have had. Some of my aunts, uncles and grandparents even came to the restaurant to cook and bake all sorts of things: big batches of spaghetti sauce, sweet and savory pies and of course, homemade bread. I remember that day my uncle came over to bake bread for the first time. I think he was real happy to have a restaurant kitchen to work in, I mean how often is it that you have a huge kitchen with counter space galore and multiple ovens at your disposal? And I think he didn't mind that my brother and I looked on in awe of his bread baking skills. At the time, for me anyways, bread was one of those things you only could get at the store; seeing someone make it by hand was totally impressive. The precise measuring of the ingredients, waiting for the first rise, shaping the loaves, waiting for the second rise and then, my favorite part, the aroma that filled the whole restaurant while the bread was baking! The entire process fascinated me, it was almost magical. Taking raw ingredients, doing a little mixing and ending up with something completely different! Just fascinating.
Fast forward to today and although I know some people find working with yeast intimidating, for me, it's very therapeutic. I find the measuring and mixing and kneading quite relaxing. Which is why I think it's a bit ironic that I like baking no-knead bread so much. It feels almost like cheating! Very little measuring, very little mixing, very little work at all, renders a loaf worthy of any bakery I've ever visited.

Walnut and Tart Cherry No-Knead Bread
Adapted from Jim Lahey, Sullivan Street Bakery

This particular variation on the famous no-knead bread is delicious paired with different cheeses as part of a cheese platter or simply eaten as is, toasted and spread with a bit of salted butter.

1 3/4 cup all purpose flour
1 1/4 cup whole wheat flour
1/4 tsp instant yeast
1 1/2 tsp salt
1 5/8 cup water

1/2 cup toasted walnuts, roughly chopped
1/2 cup tart dried cherries, plumped up in warm water for a few minutes and roughly chopped
Flour and oats, for dusting, as needed

In a large bowl, combine flours, yeast and salt. Add water and stir until blended; dough will be shaggy and sticky. Cover bowl with plastic wrap. Let dough rest at least 12 hours, preferably 18, at warm room temperature, about 70 degrees.

Dough is ready when its surface is dotted with bubbles. Lightly flour a work surface and place dough on it. Cover loosely with plastic wrap and let rest for 15 minutes.

Flatten dough out lightly and add the walnuts and cherries. Adding just enough flour so the dough doesn't stick to your fingers or your work surface, fold the dough over the add-ins and knead a few times to mix them in. Some of the walnuts and cherries will fall out and the dough will be a bit tough to work with but form it into a ball as best you can. Generously sprinkle some oats on a large sheet of parchment paper and place your ball of dough onto it. Sprinkle the dough with more oats and cover with a clean kitchen towel. Let rise for about 2 hours. When it is ready, the dough will be more than doubled in size and will not readily spring back when poked with a finger.

At least a half hour before the dough is ready, heat oven to 450 degrees F. Put a 4- to 8-quart heavy covered pot (cast iron,enamel, Pyrex or ceramic) in the oven, as it heats. When the dough is ready, carefully remove pot from oven. Slide your hand under the parchment paper and turn dough over into the pot; it may look like a mess but that is O.K. Shake pan once or twice if dough is unevenly distributed; it will straighten out as it bakes. Cover with lid and bake for 30 minutes, then remove lid and bake for another 30 to 40 minutes, until loaf is beautifully browned. Cool completely on a wire rack.
Pin It!

Friday, January 27, 2012

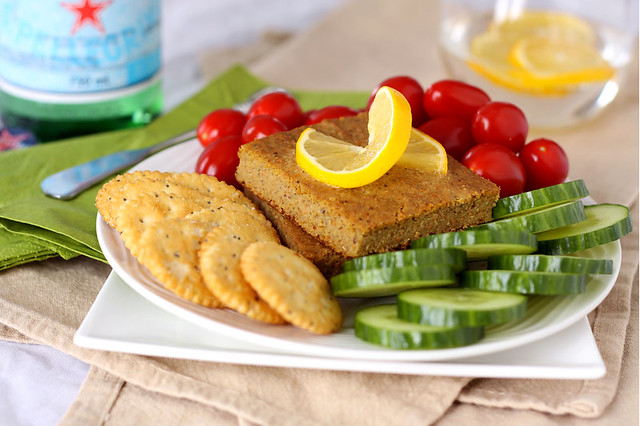
Veggie Pâté Recipe

The first time I had veggie pâté, I was still at University, visiting one of my aunts. Come to think of it, that's almost 20 years ago... Man, time does fly, doesn't it?! Anywho, my aunt was on a health kick at the time and she was experimenting with all sorts of vegetarian dishes such as seitan pie, quinoa soup, all sorts of millet recipes and of course, veggie pâté. She didn't make the pâté herself though, she bought a brand that originated in the restaurants Commensal. I mention this because, it is the only brand I actually like but it is quite expensive. At the time, I didn't even think making veggie pâté at home was possible, so I just kept buying the pre-made kind. But once I found recipes for it, I decided to try making some myself. Of course, my recently acquired food processor made the experience a whole lot easier.


The recipe I'm posting here today, is the one that comes closest to the Commensal recipe, in my opinion. The texture, when blended in the food processor, is almost as smooth and the taste is very similar. I think that's because of the sunflower seeds and nutritional yeast. The other recipes I tried didn't contain those ingredients and I always felt like they were missing something. This one... This one is perfect! It's even better than the store bought kind because, really, it's fresher and endlessly adaptable. You can use whatever blend of spices you like, add more or less nutritional yeast, try different veggie combinations, etc. My kids love it with crackers or even in sandwiches. Seriously, my oldest daughter and my son love the stuff! And, I know this makes a large amount of pâté but it keeps in the refrigerator for a week or so and you can freeze some for those times when you just don't feel like taking out the food processor.

Veggie Pâté
Adapted from Végétariens... mais pas légumes!

This recipe is a lot quicker to make if you have a food processor, all that grating and grinding, but you can still make it if you don't have one. The texture of the pâté will be a bit chunkier but the taste will be pretty much the same.

1 large onion, grated*
2 potatoes, grated*
1 large carrot, grated*
1 branch of celery, grated*
2 garlic cloves, grated*
1/2 cup (70g) unsalted sunflower seeds, ground
3/4 cup (100g) whole wheat flour
1/2 cup (25g) nutritional yeast
2 tbsp of olive or canola oil (I used avocado oil)
2 tbsp lemon juice
1/4 cup tamari
1 tsp herbes de Provence (you can also use a blend of your favorite herbs - such as basil, oregano, celery seeds, sage, thyme, etc)
Salt and pepper, to taste

*Once grated, you should have about 560g of veggies, total. A little bit more or less won't matter though.

Preheat your oven to 350 degrees F. Lightly oil an 8 x 11.5 inch baking dish and set aside.

At this point, you can just mix all the ingredients together and you will get a chunky pâté, which is fine. But I like it to have a smoother texture, so what I do is, once I've grated all my veggies in the food processor, I place the veggies in a bowl, remove the grating disc and put the all-purpose blade in its place. Then, I put all the ingredients back into the food processor and I let it whir for a good 5 minutes. I like the texture better and I think the flavors all meld together perfectly. It's a question of taste, really.

Once your mixture is ready, pour it into the prepared dish and bake in the center of the oven for about 1 hour. The pâté will be golden and completely set in the middle. Let the pâté cool in the dish before unmolding it; it will be fragile while still warm.

The pâté is best served at room temperature, with crackers and veggies or used as a sandwich base with lettuce, tomatoes, avocados, etc.

Pin It!

Friday, January 20, 2012

Craving Cinnamon (Recipe: Cinnamon Oatmeal Raisin Muffins)

I have been on a huge cinnamon kick lately and I don't usually over think these things, but I wonder if this craving means anything in particular. Is my diet lacking in some way? Perhaps I'm just missing the warmth of the holiday season and the tastes that go with it? Or maybe I'm feeling cold because of all this snow we've been getting and cinnamon is just my way of getting a little warmth and comfort?

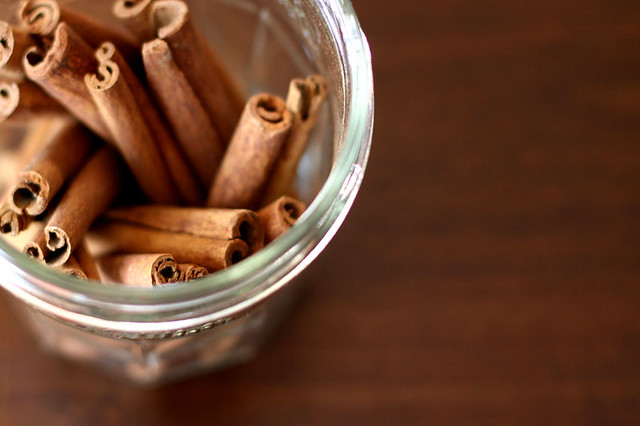
Cassia Sticks


In any case, I decided to give in to the craving because cinnamon, it seems, has many health benefits. There is of course all this debate of true cinnamon vs Cassia. Having never tried true cinnamon (also called Ceylon cinnamon) before a few weeks ago, I had never given it much thought. But after a trip to my local health food store, I came back home with a small packet of true cinnamon and I was really surprised at how much different it was from the cinnamon I had always used.

Ground Cassia on the left, true cinnamon on the right


True cinnamon has a lighter color and is much more subtle in flavor than Cassia. Less spicy, I would say. I've found though that I have to use more of it in baked goods to get that expected cinnamon-y kick. I think true cinnamon would be better for sprinkling over oatmeal after cooking or in a recipe where a subdued spiciness is preferable. I'm thinking rice pudding or maybe warmed milk. I guess I am craving comfort!

What are you craving lately?


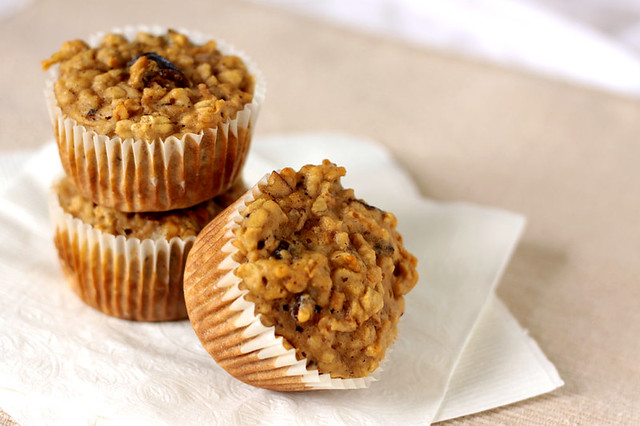
Cinnamon Oatmeal Raisin Muffins
Makes 18 small-ish muffins

I used true cinnamon in this recipe so I used 2 teaspoons of it. If you use Cassia and you're not a cinnamon fanatic, reduce it to 1 teaspoon. You can also adapt this recipe by incorporating dried cranberries instead of raisins, adding nuts or other seeds, even chocolate chips if you feel like it!

1 1/2 cups of regular or old fashioned oats
1 1/2 cups of buttermilk*
2 large eggs, beaten
1/2 cup of packed brown sugar
1/4 cup of vegetable oil
1/4 cup of unsweetened apple sauce
2 tsp of vanilla extract
1 cup of whole wheat flour
1/2 cup of all purpose flour
3 tbsp of ground flax seeds
2 tsp of true cinnamon (or 1 to 2 tsp of Cassia cinnamon, to taste)
1 1/2 tsp of baking powder
3/4 tsp of baking soda
1/2 tsp salt
1/2 cup of raisins

Preheat oven to 400 F. Grease a muffin tin or line with paper muffin cups.

In a bowl, soak oats in buttermilk for 15 minutes. Stir in eggs, sugar, oil, applesauce and vanilla extract. In another bowl, combine flours, ground flax seeds, cinnamon, baking powder, baking soda and salt; stir into oat mixture just until moistened. Fold in raisins. Fill prepared muffin tin three-fourths full. Bake in preheated oven for 18-20 minutes or until muffins test done. Cool in pan 5 minutes before removing to a wire rack.

* Sometimes, when I don't have buttermilk, I use 1/2 cup of milk mixed with 1 cup of low-fat sour cream or yogurt. Other times, when I don't have buttermilk, sour cream or yogurt, I mix in 1 tbsp of lemon juice with 1 1/2 cups of milk and let it rest for 5 minutes before adding it to the recipe.
Pin It!

Friday, January 13, 2012

Things, they are a-changing…

This post has been a long time coming and I feel bad for not having taken the time to write it before but I just hadn’t found the words yet. I’m not even sure I have the right words right now but I’ll give it a try.

How cliché of me to do this in January, right? The month of resolutions, of New Year! New You! The month of being bombarded with phrases like: This Year I Will Do It! I Will Be Good! I Will Reach My Goals! I Will Give Up Sweets! Sugar Be Damned! But really, I started this blog in January - 4 years ago -and I guess it is just the best time to reflect, the best time to get things out in the open. Clean slate and all.


I could give you tons of excuses for my lack of presence in this little web space I call mine. But we all have those: kids, homework, holidays, family… Life in general gets in the way. So I won’t bore you with that. I will say however that I really do have a very short attention span and too many things at once, I cannot do. So the blog went on the backburner and I want to apologize for not at least giving you guys a heads up. I am very sorry about that. 


I haven’t been around the blogging world because I’ve just been trying to take care of myself. Cheesy? Maybe so, but it’s true. And I know it is said that to be accountable and reach your goals more easily, it is better to share said goals with others, to talk about them openly. But I’m not that kind of person. I like to keep things to myself. Things like how much I weigh. Or what I ate for breakfast. Or how long I exercised today, yesterday or the day before. Which is not to say that I don’t like to read blogs about health and fitness and other people’s goals because, I do. And I have been inspired by them. And I love to get feedback, comments and suggestions, who doesn’t? But I wasn’t about to turn this cooking/baking/all about food blog into a health blog because I’m not an expert at any of that stuff! I’m certainly not an expert at baking either but that just comes a bit easier, you know? And I just felt silly telling anyone about it. I mean, I was just trying to eat a little better, exercise a bit more, no biggie, right? But this lifestyle change/diet/regimen, call it what you will, kept getting a little more serious every day and I kept telling myself I would post something soon, I would take the time to “shoot” this healthy recipe I was making. But I just never found the time. I never made the time. I kept thinking “no one is going to want to read about this, it’s just silly”. But, almost 2 years into this silly lifestyle change, I’ve lost 60 pounds and that is nowhere near silly. That is big. And, although I still have a ways to go, I’m very proud of what I’ve accomplished.

A few months ago, I read this post from Kristen of Dine & Dish and she really got me thinking. (I think I have a blog crush on Kristen, she is just so inspiring!) I have evolved in the last 4 years, I’ve changed, but my blog hasn’t. Why should I keep writing the same way when I am not the same? Change is scary, that’s why. Would you guys keep clicking on over here if I changed my style? Would the posts without recipes attract as much people as the ones with a pic of a luscious [insert name of decadent dessert here]. I know you guys don’t come here to read about how I’m feeling today or what I did this past weekend. And I’m not sure I even want to write about that. I don’t know what I want to write about. But I know I want to write. I miss it. Writing. Sharing my thoughts, my images. I also miss talking about how delicious and sweet and over the top the last recipe I made was! Because, no, I’m not all about healthy and low-fat, I am definitely not going to post only healthy, low-calorie, “diet” foods. I’ve been pinning sweets like crazy over on Pinterest and I sure as heck am going to try a few of ‘em. This recipe is especially driving me nuts. I think what I want to go for is balance. A mix of healthy and decadent. More of a these-things-make-me-happy blog than just a food blog.


Wow. I think this is the longest post I’ve written. Ever. If you’ve made it this long, thank you. I hope I haven’t scared all of you into just unliking this blog on Facebook and running the other way. I would love it if you stick around. There will be recipes, stories and photos, just mixed in with some other stuff. Fun stuff I hope. Life.
Pin It!

Wednesday, December 14, 2011

Maple Almond Butter - Homemade!

I am aware that, as it is mid-December, most bloggers have been working overtime, baking and cooking and writing Christmas-y posts galore, giving everyone tips and tricks and fantabulous recipes to make their holidays easier. And here I am, having not blogged in ages, yes I know, ages, and what do I post? A nut butter recipe. But, hear me out! Not an ordinary, run-of-the-mill-butter-your-toast-and-run nut butter, it's more a sit-down-and-enjoy, how-in-the-world-have-I-survived-without-this nut butter!

OK, OK, let me explain a little further how this came about. The fantastic Brilynn of Jumbo Empanadas fame had a giveaway on her blog a few weeks ago, I left a comment and didn't think about it until I got an email, from Brilynn, telling me I had won a 13-cup Kitchenaid food processor!!! So yesterday, I received THE food processor and, of course, all I had time to do was unpack and wash it, set it on the counter and gawk at it as I was already starting on dinner when the doorbell rang. On a side note, that food processor is huge! I've no idea where I'm going to store it.

Luscious!!!

Anyhoo, the first recipe I wanted to make with my new toy was hummus, but, since my cooked chickpeas are still frozen solid, I just had to find something else to do with it. A quick food blog search later, I found this recipe and I just knew I was making this! Maple Almond Butter. Just saying it makes me want to dip a spoon into the jar again! Maple. Almond. Butteeeeeeeeer! It's not just good, it's stellar! I promise, if you have a food processor and have never tried making your own nut butter, take the processor out of it's hiding place, roast some nuts, and get whizzing!

Maple Almond Butter
adapted from Food in Jars

Store bought nut butters are always too sweet for my tastes and although this is maple flavored, and the maple does come through loud and clear, it is not overly sweet. The maple flavor compliments the almonds perfectly. My favorite way to eat this is with slices of apples, delicious for breakfast or as a snack.

1 1/2 cup of almonds
3 tbsp of pure maple syrup
Fleur de sel or sea salt
2 to 3 tsp of canola oil

Line a baking sheet with parchment paper. Spread the almonds on the baking sheet and drizzle with the maple syrup giving the almonds a toss to coat them well. Roast the nuts in a 325F oven for about 20 minutes, tossing them once or twice, making sure they don't burn. When the nuts are ready, remove the baking sheet from the oven, place it on a cooling rack and let the almonds cool for a good 20 minutes.

Place the almonds in the bowl of your food processor along with a few pinches of fleur de sel and pulse a few times to break up the nuts. Add a teaspoon of oil, scrape the sides of the bowl and pulse again until the nuts break down further. Scrape the bowl and drizzle in some more oil as needed to get a creamy, luscious almond butter. Store in a jar, in the refrigerator.
Pin It!

Tuesday, September 20, 2011

Smokin' Chicken Soup

I woke up this morning and it was raining. Not an unusual sight as Fall is right around the corner, and the days are getting cooler and shorter. What came to mind as I was getting the kids ready for school? This is perfect soup weather. The kind of day that doesn't feel quite right if you don't have a pot of something warm simmering on the stove top. So after the kids were off to school, their little umbrellas over their heads, I took out my stock pot, raided the freezer for some chicken bones to boil and made some stock. Cut up a few veggies, cut the kernels off a few ears of corn leftover in the fridge, shredded some boneless, skinless chicken breasts I had cooked earlier, and voilà! Soup! Uncomplicated, comforting and healthy too. Who wouldn't go for that!


Smokin' Chicken Soup

This really is the perfect soup to have simmering on the stove on a cold and rainy Fall day.  The kick from the smoked chipotle is just enough to give it a little something different from your usual chicken soup. Please feel free to use this recipe as a guide; add more or less of whatever ingredient you like, change the veggies, add some noodles, use smoked paprika in place of the smoked chipotle powder, etc. Soup is great for experimenting!

1 tbsp olive oil
3 ribs of celery, chopped
3 carrots, chopped
1 onion, chopped
1/2 tsp garlic powder
1/2 tsp smoked chipotle powder (more if you want it spicier)
1/2 tsp salt
8 cups chicken broth
1 1/2 cups cooked shredded chicken (I used boneless, skinless chicken breasts) 
2 cups corn kernels (fresh or frozen)

In a large pot, heat the olive oil on medium high heat. Add the celery, carrots and onions and cook until softened, about 10 minutes. Add the garlic powder, smoked chipotle and salt, mix well. Add the chicken stock and bring to a boil. Reduce the heat and simmer for about 15 minutes, until vegetables are cooked. Add the chicken and corn kernels, and simmer until heated through.

Nutritional Information  per Serving
Calories: 249.2; Total Fat: 7.4g; Cholesterol: 32.4mg; Sodium: 726.1mg;
Carbohydrate: 27.2g; Dietary Fiber: 3.1g; Sugars: 8.2g; Protein: 19.6g

(Please note that the nutritional information will depend greatly on which type of chicken broth you use, if you add more or less olive oil, whether you add white or dark chicken meat and how much salt you add to your soup.)
Pin It!

Thursday, September 8, 2011

Oatmeal, Date and Apple Muffins

Summer has come and gone, vacation time flew by like it never existed and already we're back to school, in full swing, like nothing ever happened. And I know, I should, maybe, perhaps, explain where I've been, why I've neglected this blog, my readers, my friends, for such a long time but, I doubt you'd find any of it interesting. Really, it's been a case of I just don't get excited about food the way I used to... Weird, I know! And I miss getting excited about cooking, baking, finding new recipes, I really do. Summer was just all about the sandwiches and salads and taking the kids to their baseball practices and games, all the time, so everything had to be made quickly and eaten quickly and when we did have time to sit down and eat I just didn't have the energy to make anything complicated interesting blog worthy... 

But, lately I've become obsessed with finding the perfect date muffin. One that isn't so sweet it's more like a cupcake, or so moist and fluffy it falls apart. I wanted a muffin worthy of being eaten for breakfast, a sturdy muffin you can feel good about, not guilt ridden afterwards. And, after many tries, I think I've found it!


I tweaked my Buttermilk Oatmeal Muffin recipe and made it into the perfect (imho) Oatmeal, Date and Apple Muffins. Not too sweet, not too moist, full of texture from the dates and pecans, and healthy too! Each muffin has almost 3 g of fiber! Not too shabby, if I do say so myself. Maybe, just maybe, I'm getting excited about this food business again after all...

Oatmeal, Date and Apple Muffins
Makes 18 regular sized muffins

These make a quick, hearty breakfast you can grab on the go any day of the week; add fruit and some yogurt, and you've got yourself a pretty healthy breakfast!

1 1/2 cups quick cooking oats
1 1/2 cups all purpose flour
1 1/2 tsp baking powder
3/4 tsp baking soda
1/2 tsp salt
3 tbsp of granulated sugar
3/4 cup chopped, pitted dates
1/2 cup chopped, toasted pecans

2 eggs
1/4 cup canola oil
1 1/4 cups buttermilk
1 tbsp molasses
2 tsp vanilla
3 small apples, peeled and grated (about 1 cup packed of grated apples)

Preheat your oven to 400F. Line your muffin tins with paper liners and set aside.

In a large bowl mix together the oats, flour, baking powder, baking soda, salt, granulated sugar, date and pecans. Make sure to distribute the dates well throughout the dry ingredients to prevent them from sticking together.

In another bowl mix the eggs, canola oil, buttermilk, molasses and vanilla. Fold in the grated apples. Pour the wet ingredients over the dry ones and mix just until the dry ingredients are moistened. If you over mix, you'll end up with tough muffins.

Distribute the batter evenly among 18 muffin cups and bake in the preheated oven for about 20 minutes or until a toothpick inserted in the center of a muffin comes out clean. Cool the muffins completely on a wire rack.

Nutritional information per muffin:
Calories: 165; Total Fat: 6.7g; Cholesterol: 21.2mg; Sodium: 184.3mg; Total Carbohydrate: 27.5g; Dietary Fiber: 2.8g; Sugars: 9.1g; Protein: 3.7g
Pin It!

Friday, June 24, 2011

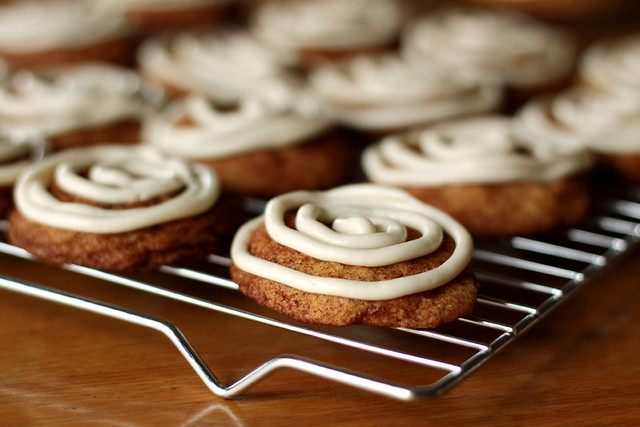
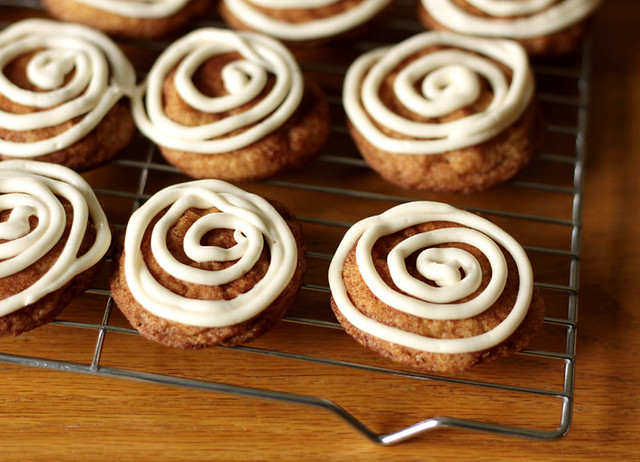
Snickerdoodles aka Cinnamon Roll Cookies

Yesterday was the last day of school and let me just say, it's been a looooong year. Not that my kids have trouble in school or anything but Tom was in first grade this year as opposed to Kindergarten and it was something else altogether to have both him and Annabelle doing homework and needing my help with something all the time and also Olivia who felt a little left out at not having any homework (I'll let you know how she feels when she does have some homework in a few years...) and me just trying to keep everything up so that all hell will not break loose. Time for blogging? Not so much.


So, yesterday was the traditional Breakfast at School day and all the parents were invited to bring a little something and have breakfast with the kids and teachers. I decided to make Snickerdoodle Cookies, because you know, when do you get to eat cookies for breakfast other than the last day of school? The night before as I was making them (at about 9pm) Martin commented that they smelled like Cinnamon Rolls. And that's when I had a flash: frosting!!! So the next morning I whipped up a small batch of frosting, made a cute little swirl on each cookie and voilà! Cinnamon Roll Cookies! They were a huge hit, the breakfast was once again a success and finally, summer's here (albeit a little cool still, though I'm not complaining) and hopefully we can relax, relax and, uh, relax some more.


Cinnamon Roll Cookies
adapted from Michael Smith's Snickerdoodle recipe

1 cup unsalted butter, softened
1 1/2 cups granulated sugar
2 eggs
1 tbsp vanilla extract
1 tbsp corn syrup
3 cups all-purpose flour
1 tsp baking powder
1 tsp baking soda
1/4 tsp salt

1/4 cup granulated sugar
2 tbsp cinnamon

Preheat your oven to 375F and line a baking sheet with parchment paper.

In a large bowl with your mixer of choice, beat butter and 1 1/2 cups of granulated sugar until light and fluffy. Add the eggs, one at a time, beating well after each one and then add the vanilla and corn syrup. Mix well.

In a separate bowl, whisk together flour, baking powder, baking soda and salt. Add to the wet ingredients and mix until smooth.

In a small bowl, whisk remaining 1/4 cup of sugar with the cinnamon. With a tablespoon or a small ice cream scoop, form the dough into balls (about 1 to 1 1/2 inch in size) and roll the balls in the cinnamon sugar to coat. Place them on the parchment lined baking sheet, leaving about 2 inches between each cookie, and bake for 10 to 12 minutes. Cool the cookies completely on a wire rack before icing them.

Cream Cheese Icing
1 tbsp unsalted butter, softened
1 tbsp cream cheese, softened
1 cup confectioner's sugar, sifted
1 tsp vanilla extract
1 tsp warm water

In a stand mixer using the whisk attachment, beat the butter and cream cheese together until smooth. Add the sifted confectioner's sugar slowly, then the vanilla extract and beat well. If needed, add a little warm water until desired consistency. Using a pastry bag with a small round tip, or a ziptop bag with one of the corners cut, make swirls on the cooled cookies. The icing does not completely set so if you want to make them ahead of time and serve them later, I suggest you ice them just before serving.

Makes about 42 1 1/2 to 2 inch cookies.

Pin It!

Tuesday, April 19, 2011

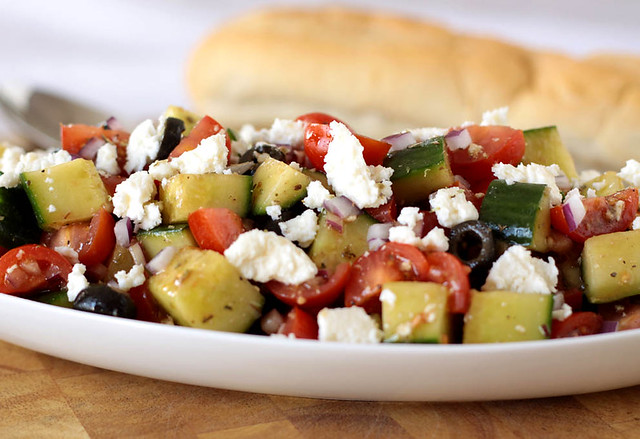
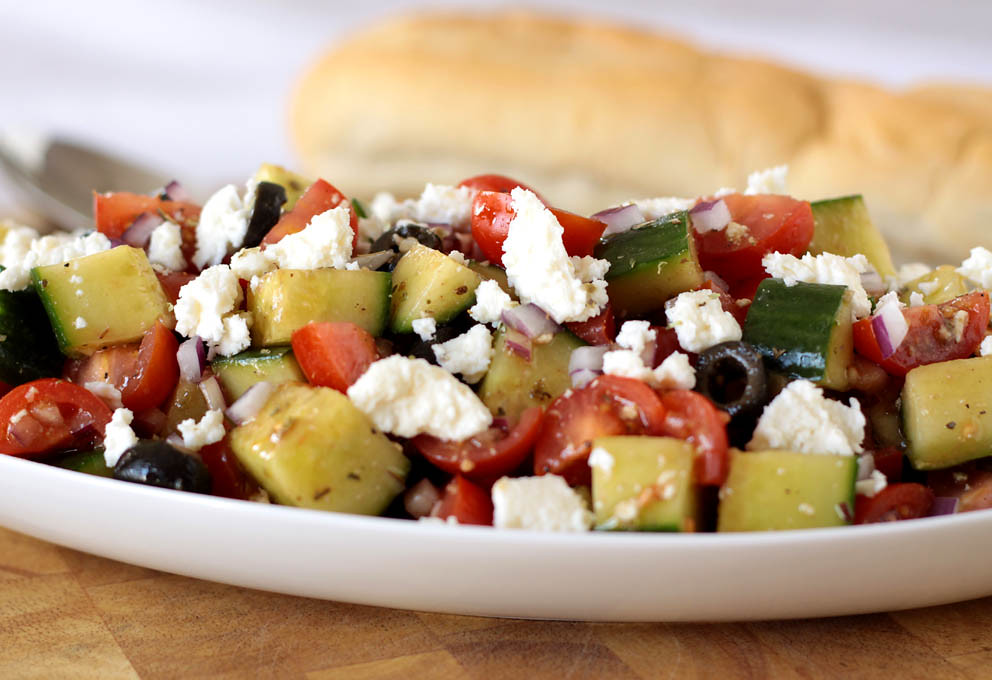
Making Friends (Eve's Greek Salad Recipe)

One of the things I find difficult about being a stay at home mom is making friends. No regular workplace to go to and meet people, no work related trips or classes. But sometimes, you do get lucky. Last year, I met Eve. Both our sons were starting Kindergarten and we would go to the school to pick them up, as they finished earlier than the older kids. As we waited in the school yard for the boys to come out, we would strike up conversations about this and that and whatever. We hit it off right away and became fast friends. Now, as other stay at home moms know, you sometimes need to get outside the house in order to stay sane. So when the kids have days off from school, we use that opportunity to get together, make lunch, have coffee and wonderful conversations. Having grown-up conversations, for a stay at home mom, is almost like winning the lottery, seriously.


On one of those no-school days, the kids and I went over to Eve's for lunch and she had made this wonderful salad with cucumbers, tomatoes, olives, onions, feta and a homemade vinaigrette. I was sure my kids would taste but not necessarily like the salad. Boy, was I wrong. They loved it! Tom even requested that I make it again just a few days after our visit! And every time he asks for it he calls it Eve's Salad, so that's what we call it now! So thank you Eve, and here's to new flavors and good friends!

Eve's Greek Salad

1 seedless cucumber, cubed
300g of cherry or grape tomatoes, quartered
125g of feta cheese, crumbled
1/2 of a red onion, diced
1/4 cup of sliced, pitted black olives (or more to taste)

for the vinaigrette:
1 tsp Dijon mustard
1 tbsp Balsamic vinegar
1/2 tsp dried oregano
1 small garlic clove, finely minced
1/4 cup of extra virgin olive oil
Salt and pepper, to taste

In a large bowl, mix all of the salad ingredients together. Set aside while you make the vinaigrette.

In another bowl, mix everything but the olive oil. Whisking constantly, slowly drizzle the olive oil into the other ingredients until everything is mixed well.

Mix some of the vinaigrette into the vegetables, to taste. Serve with a baguette or some pita bread.

Note: You might not need to use all of the vinaigrette, it all depends on how you like your salad. You can keep any leftover vinaigrette in the refrigerator for a few days and use it for other salads or simply drizzle it on slices of tomatoes.
Pin It!

Tuesday, April 5, 2011

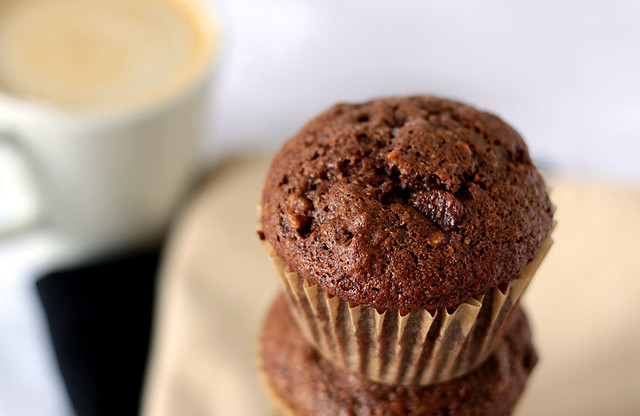
Finding More Time (Chocolate Banana Muffins Recipe)

Is there a way to find more hours in a day? Anyone? Anyone? I'm not trying to make excuses, I'm just wondering if anyone else is feeling overwhelmed by the amount of things to do in a day and how it affects creativity. I try to do everything I should do: get up, get dressed, cook, clean, homework with the kids, exercise, volunteer at the kids' school, smile and wave and say everything's fine and dandy, and even all that isn't easy to fit in a day's worth of hours... But when do I find the time to do what I want to do? Blogging, writing, photography, see friends, read a book... When do these things come into play? Seriously, how does everyone do it? Is it at all possible to get everything done? I'm not down in the dumps or anything, just in a rut I guess, just out of juice maybe, trying to get back in the swing of being creative without letting any of the other stuff get out of hand. Is it possible? Not sure yet...


Let's get started with these muffins. They're quick, they take care of those few overripe bananas on the counter and they're packed full of chocolate, not a bad combo if you ask me. And on a rainy day like today, I sure need a dose of quick, easy and chocolate! A cup of strong coffee doesn't hurt either. ;)


Chocolate Banana Muffins

1/3 cup canola oil
1 cup sugar
2 eggs
1 tsp vanilla extract
2 medium bananas, mashed
1 1/2 cups flour
1/4 cup unsweetened cocoa powder
1 1/2 tsp baking powder
1/2 tsp baking soda
1/4 tsp salt
1/2 cup milk chocolate chips

In a large bowl, mix together first 5 ingredients. In another bowl, mix all the other ingredients; add dry ingredients to wet mixing just until blended. Fill muffin tins lined with jumbo paper liners. Bake in a 375°F preheated oven for 30 minutes or until a toothpick inserted in center comes out clean. Cool on wire rack.

Makes 12 jumbo muffins (about 15 smaller ones).

8UNC8YN64TNR
Pin It!

Monday, February 14, 2011

Happy Valentine's Day!!! (Nutella Brownies and Red Velvet Cupcake Recipes)

I couldn't have had a better surprise this morning than to wake up to a snowstorm and closed schools! I was really happy to have the kids at home, I made an army of tiny Red Velvet Cupcakes, found an Origami Heart pattern on the net then invited a few friends over for sweets and crafts!


It was my first time making Red Velvet anything and I thought Valentine's Day was the ideal day to try these cupcakes. I was pleasantly surprised by their texture, they were soft and fluffy with just a hint of cocoa and the color, wow, very impressive. The cream cheese icing, well, it's just over the top sweet and creamy but I wouldn't have it any other way!


And with all this talk about Nutella lately, combined with a serious craving for brownies, well it was just a matter of time before I gave in and made Nutella Brownies. Armed with a recipe by one of my faves, Ricardo, of course, I knew I couldn't fail! The brownies were just delightful, the hazelnut taste of the Nutella really came through and the texture, oh boy, just dreamy! Perfect for a Valentine's Day weekend!


I hope everyone had a great Valentine's Day!!!

For the Red Velvet Cupcake recipe please visit Brown Eyed Baker. I made the recipe pretty much as is except for using gel food coloring (about 1 tbsp) instead of liquid and baking the cupcakes in mini muffin pans for about 12 minutes.

For the Nutella Brownies recipe please visit Ricardo's website.
Pin It!

Friday, February 11, 2011

Homemade Pretzels with Cheese Sauce

I know I'm late to the party as talking about Superbowl food and stuff is sooooo last week (Yay Packers, by the way!) but, even though I made these pretzels for the event in question, I want to make sure they don't stay labeled as "party food". No, in fact I think you should make these any time, special event or not.

First, they are really easy to make, just like making bread. Second, they're impressively tasty, think bagels but with a fun shape factor. And third, they are endlessly adaptable: they could be salty, sweet, with sesame or poppy seeds, served with a cheesy sauce or an onion dip, or even, oh my, with a cinnamon coating and served with a cream cheese dip! I just thought of that one, I might have to make some this weekend!


Homemade Pretzels
adapted from Chuck Hughes via Food Network Canada

1 1/2 cups warm water (between 110F and 115F)
1 tbsp granulated sugar
2 tsp active dry yeast
3 cups all purpose flour
2 tsp kosher salt
2 tbsp melted butter

10 cups water
2/3 cup baking soda
Egg wash: 1 egg, beaten with 1 tsp water
Coarse salt, sesame seeds, your choice of toppings

Lightly oil a large bowl and set aside.

In a measuring cup, combine warm water, sugar and active dry yeast. Allow to sit 5 minutes so the yeast can start doing its thing. In a large bowl, mix the flour and salt. Once the yeast mixture starts to foam, add the melted butter and pour into the flour mixture. Using a wooden spoon, start mixing the dough until it comes together. Place the dough onto a lightly floured surface and knead for about 5 minutes, adding flour as necessary to obtain a smooth ball of dough. Place the ball of dough in your previously oiled bowl, cover with plastic wrap and leave to rise in a warm place until the dough has doubled in size, about one hour.

Once your dough has risen, line a baking sheet with parchment paper and oil it lightly. Take the dough out of the bowl and divide it into 12 equal pieces. Roll each piece of dough into an approximately 20-inch rope. Make a U shape with the rope, holding the ends of the rope, cross them over each other and press onto the bottom of the U in order to form the classic pretzel shape. Proceed that way with each of the 12 pieces of dough and place the pretzels on the baking sheet and refrigerate for one hour. This step allows the surface of the pretzels to dry and makes them easier to handle.

Preheat the oven to 450F.

In the largest pot you have, bring the 10 cups of water to a boil. Once the water is boiling, add the baking soda, very carefully, a little bit at a time, as it will cause the water to boil over.

Place the pretzels in the boiling water, one at a time, 30 seconds each. Remove the pretzels from the water with a large spatula and place them back on the parchment lined baking sheet. The boiling step will help the pretzels get that signature brown, crunchy exterior.

Brush the top of each pretzel with the egg wash, sprinkle with your topping of choice and bake in the preheated oven for about 12 minutes, until the pretzels get that dark golden brown we're looking for. Transfer the pretzels to a cooling rack and let rest 5 minutes before serving.

Note: If you're not sure you're going to eat your pretzels all in the same day, may I suggest you omit sprinkling them with salt. The salt will make them soggy the next day.

Cheese Sauce
adapted from Ricardo Magazine

1 tbsp cornstarch
1 (370 ml) can of evaporated milk
2 tbsp olive oil
1 onion, finely chopped
1/2 green bell pepper, finely chopped
1 garlic clove, finely minced
1 tbsp tomato paste
1 tbsp ground smoked chipotle pepper
2 cups grated sharp cheddar cheese, preferably orange
Salt and pepper, to taste

In a bowl, whisk the cornstarch and evaporated milk together; set aside.

In a saucepan, heat the olive oil and add the onion, bell pepper and garlic. Sauté until softened, about 5 minutes. Add the tomato paste and smoked chipotle pepper and cook for another minute. Add the evaporated milk mixture and bring to a boil, whisking constantly. Simmer for about 2 minutes. Add the grated cheddar and whisk until the cheese is melted and the sauce is smooth. Add salt and pepper to taste and serve warm with the pretzels.

Note: This sauce is terrific in burgers as well. And if you have any leftovers, you can make a great quickie mac 'n cheese with it the next day.


Pin It!

Saturday, February 5, 2011

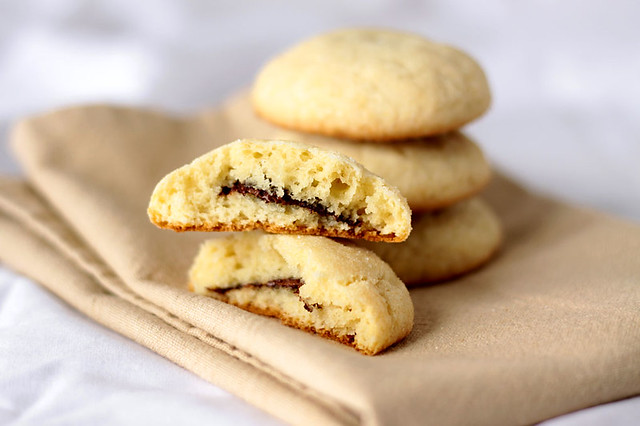
Nutella Filled Cream Cheese Cookies for World Nutella Day!!!

Ah, World Nutella Day! A few years ago I made myself a cup of Nutella Hot Chocolate, posted it on my blog and sent the link to Sara of Ms. Adventures in Italy and Michelle of Bleeding Espresso, so I could participate in World Nutella Day. I never thought it would become one of my most popular recipes to date!


So, this year, I prepared a bit better and started thinking of Nutella recipes a little more in advance. I knew I wanted to make something with cream cheese but not a cheesecake. I thought of brownies but I wanted to taste the cream cheese and the Nutella. Then I found this dough recipe that could be easily adapted, added some cream cheese to it, filled the dough with Nutella and tadaaa! I got my Nutella Filled Cream Cheese Cookies! They are moist, not too sweet, you get a hint of cream cheese in each bite and the Nutella, well, that's just the most wonderful surprise to get inside a cookie! And it works so well with the cream cheese, the cookies stay moist and they are even better the next day.


Tell me, are you making Nutella recipes today or are you dipping your spoon into a jar and enjoying Nutella "au naturel"? We'll probably be doing a little of both around here today!


Nutella Filled Cream Cheese Cookies
(dough recipe adapted from Michael Smith via Food Network Canada)

1/2 cup unsalted butter, room temp.

1 - 250g package of cream cheese, room temp.

1 1/2 cups granulated sugar

2 eggs, room temp.

1 tbsp vanilla extract

1 tbsp corn syrup

3 cups all purpose flour

1 tsp baking powder

1 tsp baking soda
1/4 tsp salt

Nutella, for filling

1/3 cup granulated sugar (for rolling)


Preheat your oven to 375F and line a few baking sheets with parchment paper.


In your mixer of choice, beat the butter, cream cheese and granulated sugar together until well mixed. Add eggs, one at a time, beating well after each one. Add the vanilla and corn syrup and mix until incorporated.
In a separate bowl, whisk the flour, baking powder, baking soda and salt. Slowly add to the butter/cream cheese mix and beat until the batter comes together.

Refrigerate the dough for at least an hour, otherwise it will be sticky, very had to work with and the cookies won't keep their shape as well.

Once your dough has been refrigerated, use a cookie scoop or a tablespoon and form little balls of dough. Make an indentation in each one and dollop about 1/2 tsp of Nutella in it. Close the dough around the Nutella as much as you can then
use a small piece of dough to close up the hole. Form into a ball shape and roll into the remaining 1/3 cup of granulated sugar. Place on the parchment lined cookie sheet, 6 cookies to a sheet.

Bake (one sheet at a time) in preheated oven for about 12 minutes or until the cookies are slightly golden. Transfer to a wire rack to cool completely. Makes about 36 large cookies.


Pin It!

Monday, January 24, 2011

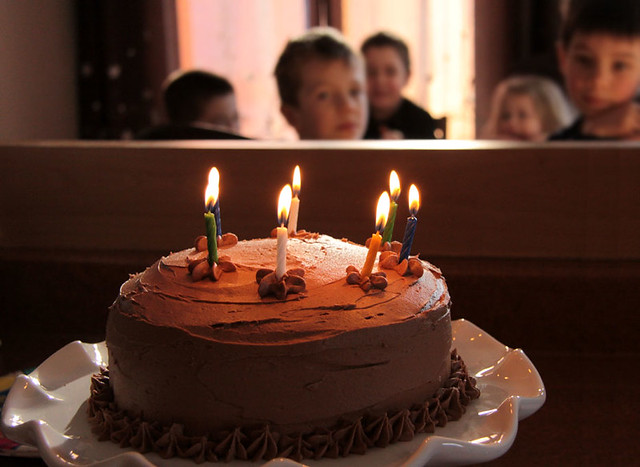
Growing up (One Bowl Chocolate Cake Recipe - Redux)

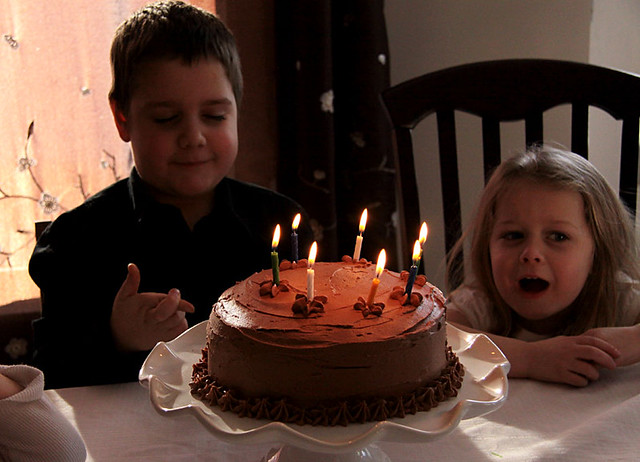
My son turned 7 yesterday and as I sit here typing these words, I still can't believe it. How in the world do kids grow up so fast? How did he become this little 7 year old boy who can now read and write, do math problems and figure out a video game way quicker than I can? Can you tell I'm feeling a little old right now? Yep, I am...


When I asked Tom if he wanted cupcakes or a real cake for his birthday party he replied: "A real cake, of course!" as if cupcakes were just for girls! And, of course, he wanted a chocolate cake. So I decided on my usual One Bowl Chocolate Cake with Chocolate Icing. A bunch of little boys eating chocolate cake at a birthday party, sounds fun, right? Can't be afraid of a little sugar high!

The reason I decided to do another post for this cake is that I used buttermilk instead of milk in the recipe. Doesn't sound like much of a change but it makes a great cake even better. Annabelle even told me the cake was just as good, if not better, without the icing. Without icing! OK, so I'm not sure the boys would have been quite as impressed if I had baked this as a bundt instead of a 3 layer cake but I'm sure going to try it when another chocolate craving strikes!


One Bowl Chocolate Cake
adapted from Allrecipes


2 cups white sugar
1 3/4 cups all-purpose flour
3/4 cup unsweetened cocoa powder
1 1/2 teaspoons baking powder
1 1/2 teaspoons baking soda
1 teaspoon salt
2 eggs
1 cup buttermilk
1/2 cup vegetable oil
2 teaspoons vanilla extract
1 cup boiling water

Preheat oven to 350 degrees F (175 degrees C). Grease and flour two nine inch round pans (or 2 heart-shaped pans).

In a large bowl, stir together the sugar, flour, cocoa, baking powder, baking soda and salt. Add the eggs, buttermilk, oil and vanilla, mix for 2 minutes on medium speed of mixer. Stir in the boiling water last. Batter will be thin. Pour evenly into the prepared pans.

Bake 30 to 35 minutes in the preheated oven, until the cake tests done with a toothpick. Cool in the pans for 10 minutes, then remove to a wire rack to cool completely.

Note: For the layer cake pictured above, I used three 9-inch round cake pans and baked them for approximately 20 minutes. Check the layers and if a toothpick inserted in the center of the cakes comes out clean, they're done!

Chocolate Icing

4 cups sifted confectioner’s sugar
1 cup butter, at room temperature
2 tsp pure vanilla extract
1 to 2 tbsp milk, depending on the consistency you want
5 tbsp unsweetened cocoa powder

Cream butter, sugar and vanilla. Add a small amount of milk to reach desired spreading consistency. Add cocoa powder and beat well. Spread on cooled cake.
Pin It!