Sunday, October 31, 2010

Happy Halloween!!! (Pumpkin Carrot Cupcake Recipe)

Happy Halloween everyone! I hope you guys had as much fun as we've been having here. The kids have been costumed twice now, since last week: once for school and once for going door to door. They had a blast and of course, so did I! I just love making their costumes and also, baking up goodies.


I made these Pumpkin Carrot Cupcakes using an Anna Olson recipe from the Food Network and they turned out great. I made a Cream Cheese Frosting to go along and decorated with a pumpkin shaped candy. Aren't they cute! Of course, it's not as if the kids are going to need any extra sugar in their diets any time soon, but the cupcakes might just stop me from digging inside the kids' goody bags for a while. Maybe...


For the cupcake recipe click here. The only changes I made to the recipe was using butternut squash puree instead of pumpkin because that's what I had!

Cream Cheese Frosting

This frosting is perfect if you want to pipe it on thickly onto the cupcakes.

8 oz cream cheese, at room temperature
1/4 cup of unsalted butter, at room temperature
1 tsp vanilla extract
3-4 cups confectioners sugar, sifted

In the bowl of a stand mixer, fitted with the paddle attachment, beat the cream cheese, butter and vanilla extract, until well blended. Then, a little at a time, blend in the confectioners sugar, until the frosting is thick, creamy and luscious. Pipe it or spread it onto your cupcakes and dig in!
Pin It!

Friday, October 29, 2010

Roasted Squash with Risotto

Fall is my very favorite season for so many different reasons. I love the cooler temperatures and being able to wear a warm sweater to go for a walk. I love that the leaves change colors and become these gorgeous reds and oranges and yellows. And, I also love the fresh vegetables that we can get during Fall.

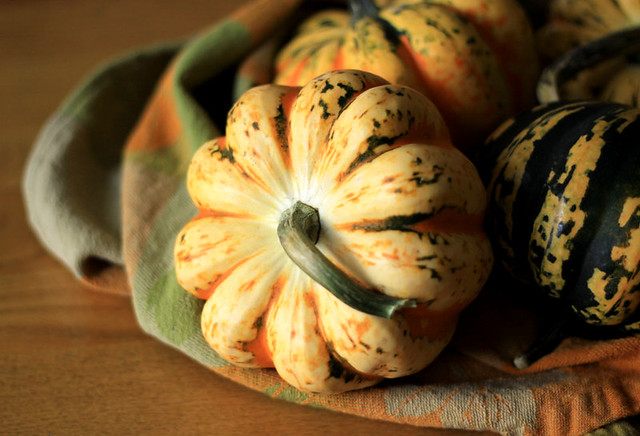
Squash varieties abound and they are all delicious and so easy to prepare. Either baked cubed or halved or even whole, squash can be served as a side dish, its purée can be used in quick breads or muffins, and you can even serve it as a bowl for your main dish. My favorite way is to serve it with risotto. I don't know what it is that makes them go so well together but the creamy, cheesy risotto served inside a halved, baked squash just seems even more comforting. You can't eat this and not feel all comfy and warm, it's just impossible.

Roasted Squash

2 or 3 small, roundish winter squash (such as acorn or carnival), cut in half, seeds removed
Olive oil
Fresh thyme
Salt and pepper

Preheat your oven to 400F and line a baking sheet with parchment paper. Place the squash, cut side up, on the baking sheet and drizzle with olive oil. Sprinkle fresh thyme, salt and pepper on the squash and then flip it over (cut side down). Bake in preheated oven for 45 minutes to an hour, depending on the size of your squash. The flesh should be very tender when the squash is done. While the squash is baking, prepare the risotto.

Risotto
Adapted from The Food Network

1 onion, finely chopped
3 tbsp butter
Pancetta, bacon or diced ham, about 2 ounces
5 cups or more of chicken broth
Fresh thyme, a few branches
1 ½ cups Arborio rice
Salt and pepper to taste
½ cup freshly grated Parmesan or Grana Padano Cheese

Melt the butter in a 4 to 5 quart saucepan over medium heat, stirring regularly. Add the diced pancetta, bacon or ham and let it brown a few minutes. Add the onion, continuing to stir, until it turns soft and translucent. Turn the heat down if the onion starts to brown.

Meanwhile, pour the chicken broth into a separate saucepan, add the fresh thyme and set over medium heat, and bring to a gentle simmer. Adjust the heat as needed to maintain this simmer the whole time you are preparing the risotto.

Once the onion is soft, add the rice and cook over medium heat, stirring constantly, for about 3 minutes. Adjust the heat as necessary -- if the rice is cooked at too high a heat, it will turn brown and take on an undesirable flavor.

Using a ladle, scoop up about 1/2 to 3/4 cup of broth. Pour it in the pan with the rice, stirring constantly with a spoon. After the first addition of broth, the rice mixture will look a bit soupy.

As the rice begins to cook, stir it constantly, making sure that you scrape along the bottom of the pan so that it does not stick. You should see little bubbles popping up on the liquid from time to time. If it bubbles more vigorously than this, turn the heat down to medium-low.

When most of the liquid is absorbed into the rice and the rice begins to look a bit dry, add another ladle of broth to the pan and stir constantly, as before.

Continue to add the broth in 1/2-to-3/4-cup batches and stir the rice until you have used most of the broth (this will probably take about 20 minutes). It is now time to test whether the risotto is cooked. Spoon up a grain of rice and bite into it -- it should be tender without being too mushy. If it is still crunchy and tastes a bit starchy, you will need to continue adding liquid and cooking further.

If it looks as if you will run out of chicken broth and your rice is still not cooked, don't be alarmed. Because of variations in individual stoves and cooking temperatures, you may need more liquid than called for in the recipe. Simply heat up another cup or 2 of chicken broth. If you run out of broth, use hot water.

When the rice is tender and the risotto has a creamy consistency, almost like thick oatmeal, it is done.

Add salt and pepper to the risotto, about 1/4 teaspoon at a time, until it seems well seasoned to you. Stir.

Add the grated Parmesan cheese and stir well.

Serve the risotto immediately in the warm squash "bowls" and have extra grated Parmesan on hand.

Pin It!

Friday, October 15, 2010

CSN Giveaway Winner

Hi everyone! Thanks so much for all the comments on my giveaway post! I used Random Number Generator to determine the winner amongst the 78 eligible comments and...

Comment number 48 Tabathia! Congratulations, I hope you have fun spending your 125$ from CSN Stores!
Pin It!

Thursday, October 7, 2010

Giveaway!!! (and a Savory Muffin Recipe)

EDIT: Giveaway is now closed! Thanks for your comments, winner will be announced shortly!

Do you guys remember that great website I talked about a few weeks ago? You know, the one with everything from bed sets to wine glasses to coffee grinders? That's right,
CSN Stores! Do you also remember I told you I was going to host a giveaway sponsored by CSN Stores? Well, today's the day!!! Aren't you guys lucky you know me?

Alright, so one lucky Canadian or US resident (sorry, dear international readers!) is going to win a 125$, yes you read right, 125$ gift certificate (cannot be used on shipping or international costs) to be used on ANY of CSN's stores! Imagine what you could get with 125$ and all that choice! Too many exclamation marks, I know I'm just too excited. Way too much excitement for me since last week, whew!

To enter the giveaway, leave a comment on this post. It's that easy! And for a bonus entry, you can "like" And then I do the Dishes on Facebook! Did I mention I have a Facebook page now? No? Well, look at the right column and you'll see a nice little box where you can "like" And then I do the Dishes. Then, come back and leave another comment telling me the name you use on Facebook so I can check you really "liked" the page. To be fair, I really will have to check. So be nice! You'll have until Thursday October 14th, 2010 at midnight (Daylight Savings Time) to enter the giveaway. Winner will then be chosen at random and will be announced on Friday October 15th, 2010.


Since I didn't include a recipe in my previous post, I just had to share one with you today. It has nothing to do with the giveaway, I just love these little Savory Muffins! I hope you enjoy them too!

Savory Muffins

These can be endlessly adapted with the ingredients of your choice. Change the cheese, use cooked chicken instead of ham, thyme instead of basil; use your favorite ingredients.

1 1/2 cups (215g) all-purpose flour
1/2 cup (65g) whole wheat flour
1 tbsp (10g) baking powder
1 tsp (5g) kosher salt
1/2 tsp (3g)baking soda
Freshly ground black pepper
1 cup (130g) Mamirolle cheese, cubed
1 tbsp fresh basil, chopped
2 eggs
3 tbsp olive oil, or the oil the sun-dried tomatoes were packed in
1 cup (300g) fat free sour cream
1/4 cup (40g) oil packed sun-dried tomatoes, finely chopped
1/2 cup (75g) Black Forest Ham, chopped small

Preheat your oven to 400F. Butter a 12-cup muffin tin or line with paper cups and set aside.
In a large bowl, whisk together the all-purpose flour, whole wheat flour, baking powder, baking soda, salt and pepper. Add the cubed cheese and chopped fresh basil and toss to coat; set aside.

In another bowl, mix together the eggs, oil and sour cream. Pour over the dry ingredients, mix lightly, then fold in the sun-dried tomatoes and the ham. Don't over mix.
Spoon the batter into your prepared muffin tin and bake in preheated oven for about 20 minutes or until a toothpick inserted in the center of the muffins comes out clean. Let the muffins cool in the tin for about 5 minutes then invert onto a wire rack to cool completely.

These are wonderful served with a salad or with crudités for a light lunch.


Giveaway Details Recap: Giveaway open to US and Canadian residents only. The prize, consisting of a 125$ gift certificate is provided by CSN Stores and cannot be used to pay for shipping or international charges. Contest is open from Thursday October 7th, 2010 until Thursday October 14th, 2010 (Midnight DST).
Pin It!

Thursday, September 30, 2010

Foodies of the World

I think I must have started-deleted-started this post again at least 10 times. I'm so excited, I feel like a kid on Christmas morning and I just don't know where to start! I feel like using exclamation marks everywhere! in! this! post!!! Breathe in... Breathe out... OK, let me start over, yet again.


In March, I was contacted by the Slattery Media Group, to take part in a project involving food bloggers from all over the world. This seemed like such a wonderful and lucky opportunity, it didn't take me long to reply with a resounding YES!

At first I just couldn't believe that my blog was actually selected as part of this project, I mean how many food blogs are there out there? What makes my blog special, worthy of being part of such a project? Was this some sort of a joke? I had so many questions! When the initial disbelief wore off, I started working on the texts, recipes and photos needed for the book. And then once everything was sent in, laid-out and accepted, I waited. It seemed like such a long time to wait and I told so few people about the project, it just seemed unreal. But now, I just can't believe the book is out already! It's real, and isn't it just gorgeous?

The overview from the Slattery Media Group's website reads like this:

"Foodies of the World is a collection of profiles and recipes from the best blogs around the world.

The publication covers an international spread of cuisines, courses and recipe styles, as well as profiles of the bloggers themselves, who come from all corners of the globe.

Containing stunning photography, styling and images, this is a high-quality cookbook with real food from real people."

Real food, from real people. Yes, that's it exactly, isn't it? That's what's blogging is all about, to me anyways. It's about sharing your best recipes with the widest audience possible. Sharing our successes and sometimes our failures and realizing that we are not alone out there. We all need inspiration and that's what a food blog is to me. Inspiration to try something new for dinner tonight or inspiration to make something from scratch that I would perhaps not have attempted before but if someone like me, another blogger, a mother, a home cook could do it, well, maybe I can too.

If you love food blogs and would like to discover new ones or support the ones you know already, you can purchase Foodies of the World by following this link. Get it as a present for yourself or for the foodie in your life. I'm sure you won't regret it! And now, I'm off to make myself a cup of tea, I'm way too excited for my own good!

Pin It!

Tuesday, September 28, 2010

Dark Chocolate Cake

Ever have one of those days when you just feel blue and don't feel like doing anything? I'm having one of those days. And it's raining. I usually love fall but gray and rainy days like today, they just get me down. If anyone knows a more perfect remedy to a gloomy day funk than baking a chocolate cake, please, let me know!

I'm well aware I already have a few chocolate cake recipes around here, but I firmly believe you can never have too many recipes for chocolate cake. Especially when said recipe yields a dark, dense and intensely chocolaty concoction. I think I'm feeling better already!


Dark Chocolate Cake adapted from Baker's Chocolate

4 oz dark chocolate (I use an 80% cocoa dark chocolate)
1/2 cup butter
1 to 2 tsp instant coffee powder
2 cups sugar
1/2 tsp vanilla
1/4 tsp salt
2 eggs
1/2 cup sour cream or plain yogurt
1 1/2 tsp baking soda
2 cups flour
1 cup boiling water
Icing sugar

Preheat your oven to 350F. Butter and flour a 10-inch fluted tube pan; set aside.

Melt chocolate with butter in a double boiler. Add instant coffee powder; cool. Add sugar, vanilla and salt; mix well. Add eggs, one at a time, beating well after each addition. Combine sour cream and baking soda; mix well. Alternately blend in sour cream and flour 1/3 at a time on low speed of mixer. Add boiling water; blend well. Batter will be thin. Pour into prepared pan. Bake in preheated oven for 45 to 50 minutes or until cake tester inserted in center comes out clean. Cool in pan 10 minutes. Remove and finish cooling on wire rack. Dust with icing sugar.

Pin It!

Friday, September 24, 2010

CSN Stores Review (Homemade Ketchup/Tomato Chutney Recipe)

So, have you guys had a chance to check out the CSN Stores website yet? If you're like me, you have and you're drooling over every single product they offer, and they have quite the selection! As I mentioned a few weeks ago, I got the opportunity to review their products and services. This took a little longer than I expected because I couldn't decide what to order! Is there such a thing as too many choices? In any case, I finally chose a gorgeous Le Creuset casserole. I placed my order and was pleasantly surprised to be offered a free gift! Cool right? Included in my order was a Le Creuset oval dish, in the color of my choice. The ordering process is very easy and all the information is clear and accessible. The shipping on the item I choose was free but being in Canada, I had to pay some international charges. These charges include duty fees so you don't get a surprise payment to make when your purchases are delivered. I received my packages within a week of ordering and I was quite satisfied with the service. And, most of the packing material was recyclable; no packing peanuts here! Bottom line, I would order other products at CSN Stores in a heartbeat. I'm also pretty excited to say that I'm working with CSN Stores again soon for a giveaway, so stay tuned!!!

Of course, the first thing I wanted to do when I got my beautiful new toys was to cook up something to showcase them! I made a humongous beef stew in my casserole dish and it was incredibly delicious. Unfortunately, photogenic, it was not. So I made a small recipe of shepherd's pie and used my cute little gratin dish! I won't bore you with my shepherd's pie recipe, but I will tell you I use both regular potatoes and sweet potatoes in my recipe. It adds color, flavor and vitamins!


The recipe I want to give you today is for Tomato Chutney, or Homemade Ketchup as we call it here in Québec. It is delicious served up with shepherd's pie or any dish that needs a little pizazz. This is a perfect recipe to use up those tomatoes from your garden or farmer's market. And the mix of fruits, veggies and spices makes it colorful and comforting. I made up this recipe to suit my tastes but you can change the ingredients as you wish to make it all your own.

Homemade Ketchup/Tomato Chutney

1 large green bell pepper, diced
1 large red bell pepper, diced
2 medium onions, chopped
2 stalks of celery, chopped
2 large garlic cloves, minced
8 to 10 large Roma tomatoes, blanched, peeled and diced
4 peaches, blanched, peeled and diced
4 apples, peeled, cored and diced
3 pears, peeled, cored and diced
1/2 cup cider vinegar
1 cup brown sugar, packed
8 whole allspice berries
1 bay leaf
1 star anise
1/2 tsp ground cinnamon
1/2 tsp red pepper flakes
1/2 tsp mustard powder
1/2 tsp ground coriander
1/4 tsp ground ginger
1/8 tsp ground cloves
1 tsp salt

In a large pot, heat a little olive oil and add the bell peppers, onions, celery, garlic cloves and sauté, over medium heat until the onions are translucent. Add the tomatoes, peaches, apples, pears, vinegar, brown sugar and all the spices. Bring to a boil, then reduce the heat and let the chutney simmer for about one hour. By then the juices will have reduced and concentrated and it will smell fantastic! Remove the allspice berries, bay leaf and star anise. Let cool, divide in convenient portions and freeze in ziptop bags.

Please Note: I was offered a 100$ coupon code from CSN Stores in order to do a review of their products and services. Shipping and international charges were not included and I was not paid for my opinions.
Pin It!

Wednesday, September 8, 2010

Chocolate Chip Cookie Lava Cakes

I am so completely addicted to food magazines, I even collect the little pamphlets they hand out in grocery stores. These days, they look a lot more like magazines though, as they're full of neatly styled recipes featuring, of course, said store's products. As most of you know, you don't really need to use the product in question and even when the recipe calls for a ready-made product, you can make it even better by using something homemade.


Case in point? These Chocolate Chip Cookie Lava Cakes. I noticed the recipe while I was "sifting" through magazines and stuff I could get rid of. Yes, I have too much stuff, go figure, and I need to get organized. Anyhoo, I was looking through a pile of Kraft's What's Cooking Magazine and when I spotted those cakes I had to make them right away! Well, first I had to make chocolate chip cookies, then I could make the cakes.

I made my favorite chocolate chip cookie recipe, used a round cookie-cutter to cut 12 cookies to the desired size and then made the cake batter. Easy-peasy! And when they're finally out of the oven, you flip them onto a plate, and you go to chocolate heaven. First you experience the crisp, crunchy and buttery taste of the cookie, then, as you cut into it, you find a rich, molten chocolate cake swimming in melting vanilla ice cream. Did I mention you have to pair this with vanilla ice cream? Well, you do!


Chocolate Chip Cookie Lava Cakes
adapted from kraftcanada.com

OK, first you have to make some chocolate chip cookies. I suggest this recipe; it contains walnuts, which are a nice addition to these little cakes.

12 chocolate chip cookies, cut into circles with a 2 1/2-inch cookie cutter
4 ounces of bittersweet chocolate, chopped
1/2 cup unsalted butter
2 whole eggs
2 egg yolks
1 cup confectioners sugar
1/3 cup flour
1/2 teaspoon fleur de sel

Preheat your oven to 425F. Line a 12-cup muffin tin with paper liners. Place the cookies, upside down, into the muffin liners. Press them into the bottom, they might be a bit big but don't worry about squishing them in, they're like the crust of these tatin-like cakes! OK, now set that aside while you make the batter.

Place the chocolate and the butter in a large microwaveable bowl, then microwave on high for about 2 minutes. At that point the butter should be melted and a little stirring will get the rest of the chocolate melted too. Alternately, you could do this on a double boiler.

In another bowl whisk together the eggs, egg yolks, confectioners sugar, flour and fleur de sel.
Slowly add the chocolate mixture, stirring as you go, until well blended.

Pour the batter over the cookies in your prepared muffin tin. Bake in preheated oven for about 8 minutes. The cakes will be slightly firm around the edges but still soft in the middle. Let the cakes stand a minute or 2 before serving. Remove each cake from its tin, invert it onto a plate (just like a tarte tatin!), remove its liner and serve with your favorite vanilla ice cream.

Pin It!

Thursday, August 26, 2010

Margherita Burgers Recipe and a Review to Come

As I mentionned briefly in a previous post, we've been changing things around the apartment lately: cleaning, painting and searching for some new furniture. I've been looking for inspiration pretty much everywhere I can find it. From kitchen tables to window treatments and wall hangings, I've been Googling like crazy!
One site that has it all is CSN Stores and I've been given the opportunity to review their services and products. I'm not kidding when I say they have everything, have a look for yourselves! So, please stay tuned for more in the coming weeks!
While we have been working pretty hard on making our apartment feel a little cozier, we've also been trying to take advantage of what's left of Summer vacation. The kids start school in less than a week now and it seems like just yesterday we were so happy that Summer was finally here! It has been a little cooler lately and I've been trying to use up those herbs I have growing on the porch. My favorite is basil, I could use it in just about anything, and most often I end up putting a big handful in my burgers. A few weeks ago I "invented" this burger recipe and I've made it at least 3 times since! The burgers are juicy and flavorful and yes, they taste like Summer!


Margherita Burgers

You can change the given quantities of pretty much any of the ingredients to suit your tastes.


2 lbs lean ground beef

1 egg

1/3 cup plain bread crumbs

1/4 to 1/3 cup of sun dried tomatoes, in oil, chopped finely

2 tbsp of the oil the tomatoes are packed in

1 small red onion, finely diced

1/2 cup of chopped fresh basil

Salt and pepper to taste


Hamburger buns

Slices of fresh tomatoes, mozzarella and fresh basil leaves, for garnish


In a large bowl, mix the ground beef, egg, bread crumbs, sun dried tomatoes, oil, onion, chopped fresh basil and salt and pepper. Mix well and form 8 patties. You can cook the burgers on the BBQ, in a pan or, as I like to cook them in my panini press, it takes half the time as they cook on both sides at the same time! Just cook them from 8 to 10 minutes per side or until the internal temperature of each patty is 160F. Let the burgers rest a few minutes before serving them.

Heat or toast the hamburger buns, place a patty on each bun, then top with mozzarella, tomato slices and fresh basil leaves. Then enjoy what's left of Summer!
Pin It!

Sunday, August 8, 2010

Sunday Kind of Breakfast

I love getting up on Sunday morning and taking my time deciding what to make for breakfast. I'll let the kids play their video games so I'll have time to make myself a cup of coffee, browse through my many, many bookmarks or magazines, and try to find THE recipe I feel like making that morning. Or perhaps I'll settle for a tried and true breakfast favorite like crêpes, scones, muffins or waffles. But some days, I feel like having more of a savory breakfast, something I usually make as "breakfast for dinner". Those most often involve eggs, bacon and some type of bread. We so very rarely have bacon for breakfast that once the bacon aroma started wafting through the house, my son walked into the kitchen with this surprised and happy look on his face and actually said: "Are you making BACON for breakfast?!?" He was one happy kid.

I also had a bunch of gorgeous grape tomatoes from the market which I turned into a nice little salsa to serve alongside some eggs cooked in a bagel nest. The bagels are from Bagels Tradition'L in Québec, where you can get pretty much THE best bagel in town. They're baked in a wood oven which gives them a distinctive taste, and they are very, very hard to resist! All in all, a great Sunday breakfast. Now, what to make for dinner... ;)


Oven Cooked Bacon

Once you start cooking your bacon in the oven you will never go back to making it in a pan. You can use the time the bacon is baking to make the rest of breakfast! Cool, right?

Preheat your oven to 400F. Lay the bacon slices down on a parchment lined baking sheet and bake in the oven for 25 to 30 minutes, depending on how thick your slices are and how crisp you like your bacon. Once cooked, place the slices on a piece of paper towel to absorb some of the fat. You can keep the bacon warm in a low oven, if you need to.

Fresh Tomato Salsa

Olive oil
About 20 small grape tomatoes (you could also use cherry tomatoes)
1 small red onion, diced
1 clove of garlic, minced
1/4 cup of fresh basil, chopped
Salt and pepper

In a pan, over medium heat, pour a few tablespoons of olive oil. Add the onion and sauté until it starts to soften, about 5 minutes. Add the tomatoes and let them warm up and get soft, again, about 5 minutes. Add the garlic, salt and pepper and let it cook for another 5 minutes. Add basil at the very last minute and keep the salsa warm until serving time.

Eggs in a Bagel Nest


Ingredients for each serving:
Butter and olive oil
1/2 a bagel
1 egg
Sliced green onions
Grated Parmesan
Salt and pepper

Heat a nonstick pan over medium heat. Add a little butter and olive oil and heat until the butter is melted and bubbly. Place your bagel half, cut side down, into the pan and let it warm up for a few minutes. Crack the egg into the bagel hole. The white will stream down the side and that's OK. Cover the pan and let the egg cook for a few minutes, depending on how done you want the yolk to be, check on it often. Sprinkle with grated Parmesan, salt, pepper and green onions. Serve with bacon, fresh tomato salsa and make sure you don't forget the coffee!
Pin It!